Orange Cheesecake Brownie Cupcakes

Orange Cheesecake Brownie Cupcakes

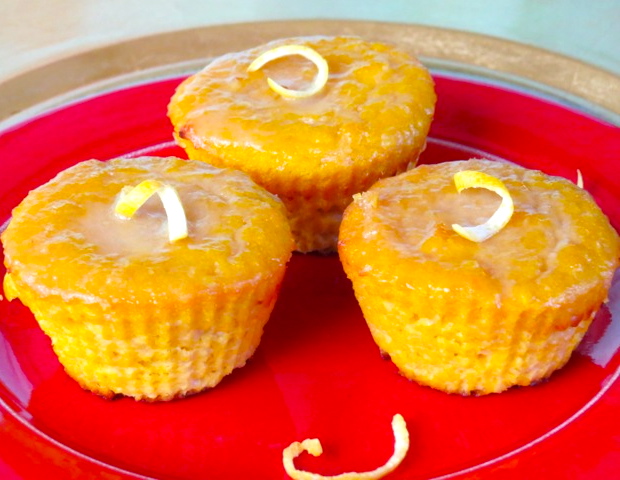
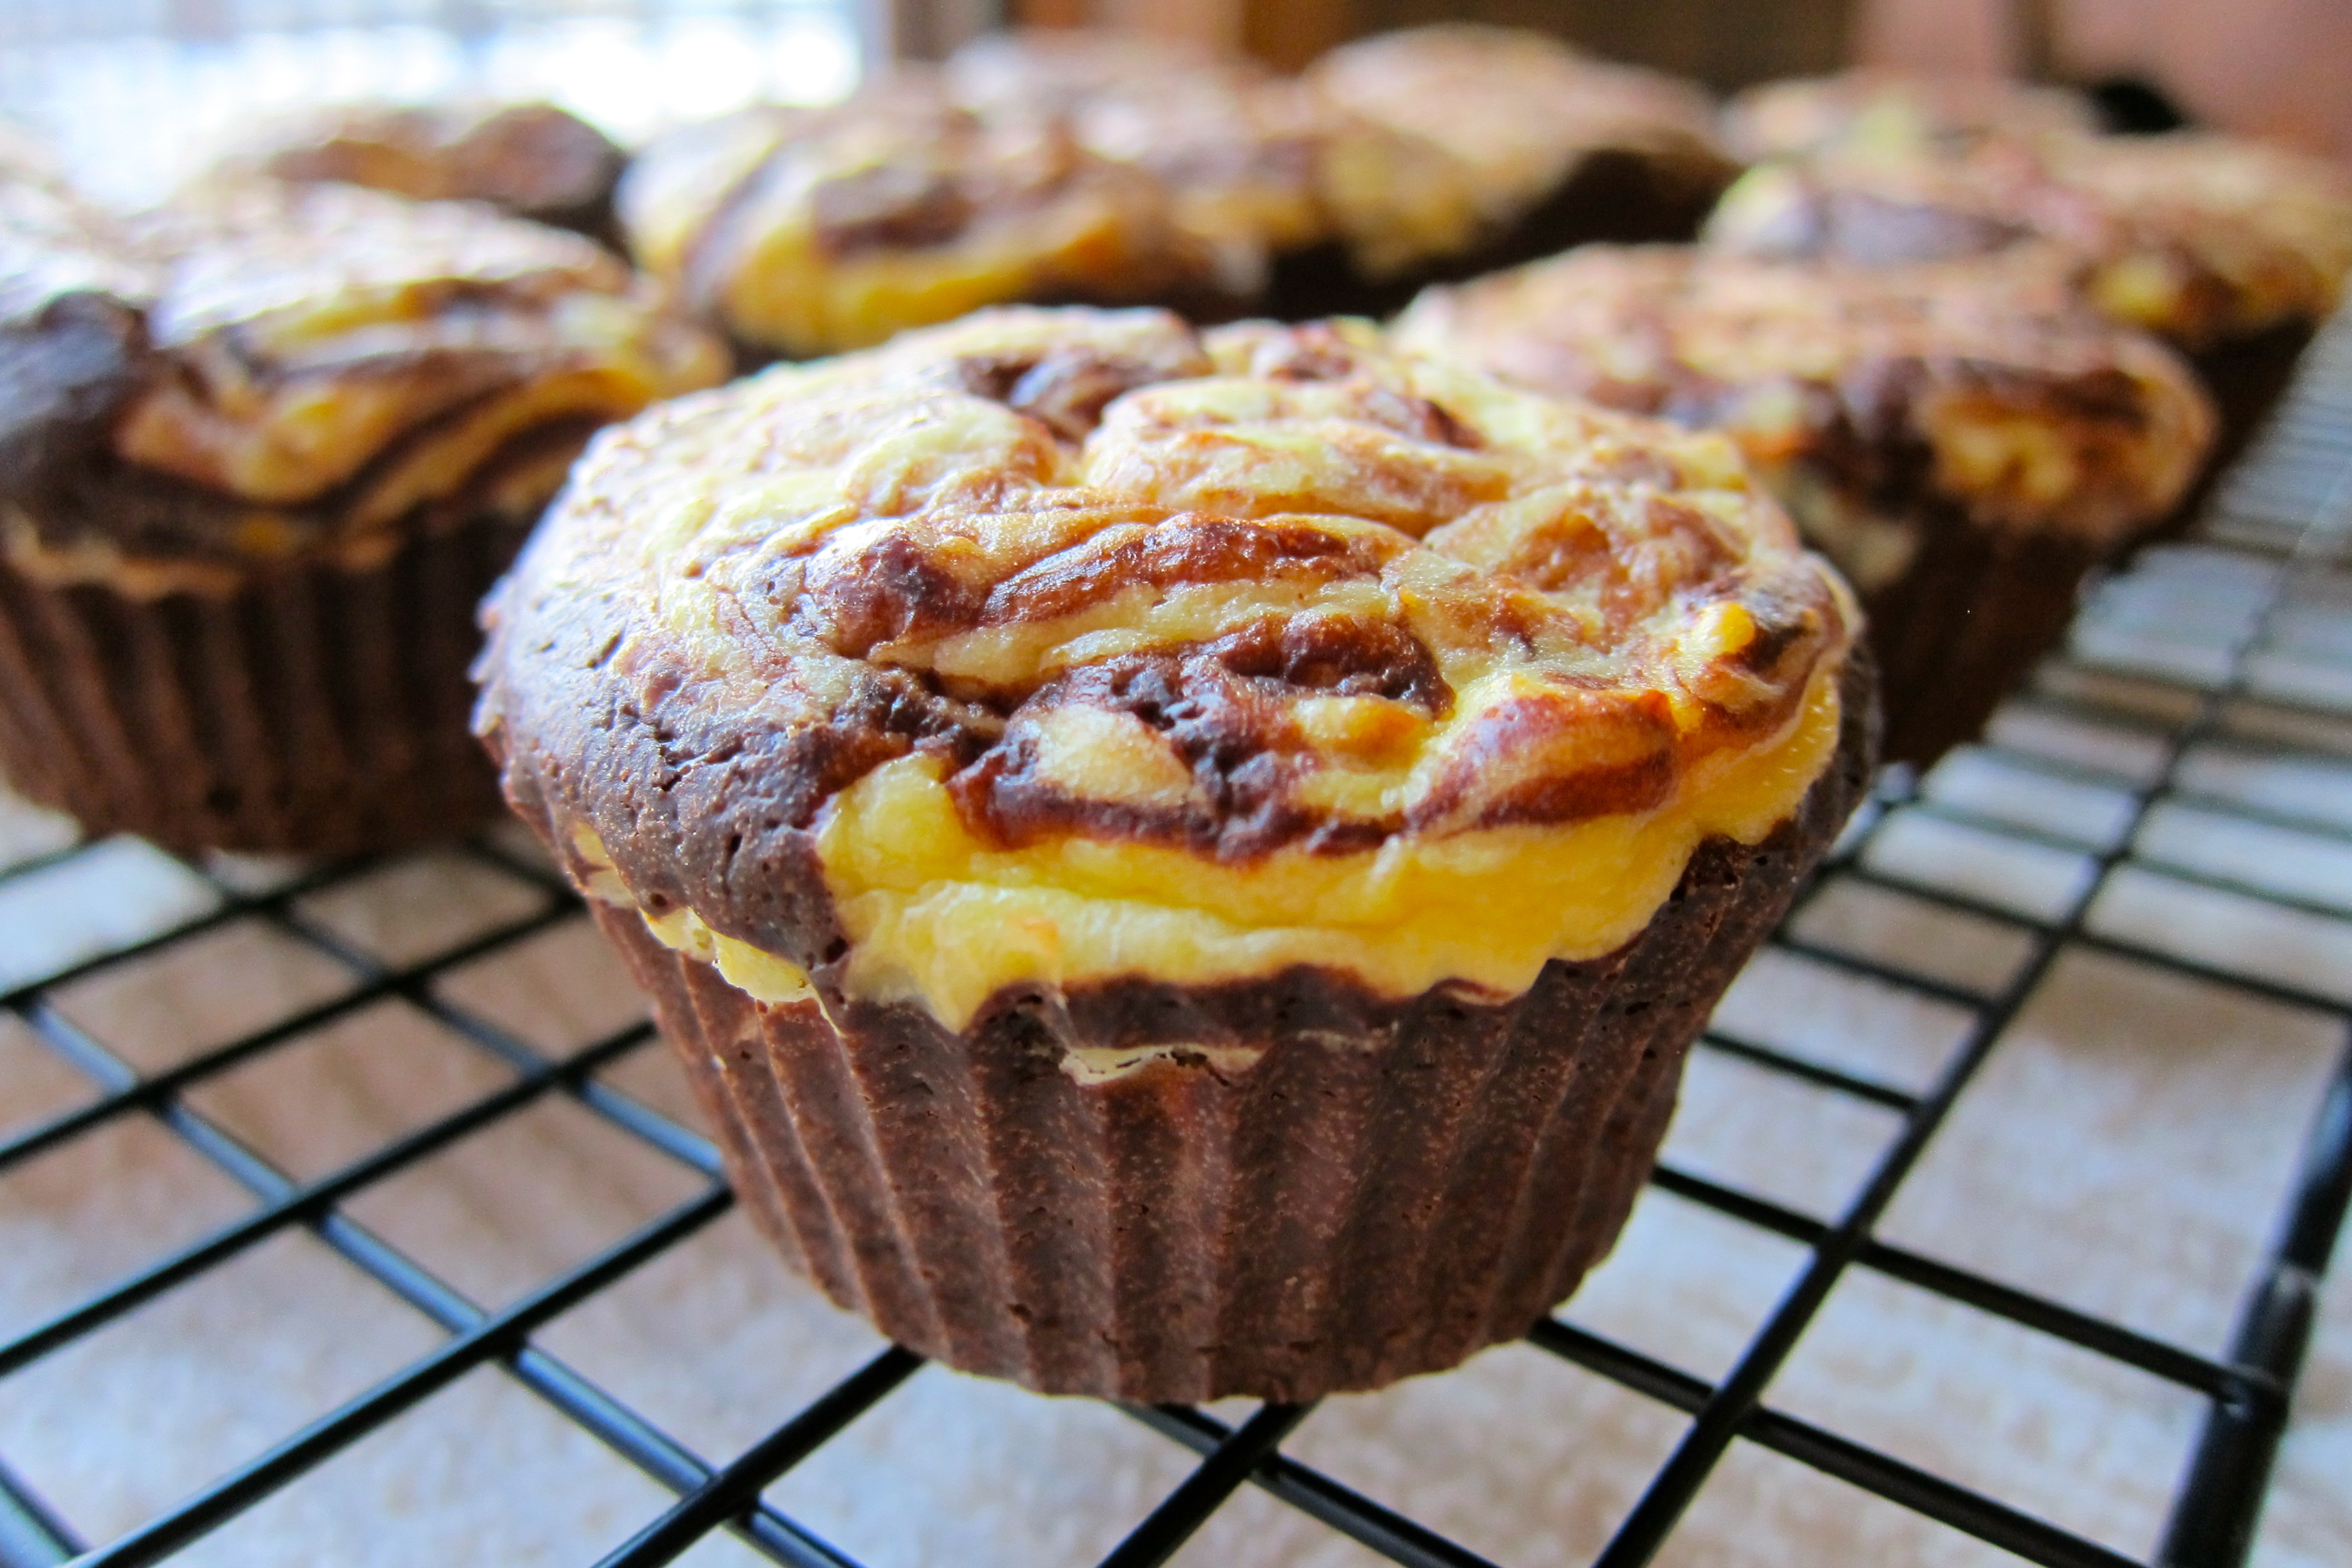
I LOVE brownies and I LOVE cheesecake…putting the two together is absolute heaven.  These little gems are SO tasty and fairly easy to make.  I have made them with both regular sugar and Swerve (erythritol) and they have turned out great both ways.  They also work nicely in a mini-muffin cup for an even smaller bite-sized treat.  I have not tried them in anything but the silicone liners though so I’m not sure how they’d do in a paper liner…I think they have enough fat in them that they would slip right out but I can’t say for sure.  I hope you enjoy them as much as I did!

Ingredients

Orange Cheesecake Layer:
  • 1 Tbsp. orange zest
  • 8 oz cream cheese, softened
  • 1/4 cup powdered Swerve Sweetener or your favorite sweetener (or powdered sugar 1:1 swap)
  • 1 large egg
  • 1 tsp. orange flavor extract
Brownie Layer:
  • 8 Tbsp. butter
  • 1/2 cup coconut oil, melted
  • 1 cup cocoa powder
  • 3/4 cup Swerve Sweetener or your favorite sweetener (or granulated sugar 1:1 swap)
  • 1/2 tsp vanilla extract
  • 5 large eggs

Instructions

  1. Preheat oven to 350° F and set 16 silicone muffin cups on a large baking sheet.
  2. For the cheesecake layer, in a large bowl, beat cream cheese and powdered erythritol (or sugar) until smooth. Beat in egg until well combined.  Add orange zest and orange flavor extract and beat until smooth and well mixed. Set aside.
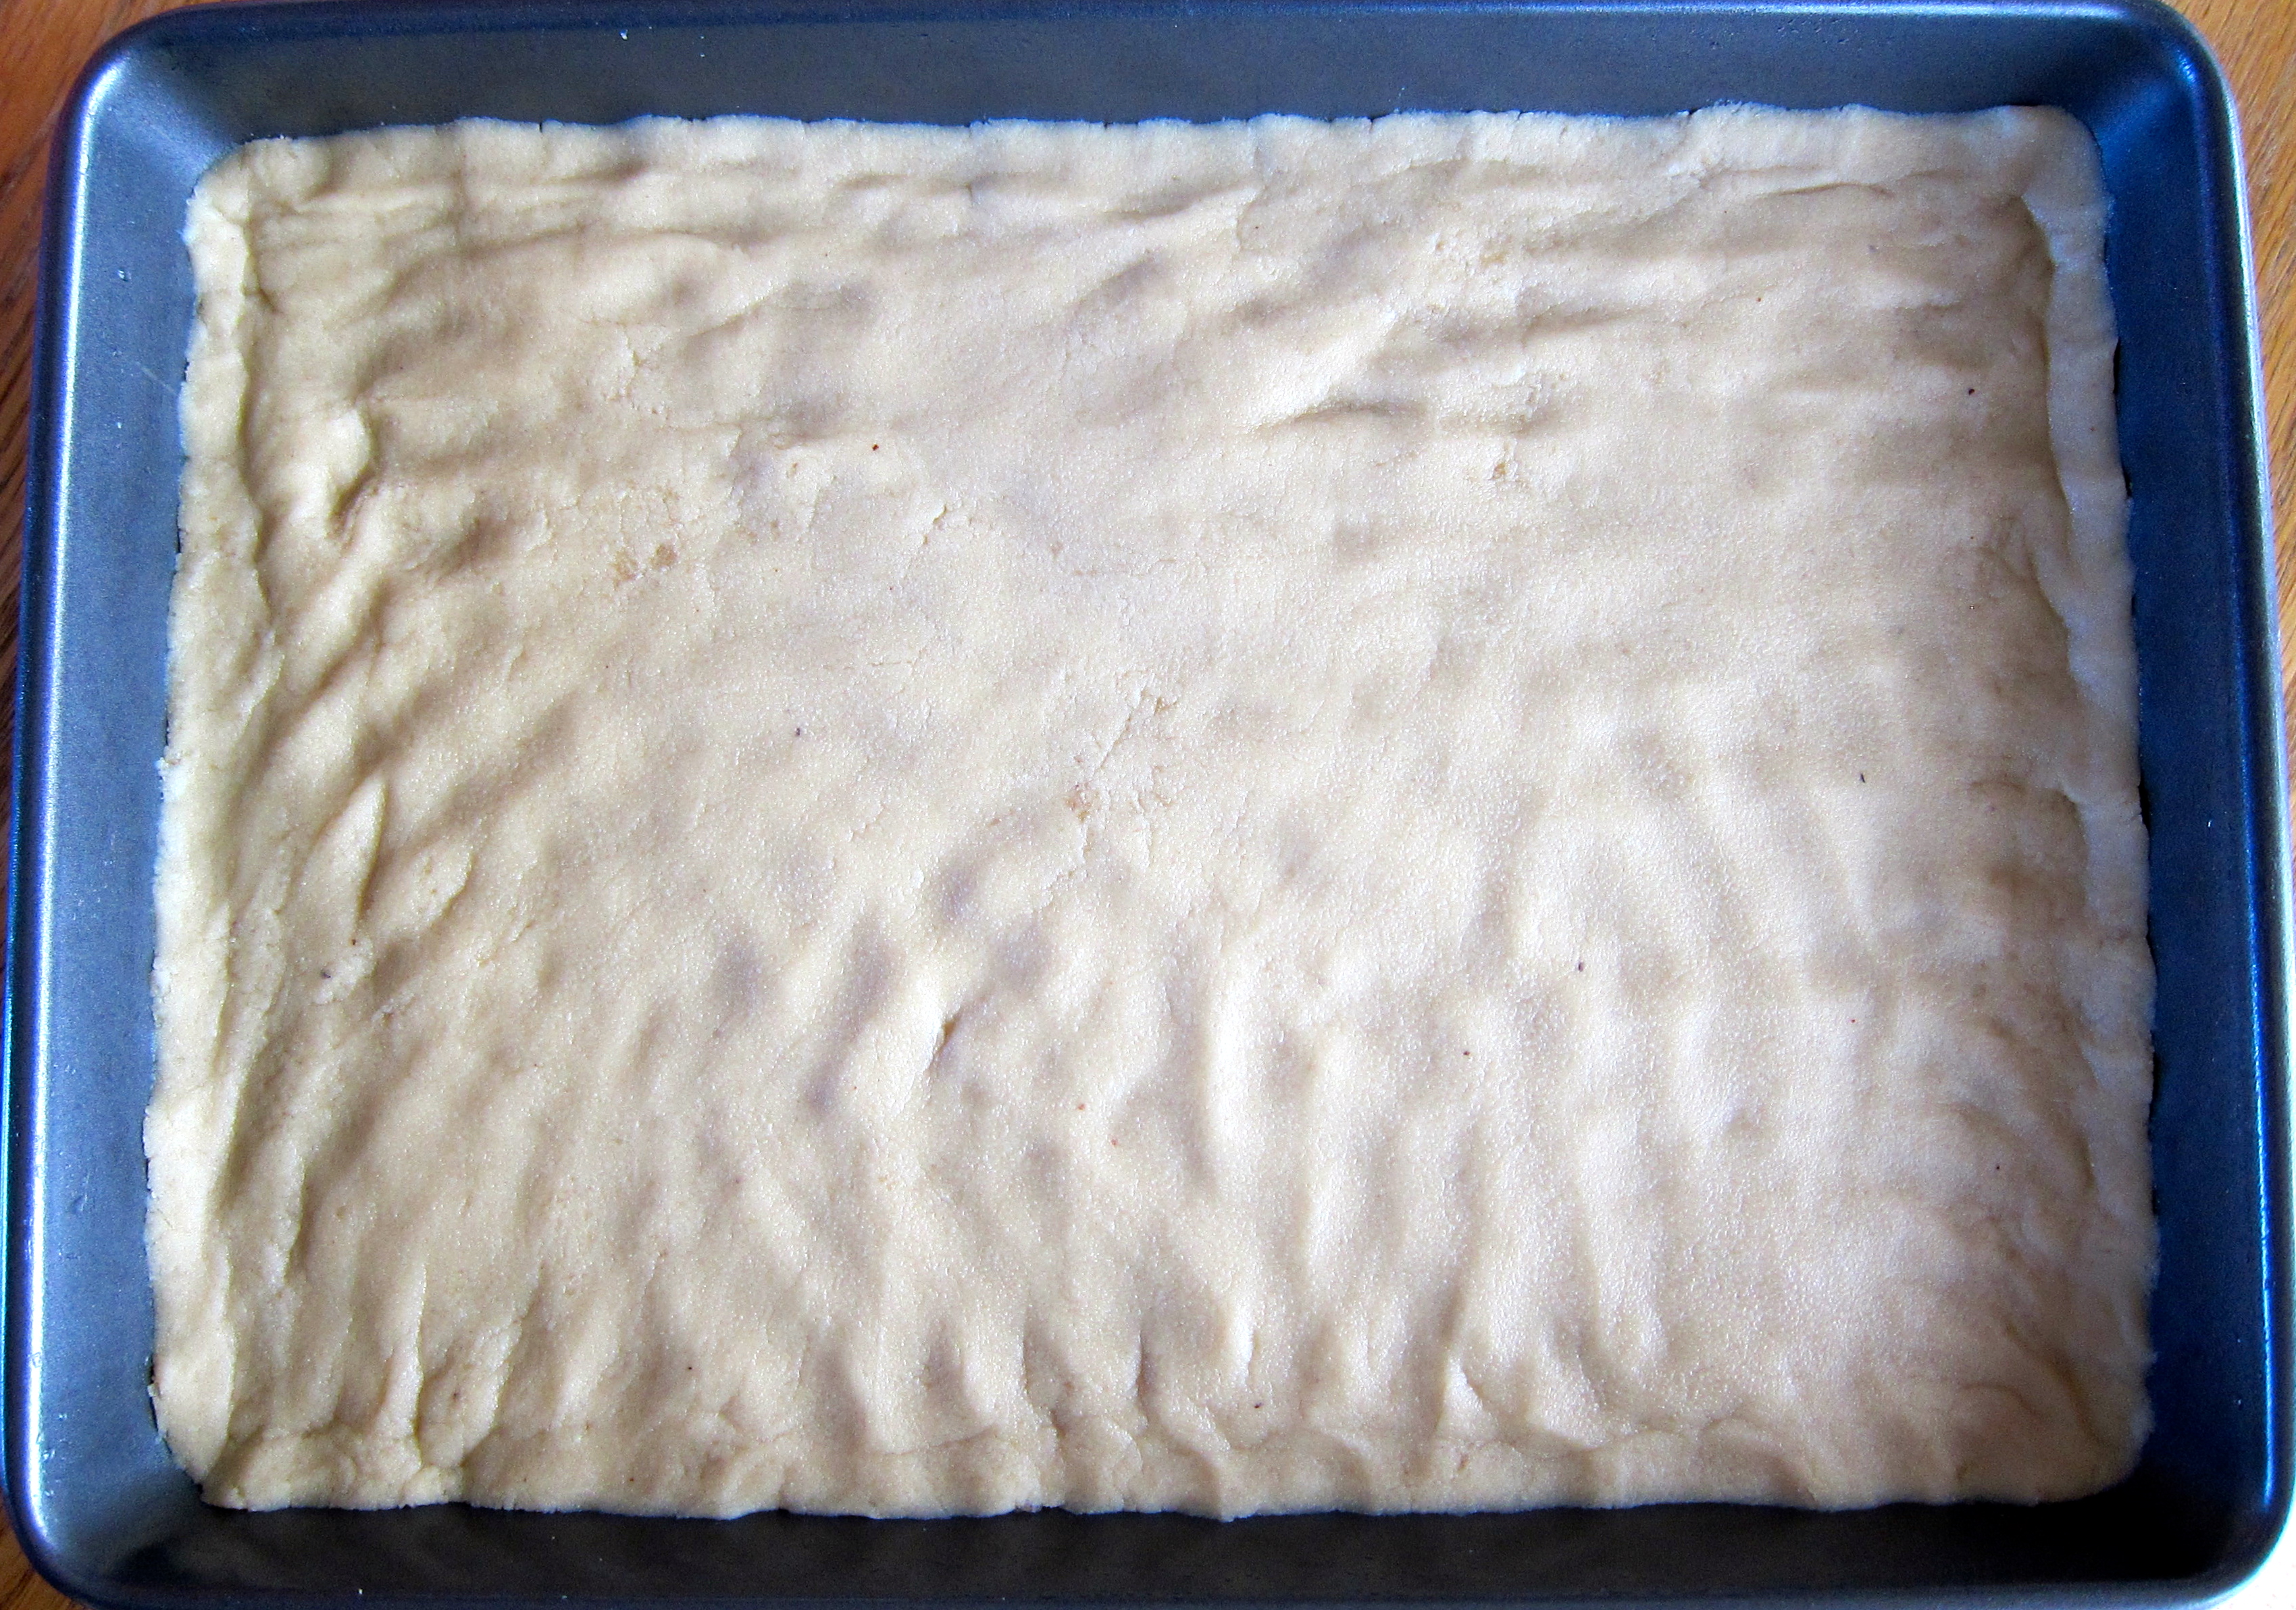
  3. For the brownie layer, in a medium sauce pan, melt butter and coconut oil over low heat, add cocoa powder and stir until smooth. Stir in erythritol (or sugar) and vanilla extract. Let cool 10 minutes.
  4. Beat in eggs, one at a time, until well combined.
  5. Spoon 2 Tbsp. of brownie batter into the bottom of each muffin cup.
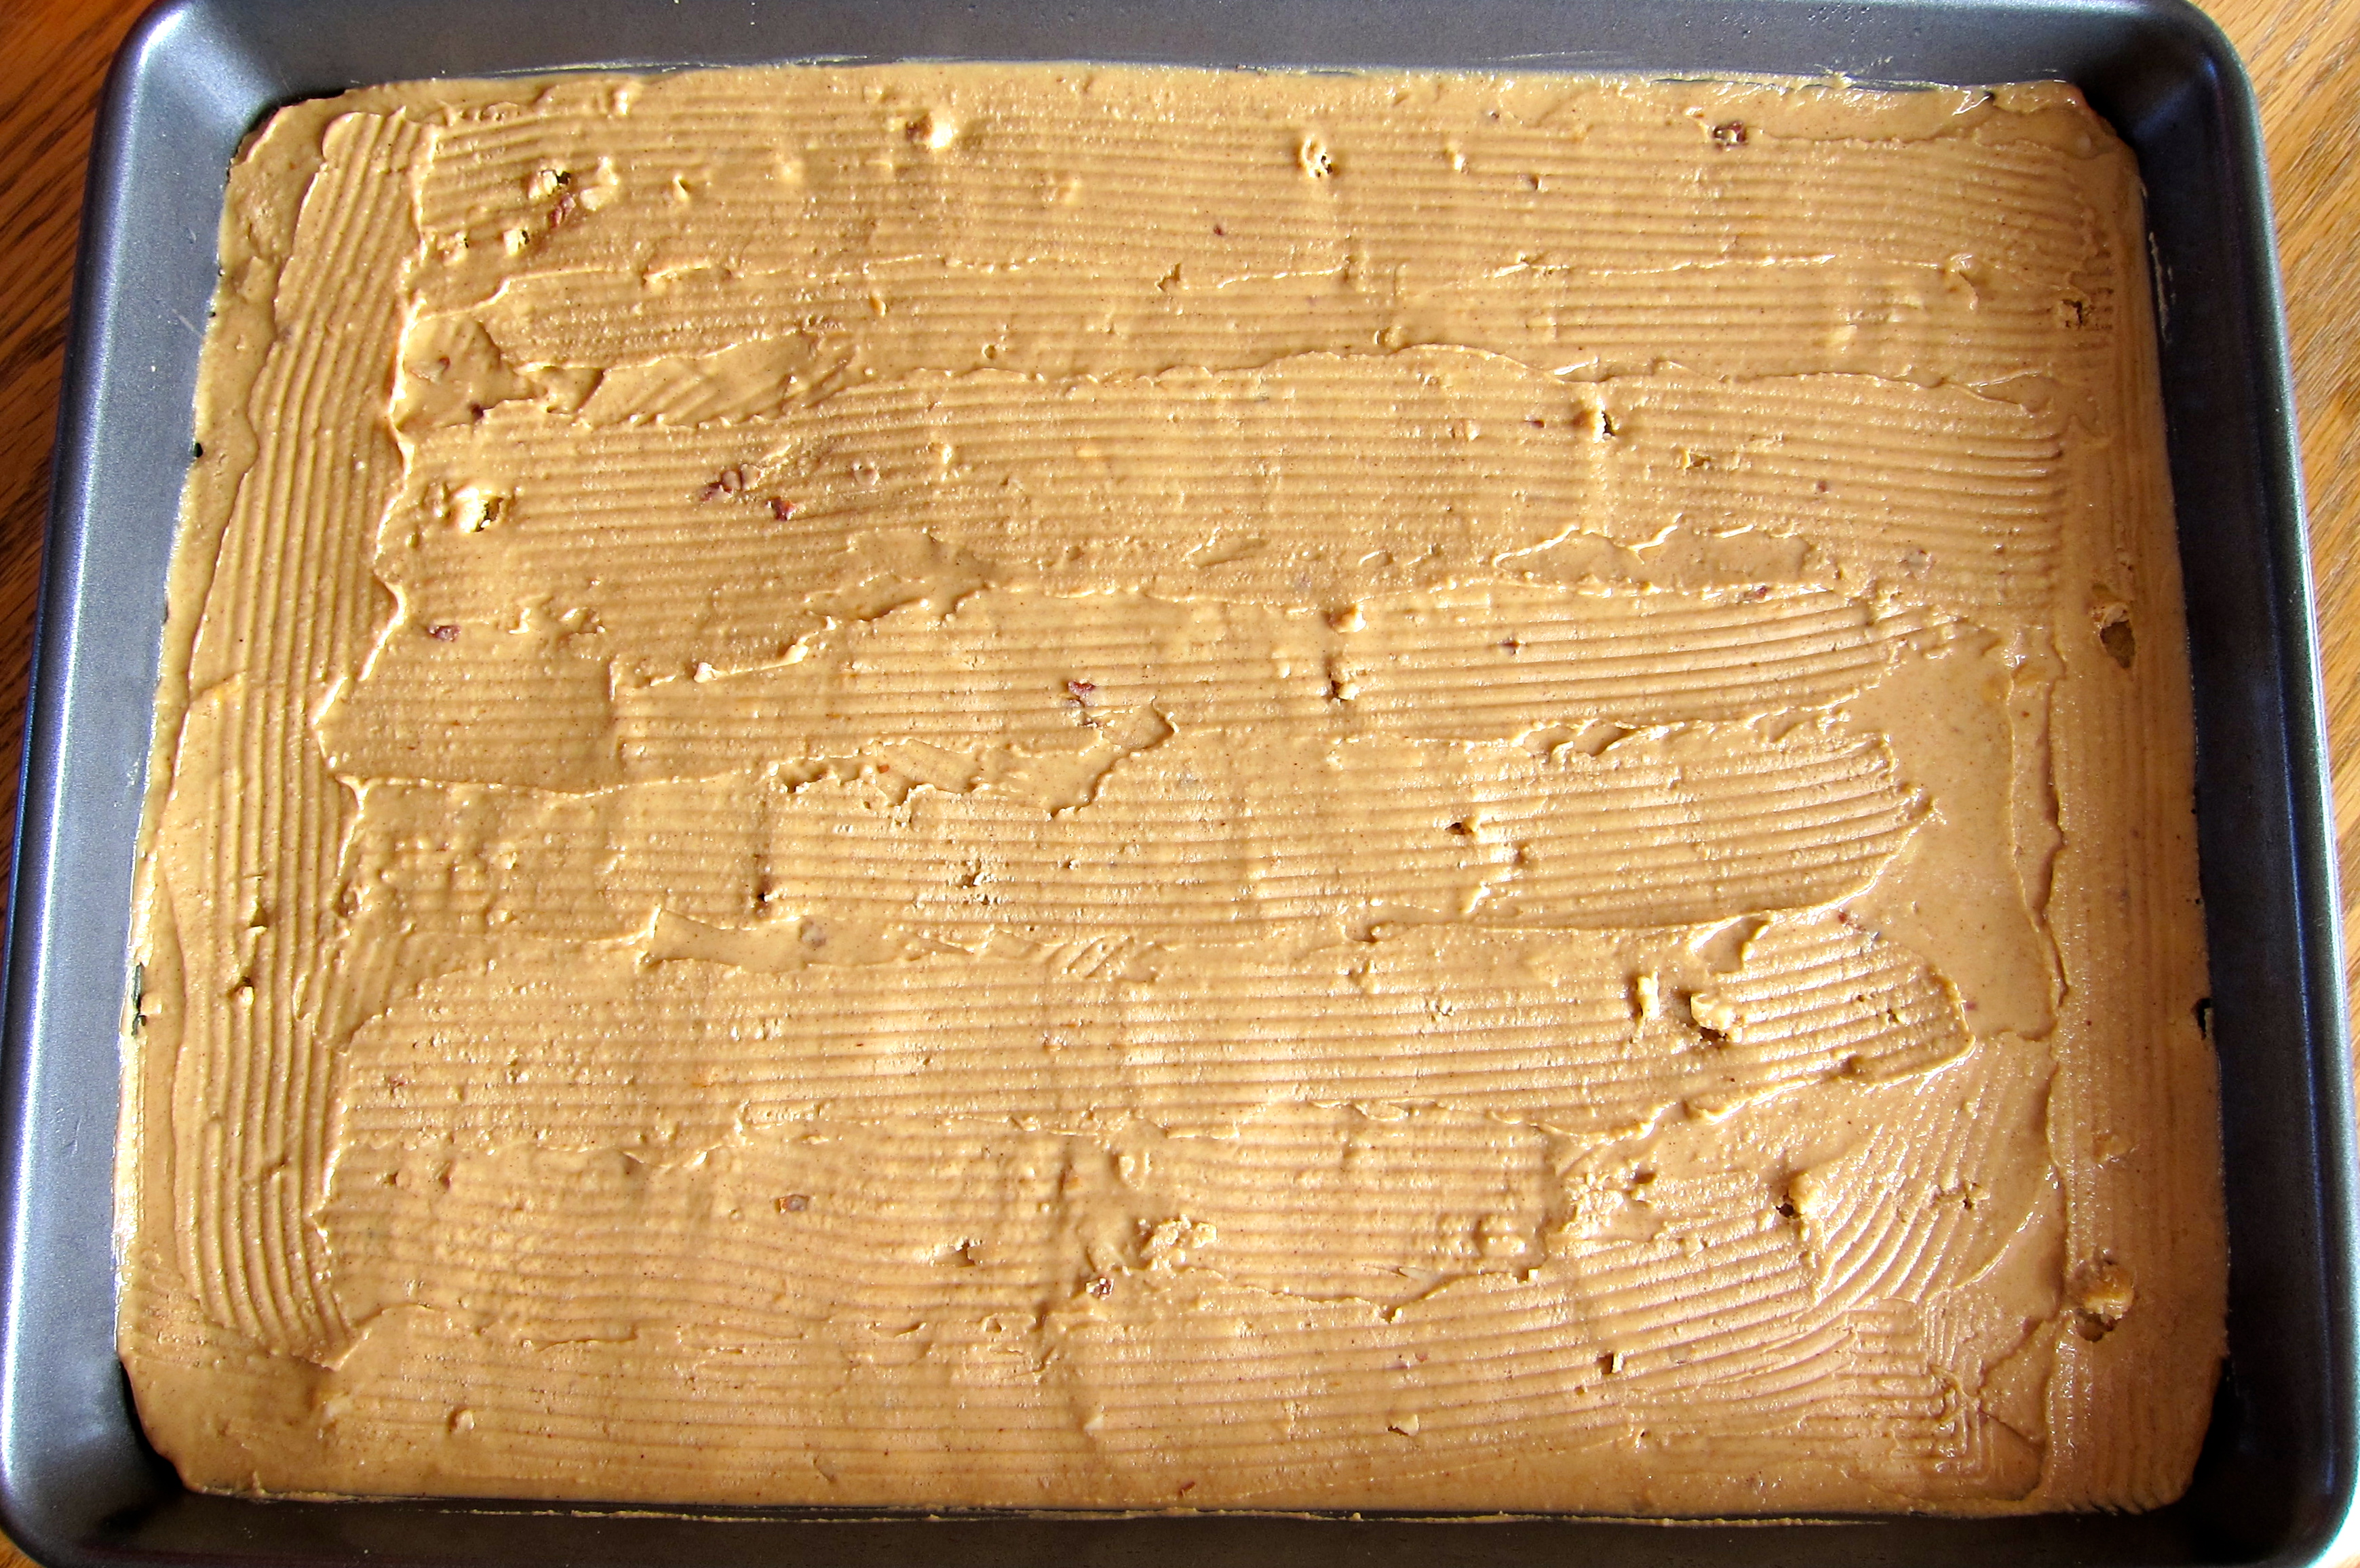
  6. Spoon 1 Tbsp. cheesecake mixture over top and use a toothpick to swirl layers together, bringing some of the brownie mixture to the surface.
  7. Bake 20 minutes, or until sides are set and the middle is just barely jiggling. Remove from oven and let cool 20 minutes, then refrigerate until set, about 2 hours.

Orange Cheesecake Brownie Cupcakes 2

This recipe is an adapted from All Day I Dream About Food’s Raspberry Cheesecake Swirl Brownies.

Shared at:

Gluten Free Tuesday, 5 Ingredient Monday, Slightly Indulgent Tuesday, Fat Tuesday, Gluten-Free Wednesday, Allergy Friendly Lunchbox Love, Allergy-Free Wednesday, Whole Food Wednesday, Gluten-Free Fridays, Wednesday Extravaganza

Chocolate PB Cupcakes

IMG_9517

Better late than never!  Sorry for the delay in posting this awesome recipe…

This recipe is adapted from my absolute favorite cupcake cookbook, Gluten Free Cupcakes by Elana Amsterdam

Chocolate Peanut Butter Cupcakes

Cupcakes:

1/2 cup blanched almond flour

1/4 cup coconut flour

1/4 cup unsweetened cocoa powder

1/4 tsp. Celtic sea salt

1/2 tsp. baking soda

4 large eggs, room temperature

2 Tbsp. coconut oil or butter, melted

1/2 cup maple syrup (or agave, honey or coconut palm nectar)

1/4 cup chopped peanuts (for topping)

Filling:

1/2 cup creamy roasted peanut butter (almond butter is nice too!)

1/4 cup maple syrup

1 tsp. vanilla

1/2 tsp. Celtic sea salt

Directions:

Preheat oven to 350° F.  Line 9 muffin cups with paper or silicone liners.

For the cupcakes, in a large bowl, combine the almond flour, coconut flour, cocoa powder, salt and baking soda.  In a separate medium bowl, whisk together the eggs, oil and maple syrup.  Blend the wet ingredients into the dry ingredients with a handheld mixer until thoroughly combined.

For the filling, in a small bowl combine the peanut butter, maple syrup, vanilla and salt and stir until smooth.

To assemble, spoon one tablespoon of the cupcake batter into the bottom of each muffin cup. Next, spoon one tablespoon of filling into each muffin cup.  Divide the remaining batter evenly between the muffin cups covering the filling completely.

Bake for 20-22 minutes or until a toothpick inserted about 1/2″ from the edge of the cupcake (to avoid the filling) comes out with only a few moist crumbs.  Remove from oven and let the cupcakes cool in the pan for 1 hour, then frost with ganache and top with chopped nuts.

Chocolate Ganache:

3/4 cup heavy cream

8 ounces dark chocolate chips or chopped

1 tsp. vanilla

pinch of salt

Place the chocolate in a medium bowl and set aside.  In a small sauce pan, bring the heavy cream to a boil and immediately remove from heat.  Pour over the chocolate and let sit for 5 minutes.  Add the vanilla and salt and whisk together until smooth.  Let the ganache cool to room temp and then place in the refrigerator to thicken, about 15 – 20 minutes.  Store any leftover ganache in a glass container in the refrigerator for up to 3 days.

This post is shared at:

5 Ingredient Monday, Slightly Indulgent Tuesday, Fat Tuesday, Tasty Tuesday, Gluten-Free Wednesday, Allergy Friendly Lunchbox Love, Allergy-Free Wednesday, Whole Food Wednesday, Gluten-Free Fridays, All Gluten Free Desserts, Wednesday Extravaganza

Glazed Lemon Muffins

IMG_1481

I’m not sure what my problem is with lemon but…I just don’t like the sound of it in my food.  I’m not saying that I don’t like the taste of it once it’s there but recipes like Lemon Bars, Lemon Pie, Lemon Dill Salmon, Lemon Chicken NEVER appeal to me…meaning I would never tear a recipe out of a magazine or order off a menu anything with lemon (or lime, for that matter!) in the title.  Weird, I know.  Especially since I enjoy the taste of pretty much each and every recipe I’ve encountered with those very ingredients!   I rarely make anything lemon or lime either.

According to my mother my dad LOVES lemon desserts, however, he is also a chocoholic (like me) so it never really occurred to me that he would actually want a lemon dessert over chocolate.  So, in honor of Father’s Day I prepared these delicious looking and smelling Glazed Lemon Muffins.  We will see if he is pleasantly surprised with lemon but I will surely have something chocolate prepared as back up!  My mom says they just might be her favorite dessert I’ve prepared…Humm…maybe, just maybe, she is the one who loves lemon desserts because she sure doesn’t like the chocolate ones… 😉

  This recipe is adapted from Kelly’s recipe for Lemon Bread at Primally Inspired.

Glazed Lemon Muffins

Muffins:

3 eggs

2 Tbsp. coconut oil or butter, melted

zest and juice from one lemon (about 1/4 cup)

1/4 cup almond milk

3 Tbsp. maple syrup or honey

1/3 cup coconut flour, sifted

1/2 tsp. baking soda

1/8 tsp. Celtic sea salt

Glaze:

1 Tbsp. coconut oil or butter

1 Tbsp. maple syrup or honey

1 Tbsp. almond milk

zest and juice from 1/2 a lemon (about 2 Tbsp.)

1/4 tsp. vanilla

Directions:

Preheat oven to 350° F.  Line a muffin tin with 6 silicone muffin cups or grease the tin very well with coconut oil.

In a small saucepan combine the ingredients for the glaze, bring to a simmer over medium-low heat.  Simmer for 5 minutes, stirring constantly then remove from heat and allow to cool for 45-60 minutes.

In a large bowl whisk together the eggs, coconut oil, almond milk and maple syrup.  Stir in the coconut flour, baking soda and sea salt. Mix until well combined.  Divide equally between the muffin liners, about 1/4 cup each.  Bake for 20-22 minutes or until the tops are slightly golden and a toothpick inserted in the middle comes out clean.  Allow the muffins to cool in the tin on a wire rack for about 30 minutes.

Remove the muffins from the silicon cups or muffin tin and set on the wire rack, place a piece of parchment paper under the wire rack to catch the glaze drizzle.  Drizzle the glaze over the muffins as desired and then place in the refrigerator to set the glaze for about 30 minutes.

Makes 6 muffins.

IMG_1475

This post is shared at:

5 Ingredient Monday, Slightly Indulgent Tuesday, Fat Tuesday, Tasty Tuesday, Gluten-Free Wednesday, Allergy Friendly Lunchbox Love, Wednesday Extravaganza, Allergy-Free Wednesday, Whole Food Wednesday, Gluten-Free Fridays, All Gluten Free Desserts

Delicious Grain-Free Carrot Cake

There is no better way to celebrate Spring than with a light, fresh Carrot Cake! 

This dessert always makes an appearance at my family’s Easter celebration in one form or another…cupcakes, mini-bundt cakes, 6-layered round cake and this year…a sheet cake.  No matter what size or shape it takes it never disappoints!!!

I am really into sheet cakes right now…no particular reason why, but they are functional, casual and great for serving a crowd.  I also love bar recipes for the exact same reasons.  This cake recipe works for both but I do prefer the different frosting variations since the whipped frosting is a bit thinner and seems to drizzle better over the individual bars which are a little thicker than the sheet cake.

Carrot Cake Bars

Carrot Cake Bars or Sheet Cake

1 ½ cups blanched almond flour
½ tsp. sea salt
½ tsp. baking soda
½ Tbsp. cinnamon
½ tsp. nutmeg
3 eggs
2 Tbsp. coconut oil or butter, melted
¼ cup maple syrup
1 ½ cups carrots, grated
½ cup walnuts plus 2 Tbsp., chopped
½ cup raisins

Preheat oven to 325° F
Grease a 8×8 baking pan for bars or a 9×12 quarter sheet pan for cake and line with parchment paper
In a large bowl, combine almond flour, salt, baking soda, cinnamon and nutmeg
In a separate bowl, mix together eggs, oil and maple syrup
Stir carrots, walnuts and raisins into wet ingredients
Stir wet ingredients into dry
Spread batter into prepared 8×8 baking pan or 9×12 sheet pan
Bake at 325° for 22 to 25 minutes
For Bars: Cool to room temperature and then turn cake out onto cutting board
Using a sharp knife, cut into 9 bars
Top cooled bars with Whipped Cream Cheese Frosting and sprinkle with 2 Tbsp chopped walnuts

For Sheet Cake: Cool to room temperature and then turn cake out onto cutting board, remove parchment paper
Wipe out the sheet pan and return the cake to the clean pan
Spread Classic Cream Cheese Frosting over the top of the cooled cake, sprinkle with chopped walnuts
Serve and Enjoy!

Frosted Sheet Cake

Whipped Cream Cheese Frosting (For Bars)

¾ cup heavy cream
8 ounces cream cheese, softened
¼ cup maple syrup
1 Tbsp. vanilla

Whip heavy cream until stiff
In a separate larger bowl, whip cream cheese until smooth, then blend in maple syrup and vanilla
With a rubber spatula, gently blend whip cream into cream cheese mixture
Store leftover frosting in an airtight jar in the refrigerator

Classic Cream Cheese Frosting (For Sheet Cake)

1 stick butter, softened
8 ounces cream cheese, softened
¼ cup maple syrup
½ Tbsp. vanilla

In a large bowl, whip cream cheese and butter with a hand mixer until smooth, then blend in maple syrup and vanilla
Store frosting in an airtight jar in the refrigerator until ready to use

These are great un-frosted too!

This recipe is shared at:

Wednesday Extravaganza, Gluten-Free Wednesdays, Allergy-Free Wednesdays, Whole Foods Wednesdays, Fight Back Friday, Wheat-Free Wednesday, Gluten-Free Fridays, Slightly Indulgent Tuesdays, Tasty Tuesday, Fat Tuesday, Tempt My Tummy Tuesday, Made From Scratch Monday,

Grain-Free, Vegan PB&J Bars

Happy National Peanut Butter Day!

IMG_2872

In honor of National Peanut Butter Day I modified one of my favorite dessert bar recipes from Elana Amsterdam’s Gluten-Free Almond Flour Cookbook.  The Raspberry Bar recipe is simply scrumptious as is but today I thought I’d add a little oomph to it…and nothing goes better with jelly (for me, anyways!) than peanut butter!  The original recipe of course calls for Raspberry fruit spread but my favorite is Black Currant so that’s what I used, you can substitute your favorite flavor and any nut butter would work in place of the peanut butter. I replaced the egg in the recipe with a flax egg to make this a vegan-friendly treat as well.  These are great for an on-the-go snack too…I cut them up, wrap them in plastic wrap and freeze them, EASY!

PB&J Bars

Crust:

3 cups almond flour

1/2 tsp. salt

1/4 cup coconut oil, melted

1 Tbsp. vanilla extract

Blend the almond flour, salt, coconut oil and vanilla in a food processor or high-speed blender until a smooth dough forms.  Press the dough into a greased 9×13 baking dish.  Bake at 350 for 12-15 minutes, until lightly golden.  Prepare the topping and measure out the filling while the crust is baking.

IMG_2844

Filling:

1/2 cup peanut butter, room temperature or slightly warmed

1 cup fruit spread

Spread the peanut butter in a thin layer over the hot crust.  Top the peanut butter layer with your favorite fruit spread flavor, spreading evenly.

IMG_2846IMG_2850

Topping:

1 3/4 cups almond flour

1/4 tsp salt

1/2 tsp ground cinnamon

1/4 cup coconut oil, melted

2 Tbsp. coconut nectar

1 flax egg (1 Tbsp. flax meal mixed with 2 Tbsp. warm water…allow to thicken)

1 cup sliced almonds

Combine the almond flour, salt and cinnamon in a large bowl.  Stir in the coconut oil, coconut nectar and flax egg.  Gently fold in the almond slices.  Distribute the topping evenly over the fruit spread layer, pressing it down slightly with the back of a spoon.  Bake at 350 for 20-25 minutes or until the topping its lightly golden brown.  Let cool on a wire rack for 1 hour and then refrigerate.  Cut into bars and serve.  Makes 18-24 servings.

IMG_2854IMG_2869

This recipe is shared at:

Fight Back Fridays, Gluten-Free Fridays, Slightly Indulgent Tuesdays, Fat Tuesday, Tasty Tuesday, Tempt My Tummy Tuesday, Gluten-Free Wednesdays, Allergy-Free Wednesdays ,Wheat Free Wednesdays

Pumpkin Spice Cakes with Pecan Praline Sauce

Pumpkin Cake with Maple-Vanilla Ice Cream and Pecan Praline Sauce

Pumpkin Spice Cake with Maple-Vanilla Ice Cream and Pecan Praline Sauce

Anyone that knows me knows that I love dessert AND that dessert really isn’t dessert for me unless it has some sort of ice cream in it or on it!  This recipe for Pumpkin Cakes with Pecan Praline Sauce was featured in the Paleo Magazine last year but didn’t list the recipe creator so I don’t have a link to the original recipe for credit, the only thing I changed was adding pumpkin pie spice rather than cinnamon and nutmeg.  I took the liberty of adding a nice healthy scoop of Homemade Maple-Vanilla Ice Cream to the top of this delightful holiday treat to help usher it into the “perfect dessert” category, the addition of the Pecan Praline topping is just enough to put it over the top!!!  These are equally good without the ice cream and even without the topping…but it’s dessert after all…just go for it!  You could even skip the cakes and just have the Maple-Vanilla Ice Cream drizzled with the Pecan Praline Topping!

Pumpkin Spice Cakes

  • 3/4 cup almond flour
  • 1 Tbsp. coconut flour
  • 1 Tbsp. pumpkin pie spice
  • 1/2 tsp. sea salt
  • 1/2 tsp. baking powder
  • 2 eggs, room temperature
  • 1/2 cup organic pumpkin puree
  • 1 Tbsp. coconut oil or butter, melted
  • 3 Tbsp. maple syrup
  • 1 tsp. vanilla

Preheat oven to 350° F.  Lightly grease 6 ramekins and set on a baking sheet.  In a medium bowl, whisk together dry ingredients.  With a hand mixer blend eggs, oil or butter, maple syrup, pumpkin and vanilla until well combined.  Add in dry ingredients and mix well.  Divide batter among the prepared ramekins and smooth the tops with the back of a spoon.  Bake for 20-25 minutes or until the center is set and springs back when lightly pressed.  Remove from oven and cool on a wire rack for 10 minutes.  Carefully remove the cakes from the ramekins and cool completely.

Pecan Praline Topping

  • 1/3 cup maple syrup
  • 1/4 cup canned coconut milk
  • 1/4 cup chopped pecans
  • 1 Tbsp. butter

In a small saucepan, combine all ingredients.  Over medium-high heat, bring to a boil.  Reduce the heat to medium low and simmer until the mixture thickens and reduces a bit, about 10 minutes or so.  Remove from heat and allow to cool slightly.  Serve while still warm or refrigerate in a glass container for up to 10 days.  If storing in the refrigerator, warm the topping in the microwave or on the stove before serving.

No ice cream necessary...

No ice cream necessary…

This recipe is shared at:

 Tempt My Tummy Tuesday, Slightly Indulgent Tuesday, Tasty Tuesday, Fat Tuesday, Gluten-Free Wednesday, Whole Foods Wednesday, Allergy-Free Wednesday, Fight Back Friday, Gluten-Free Fridays

Roasted Butternut Squash and Spinach Lasagna

Who needs dairy when you can have this?

It’s fall and time for comfort food…what better way to indulge than with a Butternut Squash and Spinach Lasagna.  I struggle with calling this dish “lasagna” since that dish traditionally defined as a baked dish containing layers of boiled lasagna noodles, and usually cheese, a seasoned sauce of tomatoes, and meat or vegetables…Well, we have a seasoned sauce of tomatoes and loads of meat and vegetables so I guess we are half-way there!  This recipe is pretty simple to throw together and can certainly be modified to include dairy by adding layers of ricotta and mozzarella (I’ve made it this way too and it is certainly delicious!).  Adapted from this recipe on Health-Bent.

Ingredients

  • 1 lb ground meat (beef, pork, turkey, or bison)
  • 2 Tbsp. Italian seasoning
  • 1/2 red onion, chopped
  • 3 cloves garlic, minced
  • 1/2 c red pepper, chopped
  • 4 oz mushrooms, chopped
  • 1 Tbsp. extra virgin olive oil
  • 1 24 oz jar tomato sauce
  • couple leaves of fresh basil
  • 5 ounces baby spinach
  • 1 small butternut squash

Directions

Preheat oven to 400ºF.  Cut the top and ends of the squash off and peel it. Split it into 1/4′s. What I mean by that is, right where the squash starts to turn bulbous, cut it in 1/2, width-wise. Split those two halves in half, lengthwise. This will make it much easier to cut into planks. Scrape out the seeds. Slice the squash into planks.  Roast the squash on a parchment lined baking sheet until tender, about 25 minutes.

While the squash is roasting, in a saute pan heat the oil and saute the onions, peppers, mushrooms and garlic.  Add the ground meat and Italian seasoning and continue to saute until the meat is browned.  Remove from heat and set aside.

Using a 9×9 oven safe baking dish, put down enough sauce to lightly cover the bottom of the dish. (This keeps the squash from sticking to the pan.) Next add a layer of squash planks and top with a layer of baby spinach, then spoon on the sausage mixture, followed by the sauce. Repeat until all your ingredients are used up (I usually get three layers)…trying to reserve enough sauce to cover the top of the lasagna, sprinkle the fresh basil over the top layer of sauce.

Cover the dish tightly with foil and bake for 45 minutes. Remove the foil and bake for an additional 15 minutes.  Look for a bubbly pan with a crispy, browned top. Right out of the oven, the lasagna may by liquidy, let it set for a good half hour before cutting into it, as it will solidify.  Serves 6 generously.

This recipe is shared at:

Gluten-Free Monday, Tempt My Tummy Tuesdays, Slightly Indulgent Tuesday, Tasty Tuesday, Fat Tuesday, Whole Foods Wednesday, Allergy Free Wednesday, Gluten-Free Wednesdays , Gluten Free Fridays, Fight Back Friday, Fill Those Jars Fridays

Crispy Delicata Squash Fries

Crispy Delicata Squash Fries…so tasty.

Winter squash seem to be EVERYWHERE these days and I couldn’t be happier!  This is a super easy and quick recipe that makes a comforting side dish for any meal…I love to roast pretty much any squash but I especially like the Delicata since the skin is edible, no peeling necessary!!!

Delicata Squash Fries

2 Delicata Squash

2 Tbsp. coconut oil

salt and pepper, to taste

Preheat oven to 425 degrees F.  Line a large rimmed baking sheet with parchment paper.  With a sharp knife cut squash in half and remove the seeds.  Slice the squash into 1/4″ pieces.

Seeded and sliced delicata squash

Place squash in a large mixing bowl and toss with coconut oil and salt and pepper to coat.

Place coated squash on the parchment lined baking sheet.

Bake for 30 minutes, turning all the squash halfway through baking.  Once the squash is browned and crispy, remove from oven and sprinkle with sea salt.  Serve immediately.

Hot out of the oven.

This recipe is shared at:

Tempt My Tummy Tuesdays, Slightly Indulgent Tuesday, Tasty Tuesday, Fat Tuesday, Whole Foods Wednesday, Fill Those Jars Fridays, Allergy Free Wednesday, Fight Back Friday, Gluten-Free MondayGluten-Free Wednesdays , Gluten Free Fridays

Gooey Sunbutter Brownies

I love to get my Clean Eating Magazine in the mailbox every month…I am totally guilty of immediately opening the magazine to the last page (seriously, every time.) which is cleverly titled “happy ending”…where there is always a “clean” dessert recipe.  Clean Eating Magazine has beautiful recipes that are easily adaptable to most styles of eating be it gluten, grain, dairy or refined sugar-free.  The “happy ending” in this issue uses spelt flour, peanut butter and organic evaporated cane juice which I substituted coconut flour, Sunbutter and a combination of coconut nectar and palm sugar to make it grain, legume and refined sugar-free.

Grain free, refined sugar-free brownies…sounds less than decadent, right?  Not so with this recipe that I adapted from the Peanut Butter Brownie recipe featured in this months (October 2012) Clean Eating Magazine.  These brownies have a “gooey” texture…not too dense,  eggy or cake-like.  The generous swirl of sunflower seed butter adds an extra layer of decadence to these “clean” dark chocolate brownies. Enjoy!

A decadent and guilt-free happy ending to any meal!

Sunflower Seed Butter Brownies

Ingredients:

4 oz dark chocolate (70% or greater)

4 Tbsp. butter or coconut oil

3 large eggs, room temperature

1/4 cup coconut nectar

1 Tbsp. coconut palm sugar

1 tsp. vanilla extract

1/4 cup coconut flour, sifted

2 Tbsp. cacao powder

3 Tbsp. smooth sunflower seed butter, room temperature

Directions:

Preheat oven to 350 degrees F. Lightly grease an 8-inch square baking dish with coconut oil and line with parchment paper leaving 2 inches hanging over 2 opposing sides.

In a large microwave-safe bowl, combine chocolate and butter.  Microwave on 50% power for 30 seconds.  Stir and cook 30 more seconds; repeat until chocolate and butter melt, being careful not to overcook. (Alternatively, bring a pot of water to a very gentle simmer; place a stainless steel bowl over pot and add chocolate and butter to bowl.  Cook, stirring until melted, 2 to 3 minutes.)

Stir in eggs, coconut nectar, palm sugar and vanilla until combined.  Add flour and cacao powder and stir until just incorporated and no white streaks remain; do not over-mix.

Pour into baking dish, spreading evenly with a rubber spatula.  Working in small dollops (about 1/2 Tbsp. each), dot the surface of batter with Sunbutter.  With a butter knife or spatula, swirl Sunbutter through batter.

Bake until toothpick comes out with only a few crumbs when inserted in center, 15 to 18 minutes.  Transfer to a wire rack and let cool completely, about 20 minutes.  Remove brownies from dish by lifting parchment paper.  Slice into 12 pieces.

Recipe Variations:

  • Substitute your favorite nut butter for the Sunbutter
  • Substitute honey, maple syrup or agave for the coconut nectar
  • Add chocolate chips
  • Add chopped nuts or seeds that complement your favorite nut/seed butter
  • If you are not grain free, omit one egg and sub 1/3 cup quinoa flour for the coconut flour
  • Make in a 12 cup muffin pan, be sure to use paper liners.

This recipe is shared at:

Made From Scratch Mondays, Slightly Indulgent Tuesday, Tasty Tuesday, Fat Tuesday, Whole Foods Wednesday, Fill Those Jars Fridays, Allergy Free Wednesday, Fight Back Friday, Gluten-Free MondayGluten-Free Wednesdays

Italian Bacon~Spinach~Tomato Mini Frittatas

This a simple recipe that uses fresh and flavorful ingredients and it’s easy to put together.  I used raw milk cheese in mine but if you are dairy-free you can simply leave it out.  Enjoy this high protein, low carb dish for breakfast, lunch or dinner with a nice side salad or even some oven-roasted sweet potatoes.

Pastured eggs, nitrate-free bacon, vine ripe tomatoes, baby spinach and raw milk cheese…beautiful!

Italian Bacon~Spinach~Tomato Mini Frittatas

This recipe makes two servings (the photo above was for one).

Ingredients:

4 pastured eggs

4 strips bacon, cooked and crumbled

2 ounces mozzarella cheese, shredded

2 large tomatoes, sliced thin and seeded

1 ounce baby spinach

2 tsp. grated Parmesan cheese

2 tsp. Italian seasoning

salt and pepper

Directions:

Preheat oven to 350 degrees F.  Grease 4 ramekins or 2 individual size serving dishes, set aside.

In a small bowl whisk together eggs and Italian seasoning.

In each dish layer tomatoes, spinach, cheese and bacon…depending on the size of your dish you should have enough room to repeat the layers.

Pour the whisked eggs over the layered ingredients evenly (about 1/4 cup in each ramekin).

Sprinkle with 1/2 tsp. Parmesan cheese.

Bake for 20-25 minutes or until the eggs are set.

Baked to perfection!

You can pop these easily out of the ramekins or serve them directly in the baking dish.  Either way…Delish!

This recipe is shared at:

Fill Those Jars Fridays, Fresh Bites Fridays, Slightly Indulgent Tuesday, Fat Tuesday, Gluten-Free Wednesdays, Whole Foods Wednesdays, Made From Scratch Mondays

%d bloggers like this: