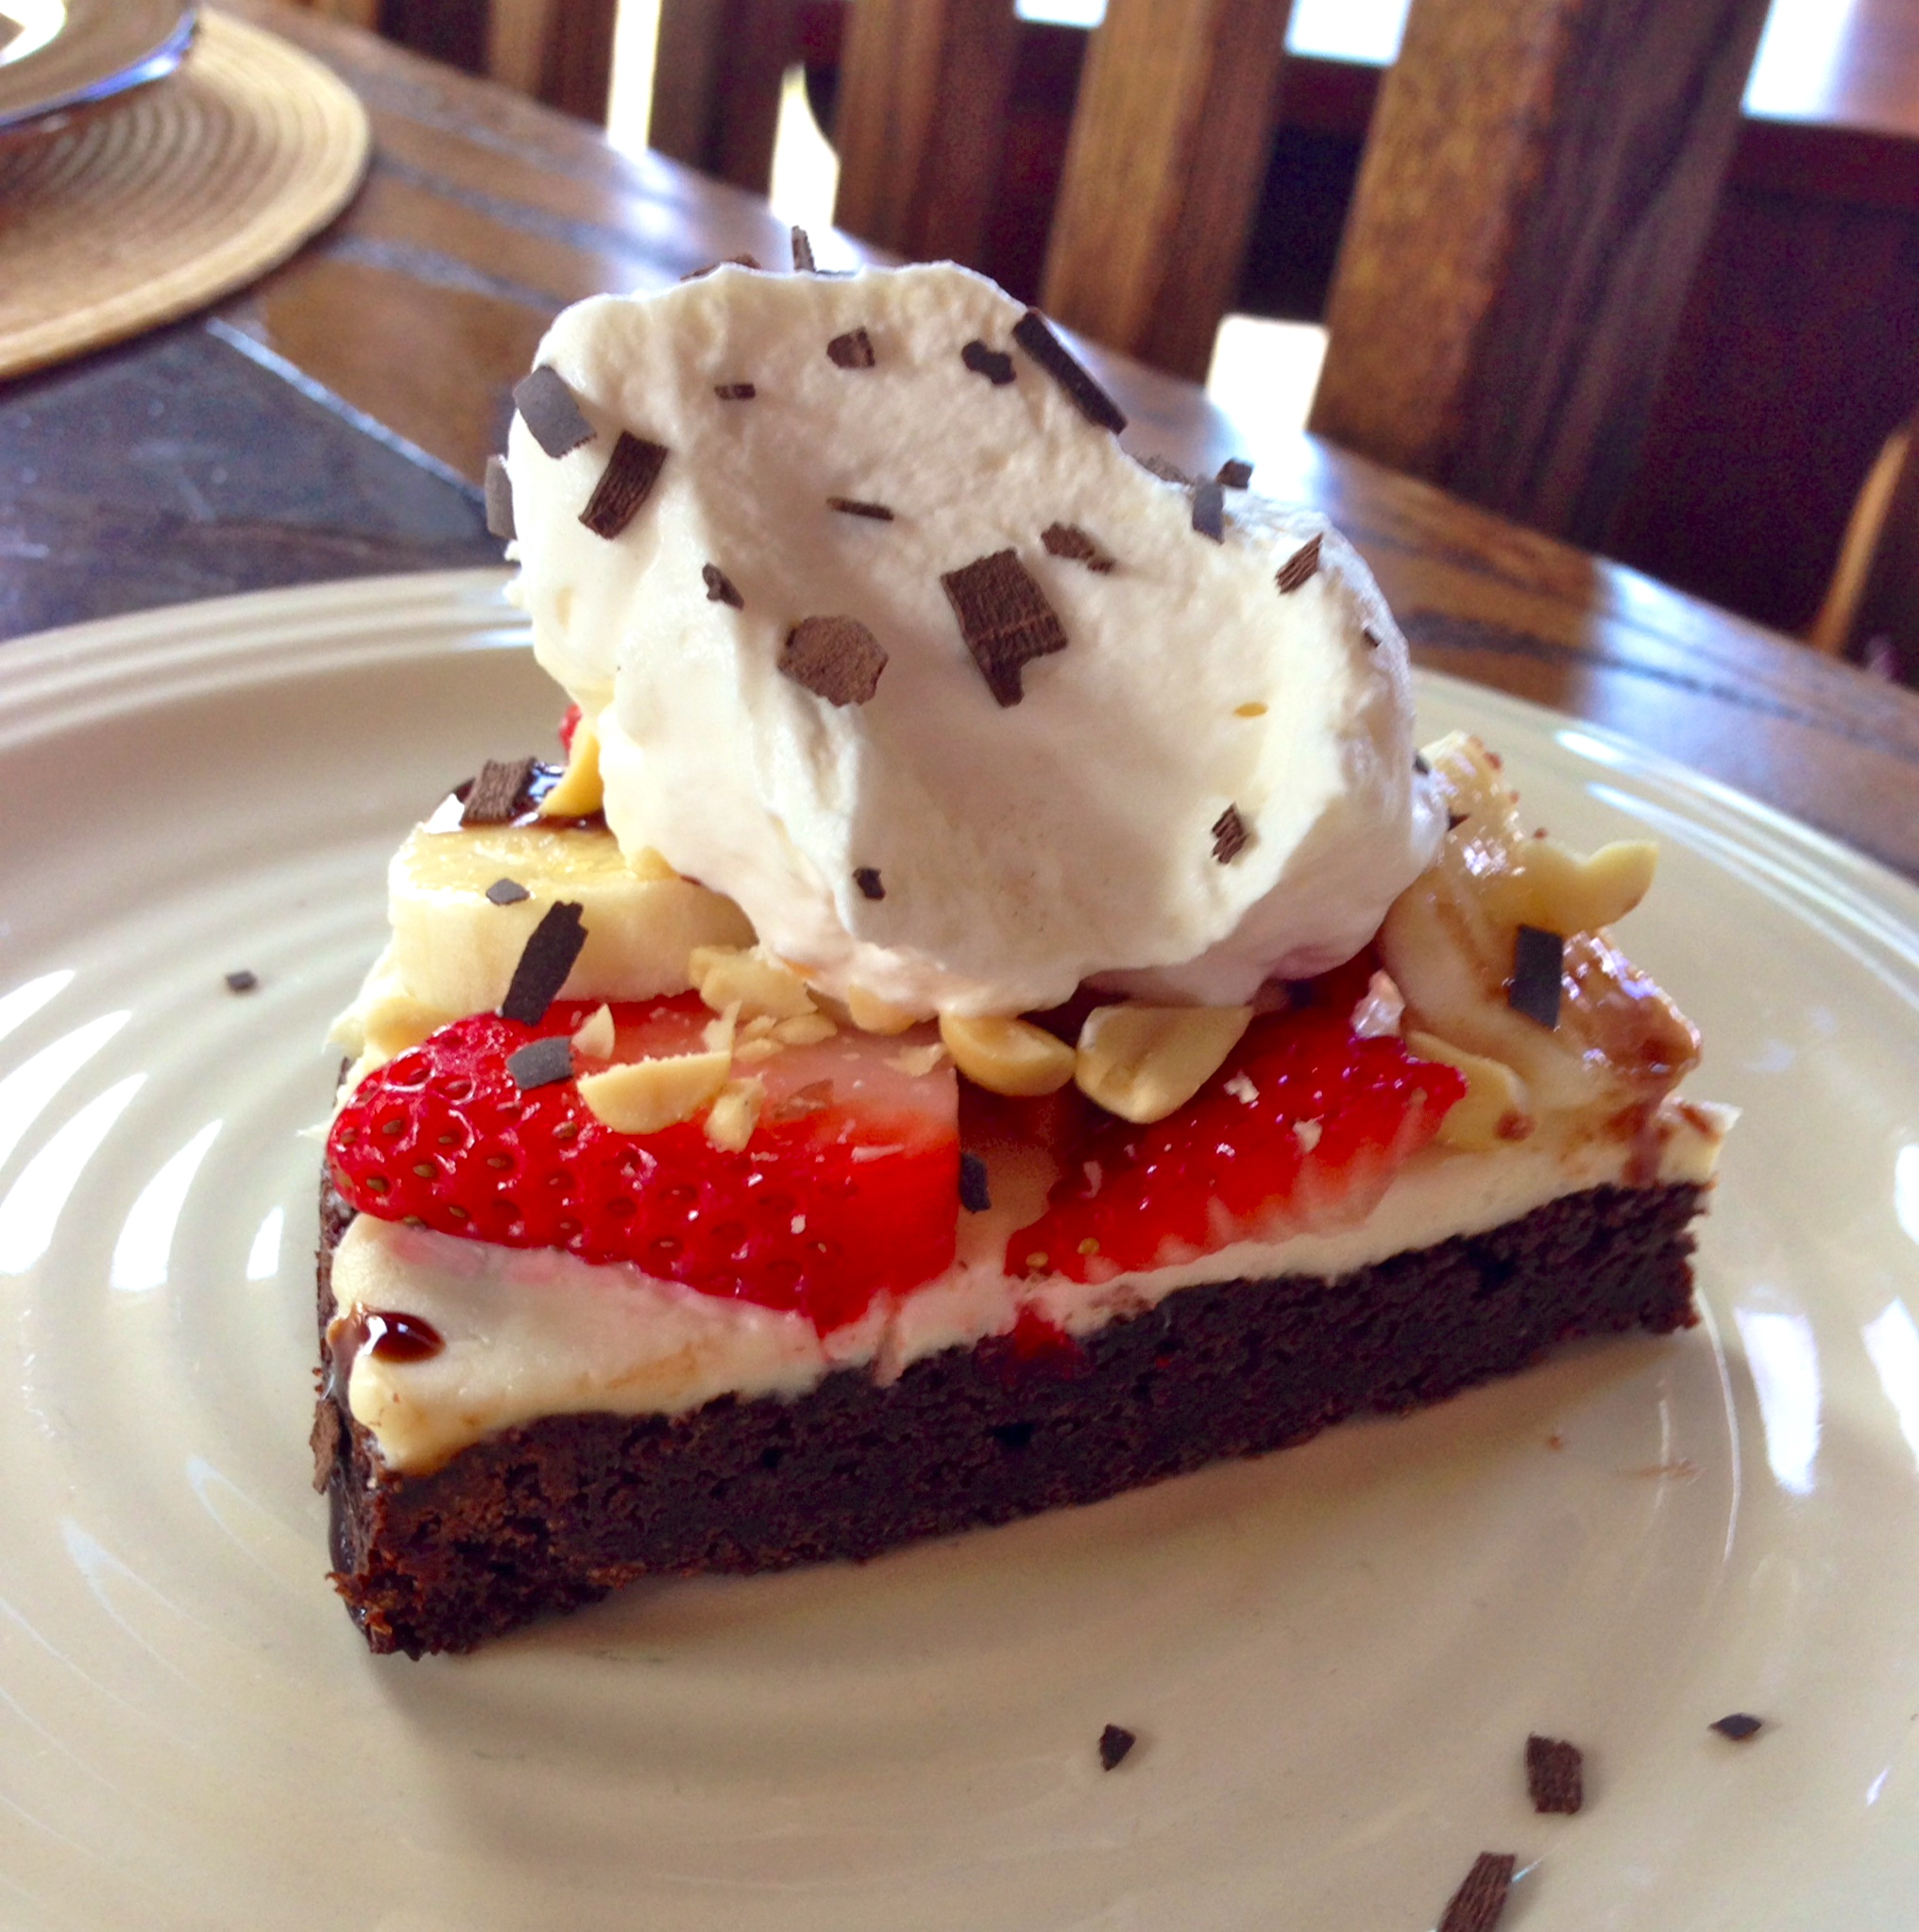
Banana Split Brownie Pizza
Serves 12
Ingredients:
1 package gluten-free brownie mix, or your favorite homemade recipe
8 ounces cream cheese
1 small can crushed pineapple, drained, juice reserved
1-2 tablespoons sweetener (sugar, agave, maple syrup, honey)
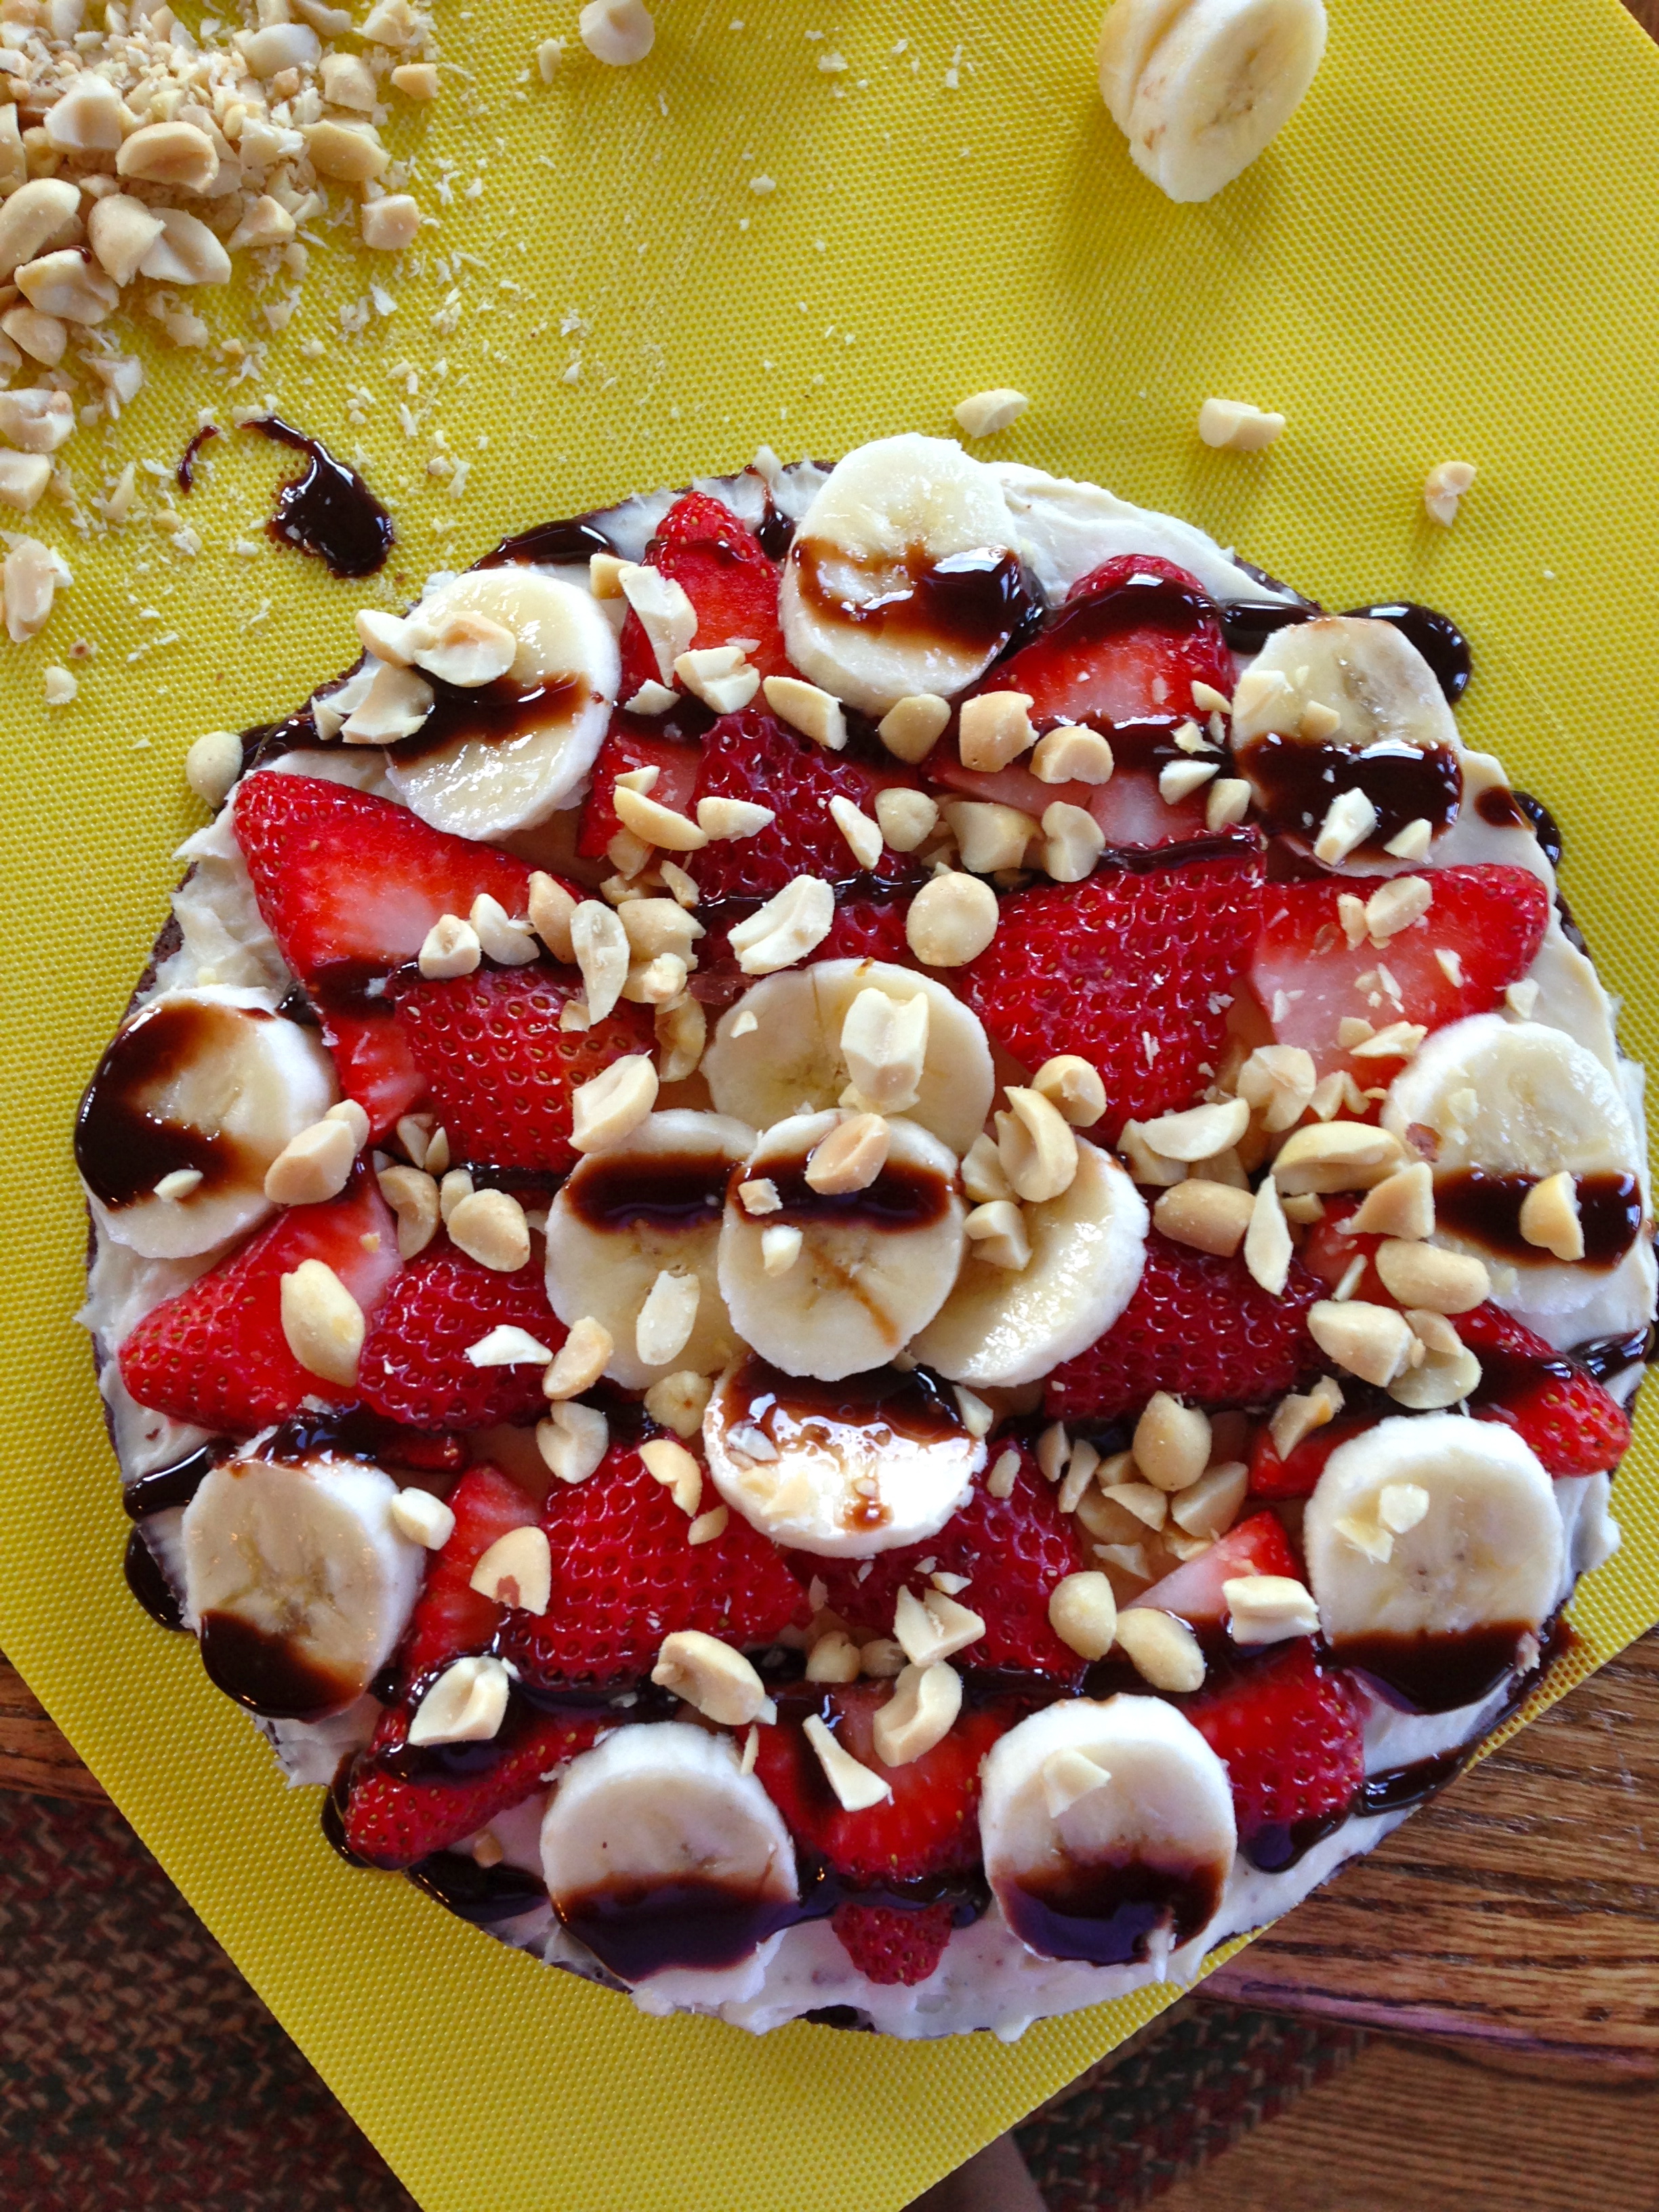
2 bananas, sliced
1 cup strawberries, sliced
1/2 cup nuts, chopped (I used peanuts)
chocolate syrup for drizzling
freshly whipped cream and chocolate shavings for topping
Directions:
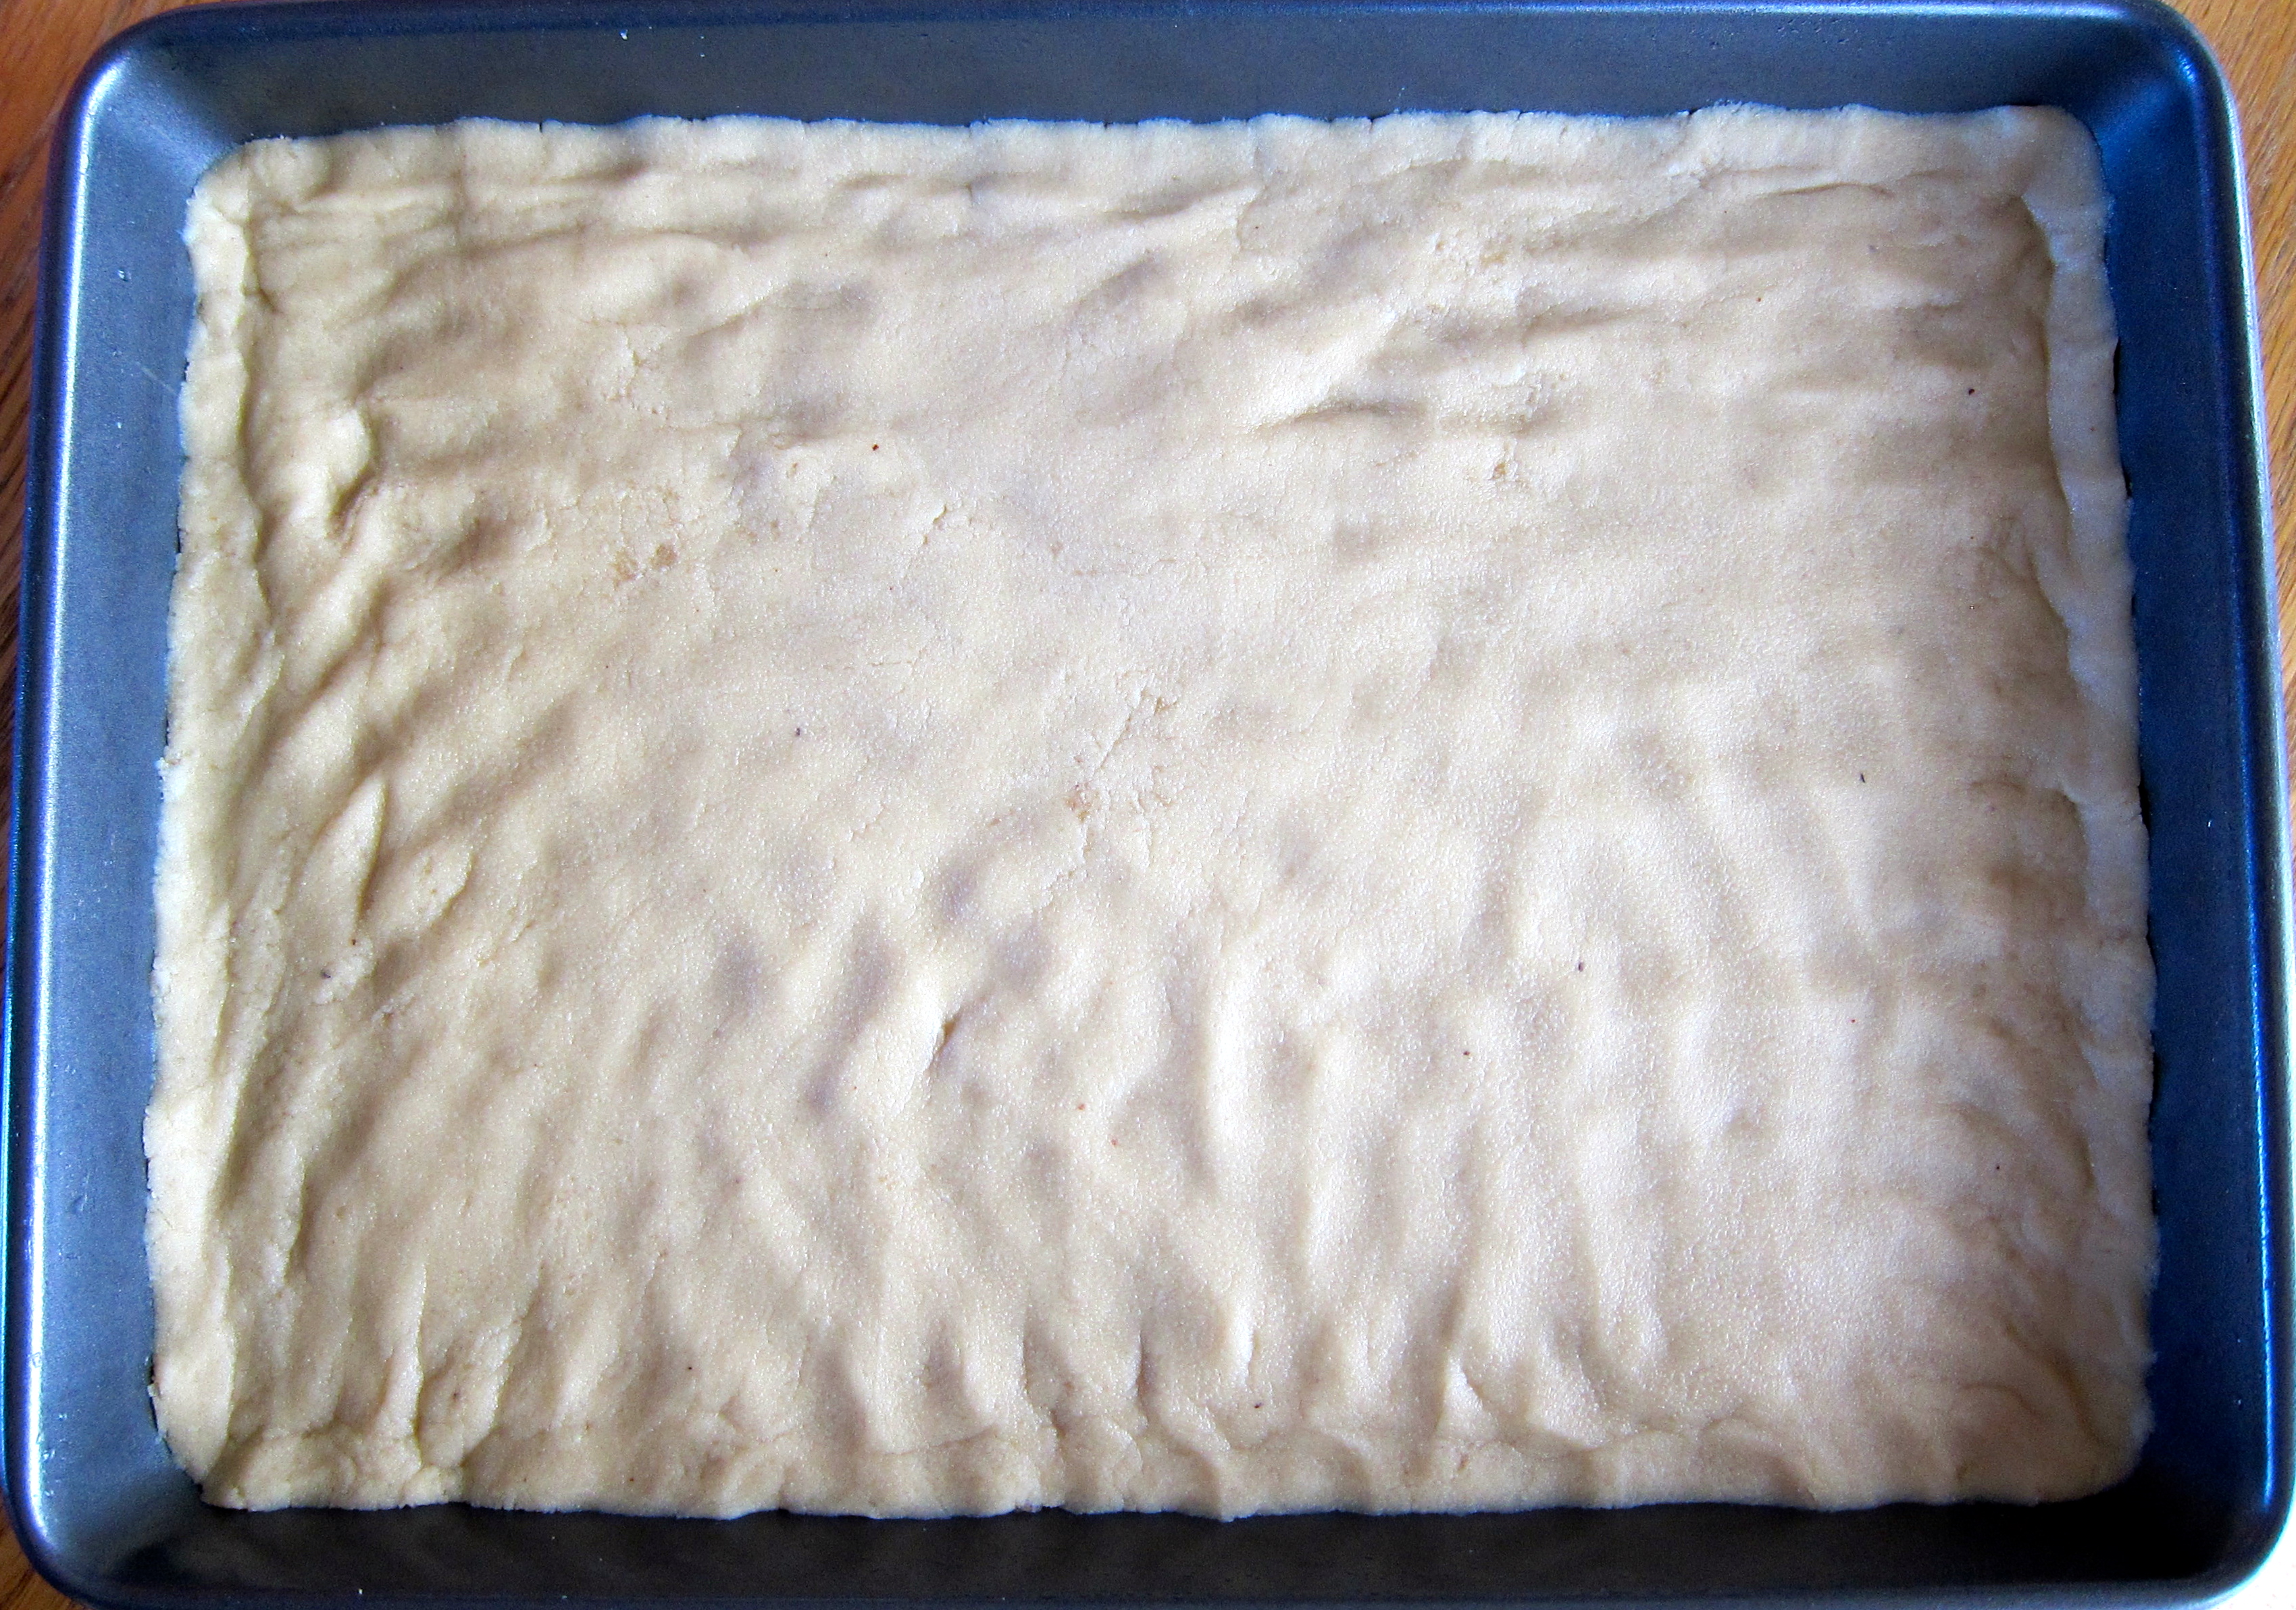
Grease a 15-inch pizza pan.
Prepare the brownie mix according to package directions. Spread into the prepared pan. Bake for 20 minutes, or until done. Remove from the oven and cool completely on a wire rack.
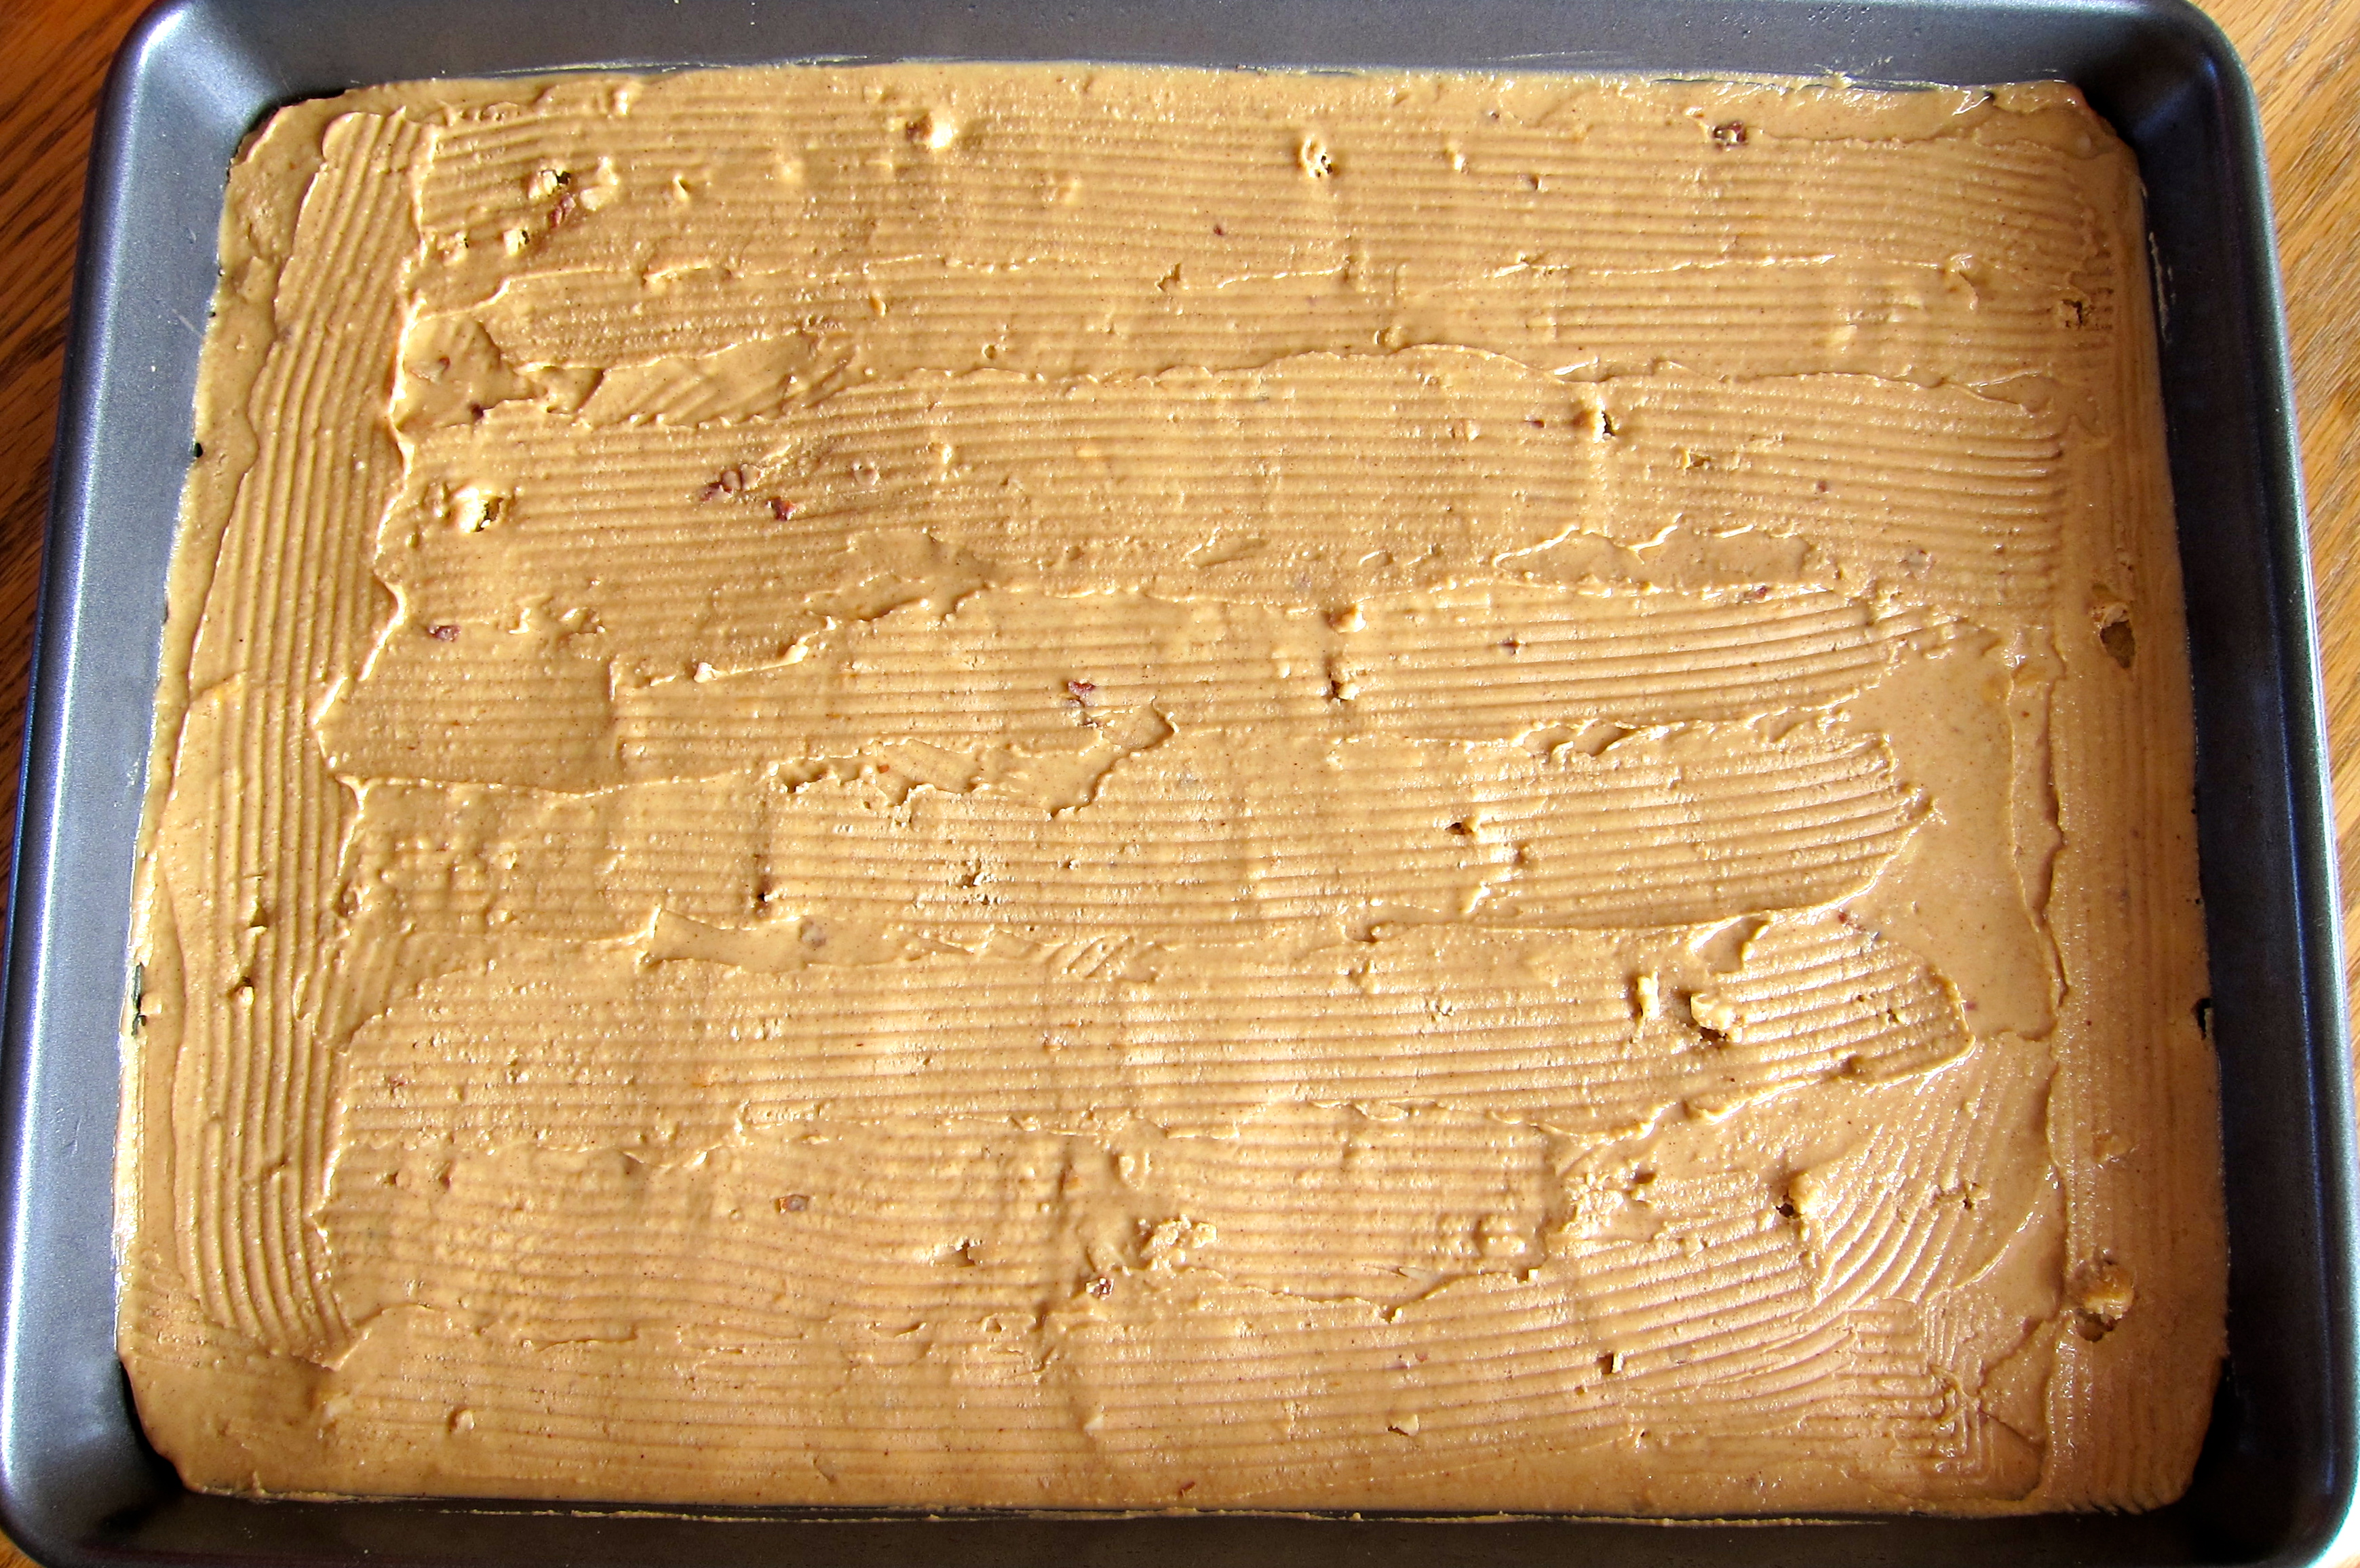
Beat the cream cheese, pineapple, and sweetener together in a bowl. Use the reserved pineapple juice, if needed, to soften the mixture to a good spreading consistency. Spread the mixture over the cooled brownie crust.
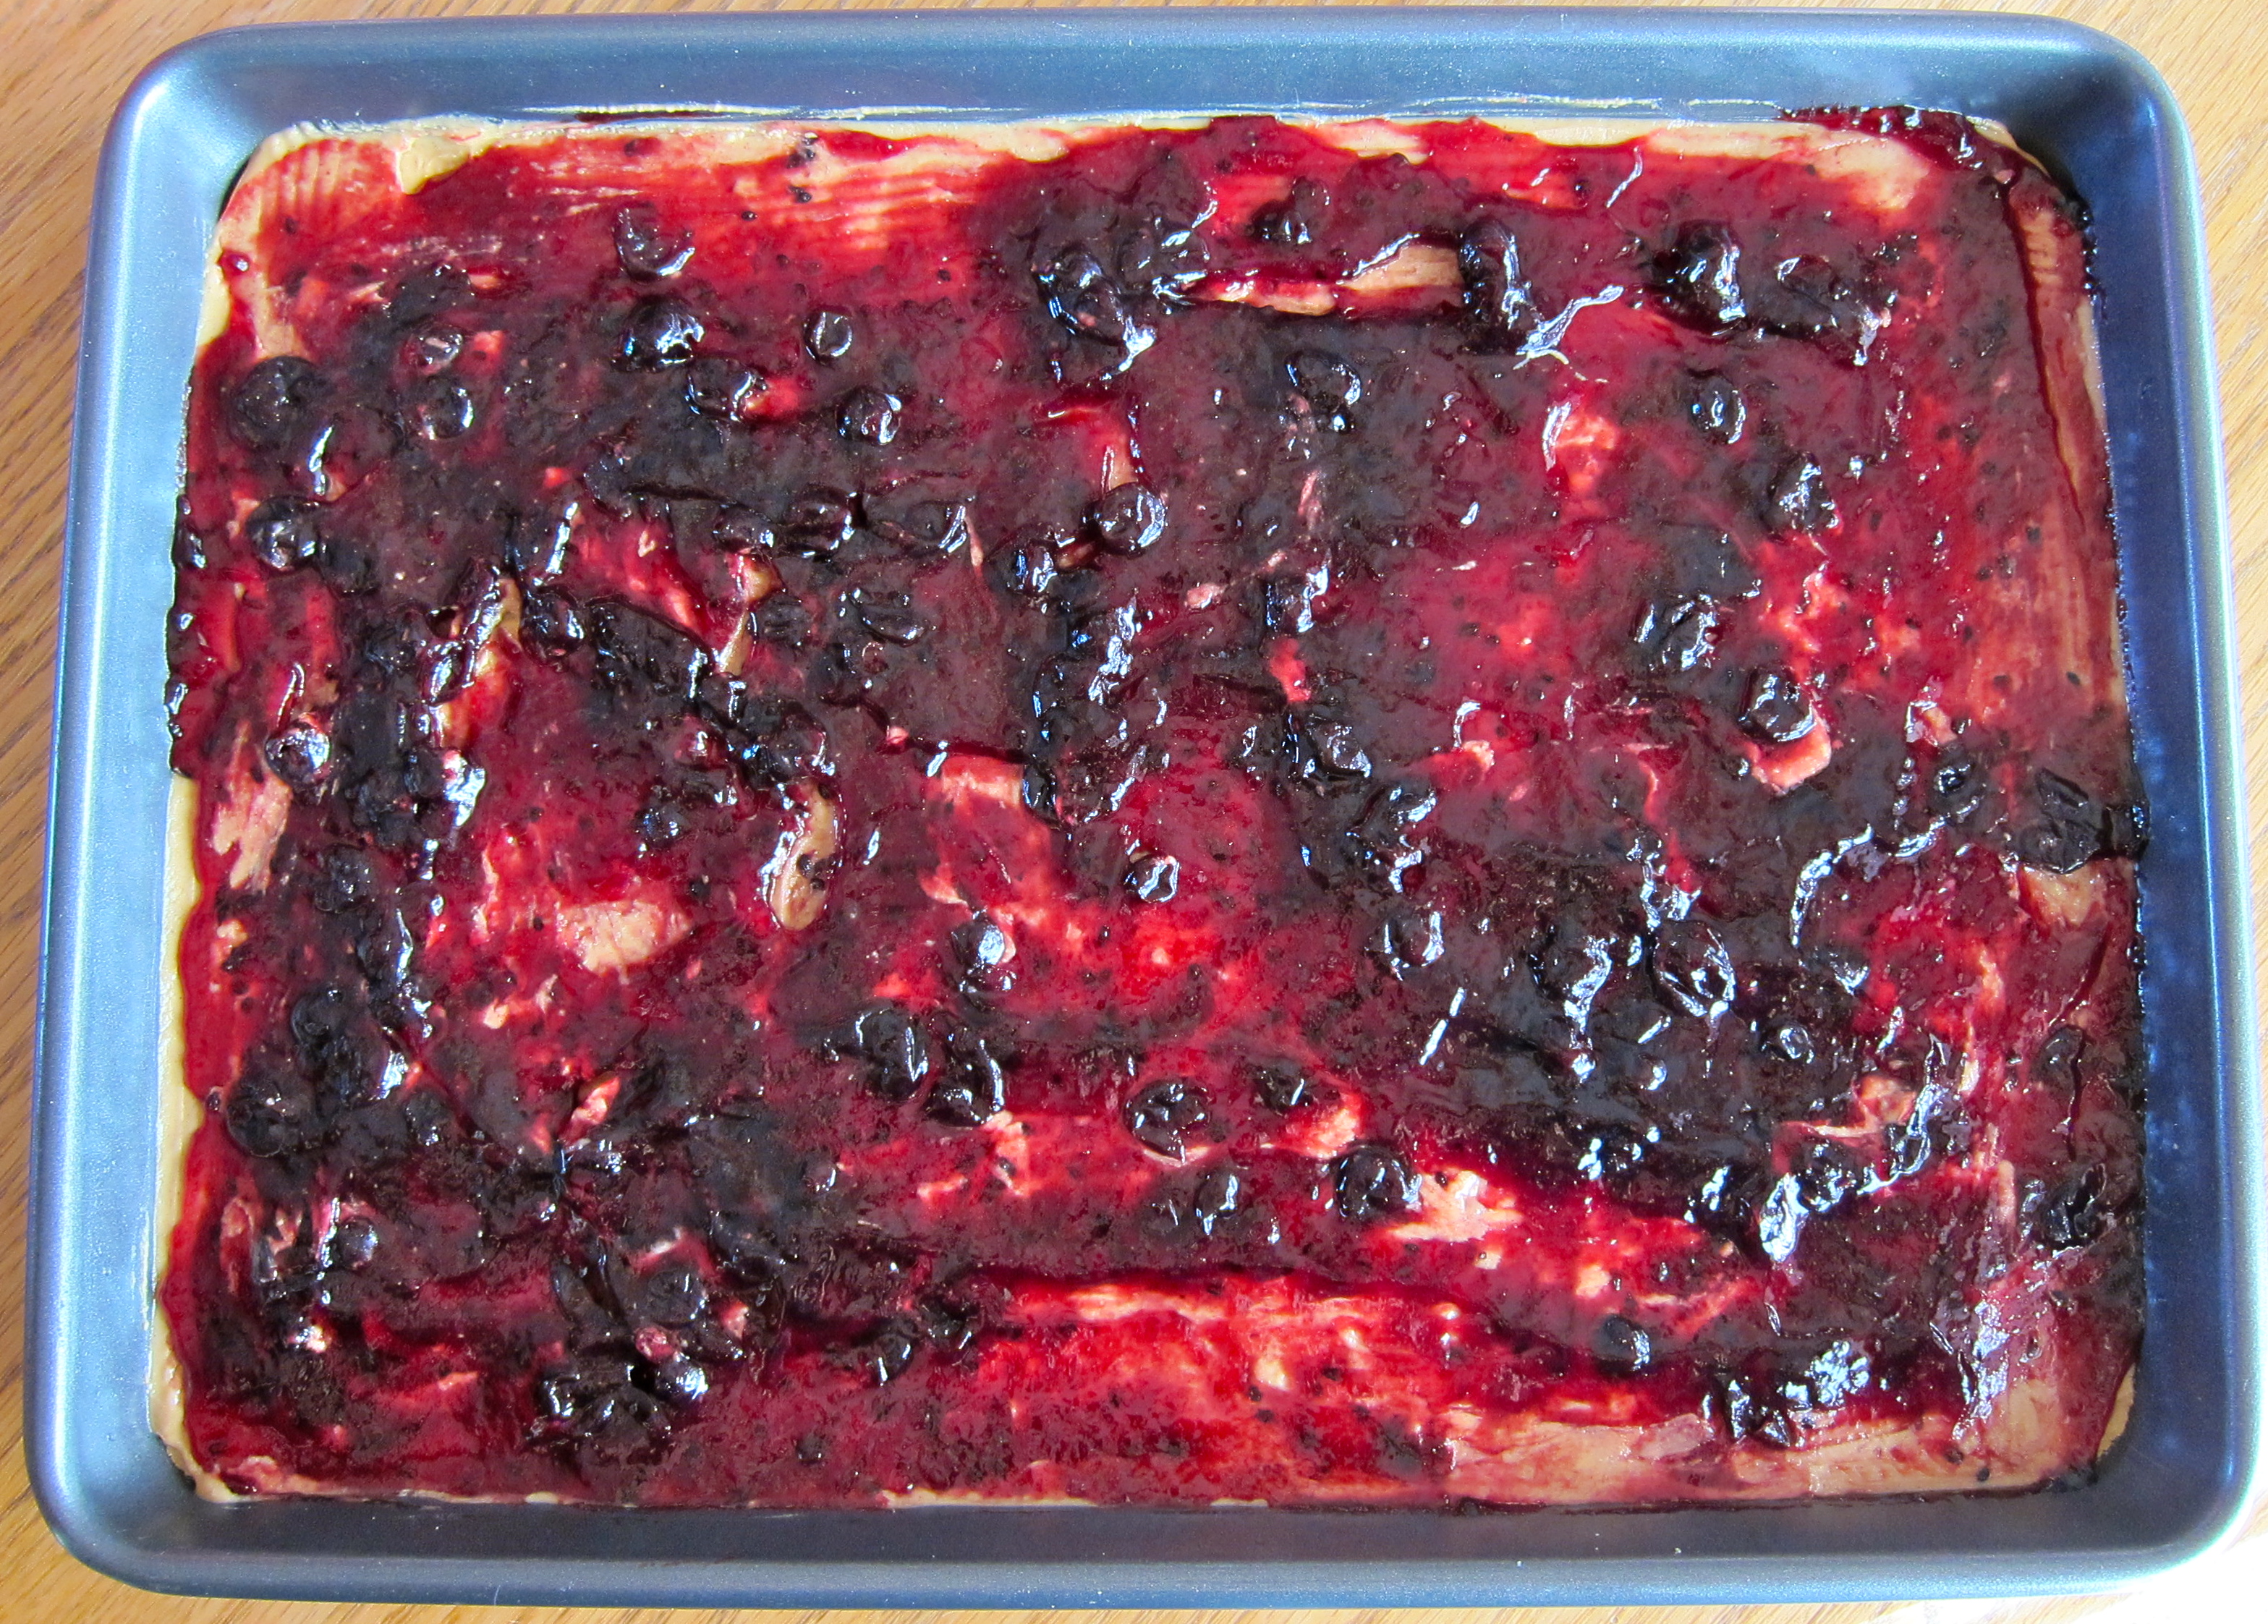
Arrange the banana and strawberry slices over the cream cheese mixture. Sprinkle with the chopped nuts and drizzle with chocolate syrup.
Refrigerate until ready to serve.
To serve, slice as you would a pizza, add a dollop of fresh whipped cream and sprinkle with chocolate shavings.
Enjoy!
***If you are not serving the entire pizza right away toss the banana slices in a little lemon juice to prevent browning…OR…add the bananas to the dessert individually when ready to serve.***