Caprese Skewers…Super Easy and Elegant Appetizer

IMG_3023

My family loves to get together for cocktails, appetizers and desserts.  We enjoy sitting around visiting with each other and having little plates of fabulous finger foods…this always leaves room for a yummy cocktail and a decadent dessert without stuffing ourselves silly with a huge meal in between (we have learned this lesson the hard way)!

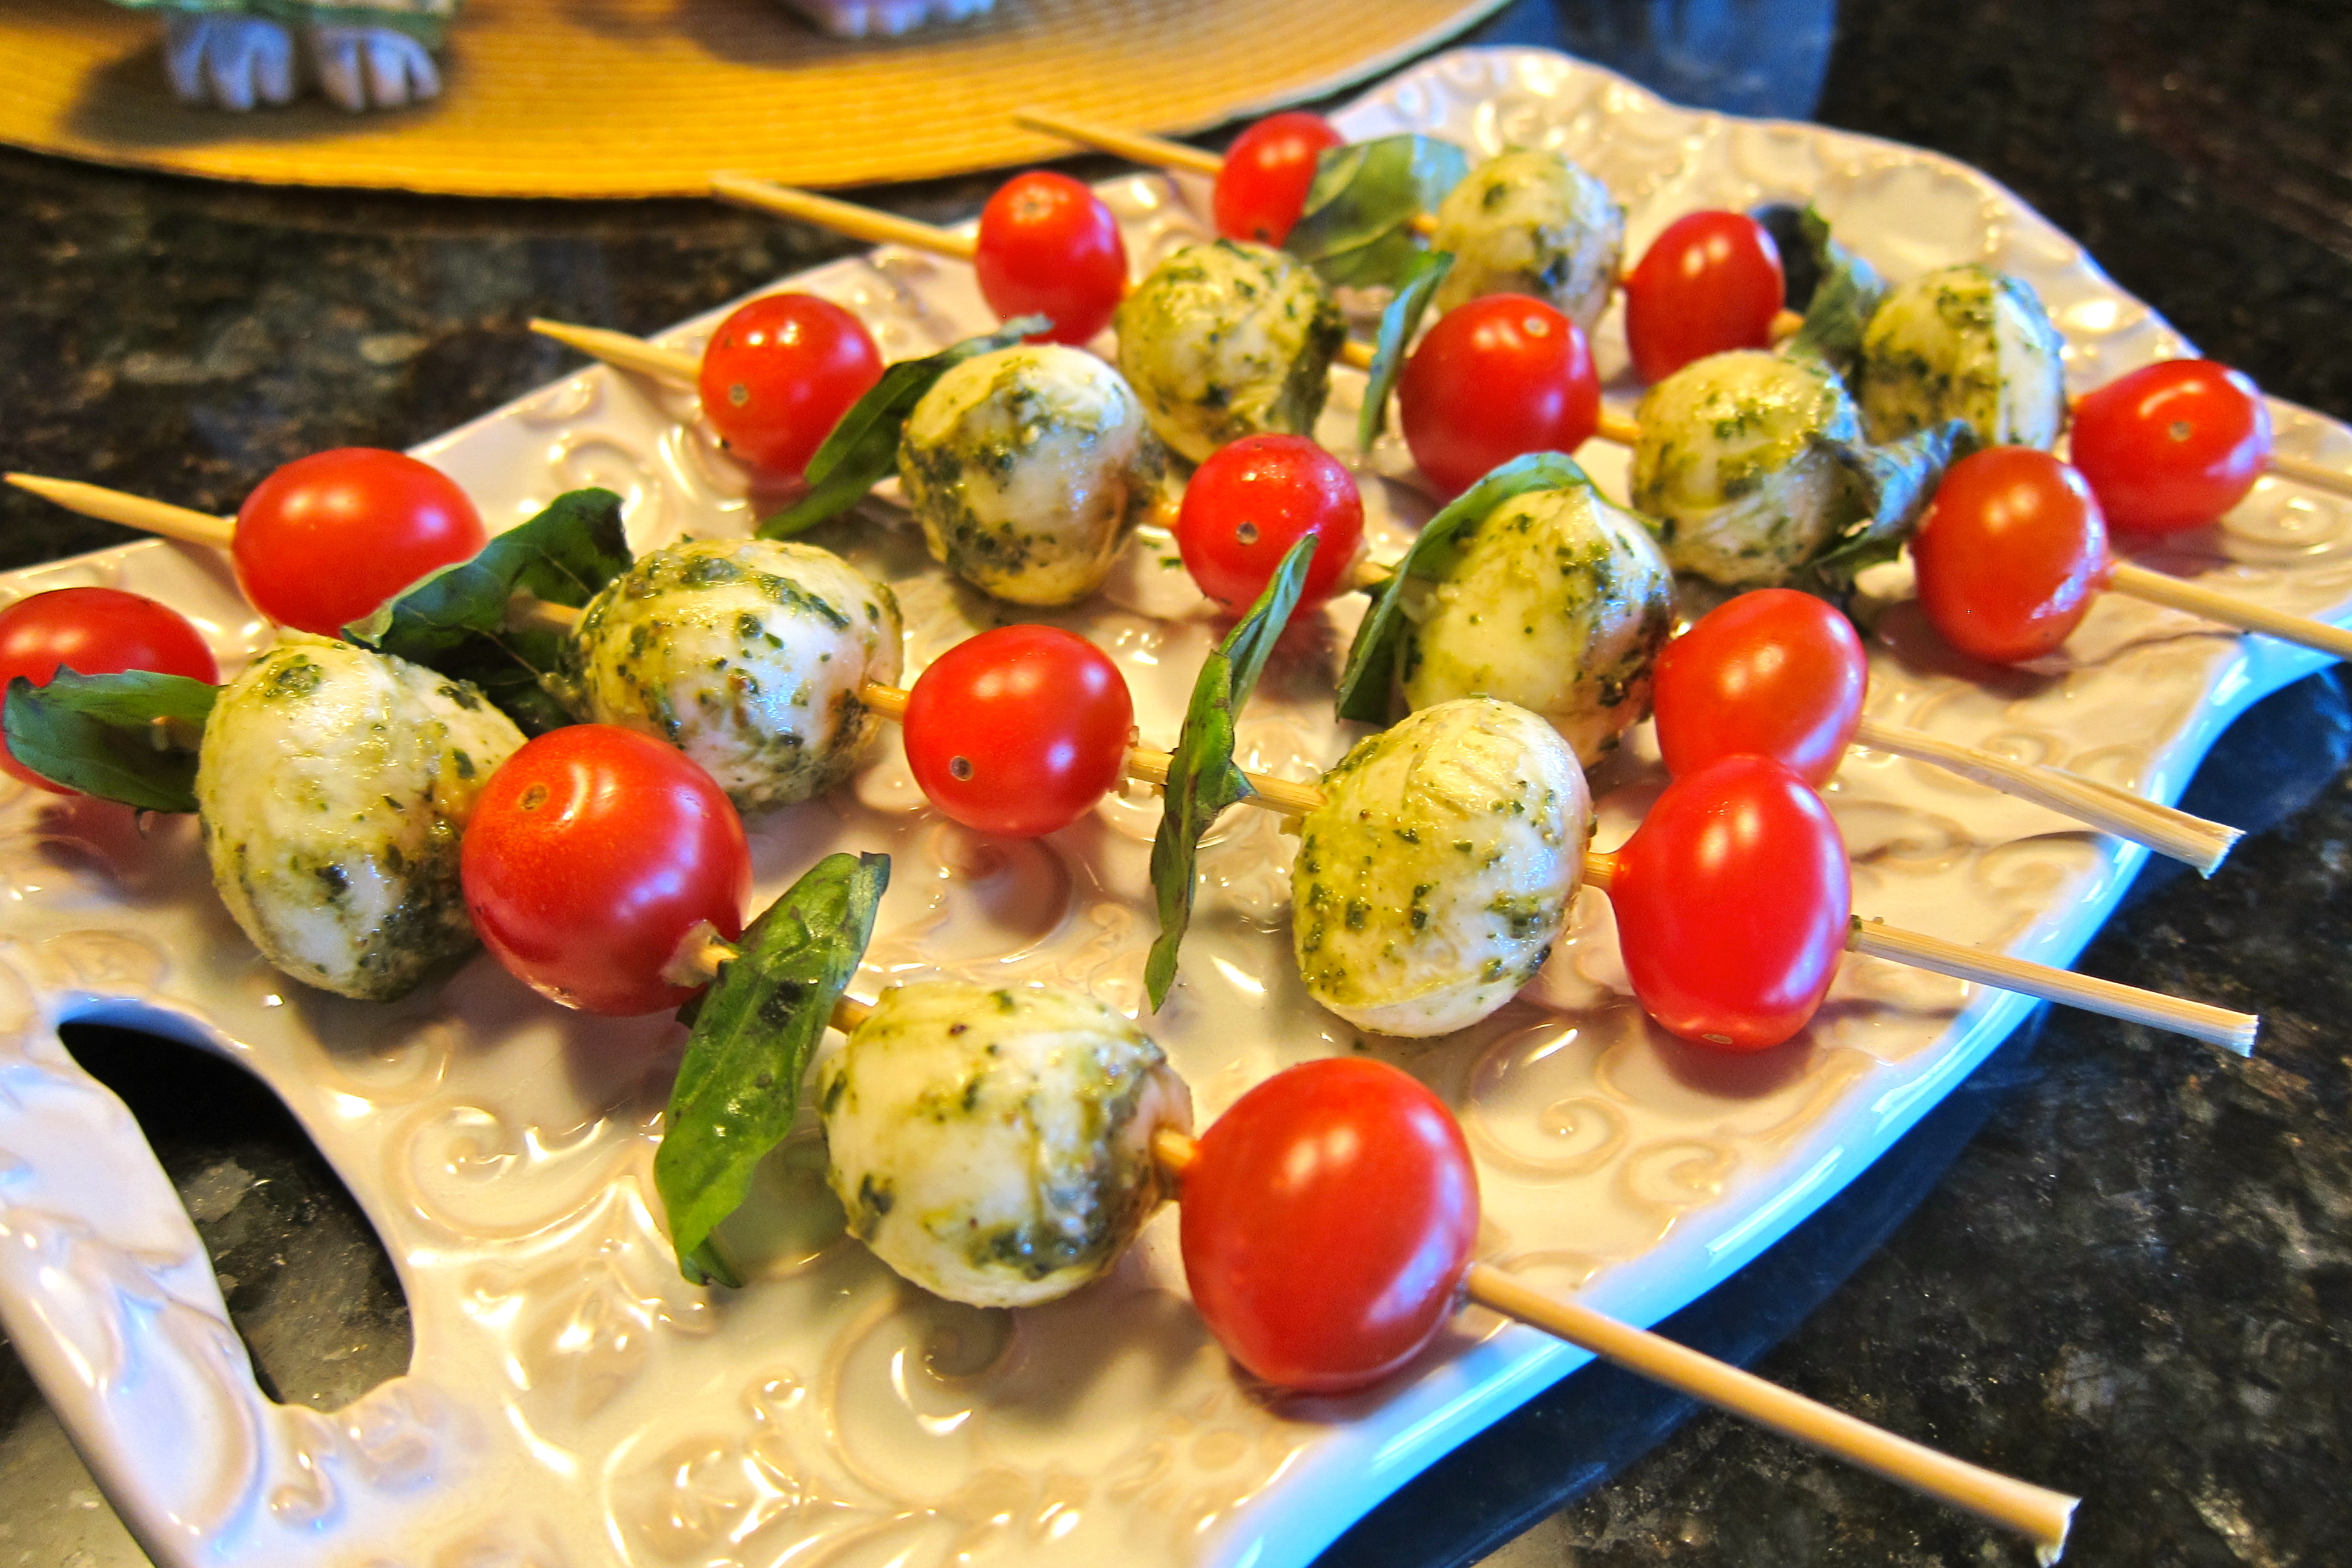
This appetizer really doesn’t need much explanation.  It is super easy, requires no cooking and looks absolutely beautiful on a plate.  You can make this recipe as big or as small as you’d like, we generally have 5 or 6 different appetizers so we plan one of these per person, this recipe is for 6 skewers.

Caprese Skewers

6 wooden skewers

18 sweet cherry tomatoes

12 small fresh mozzarella balls

2 Tbsp. pesto

12 basil leaves

In a small bowl, toss fresh mozzarella in the pesto and refrigerate for about 30 minutes.

Assemble the skewers by alternating the ingredients…start with a tomato, next a pesto marinated mozzarella ball, then a fresh basil leaf.  Repeat, ending with a cherry tomato.  Trim the ends of the skewers if necessary to fit on your serving dish.

100_1643_2

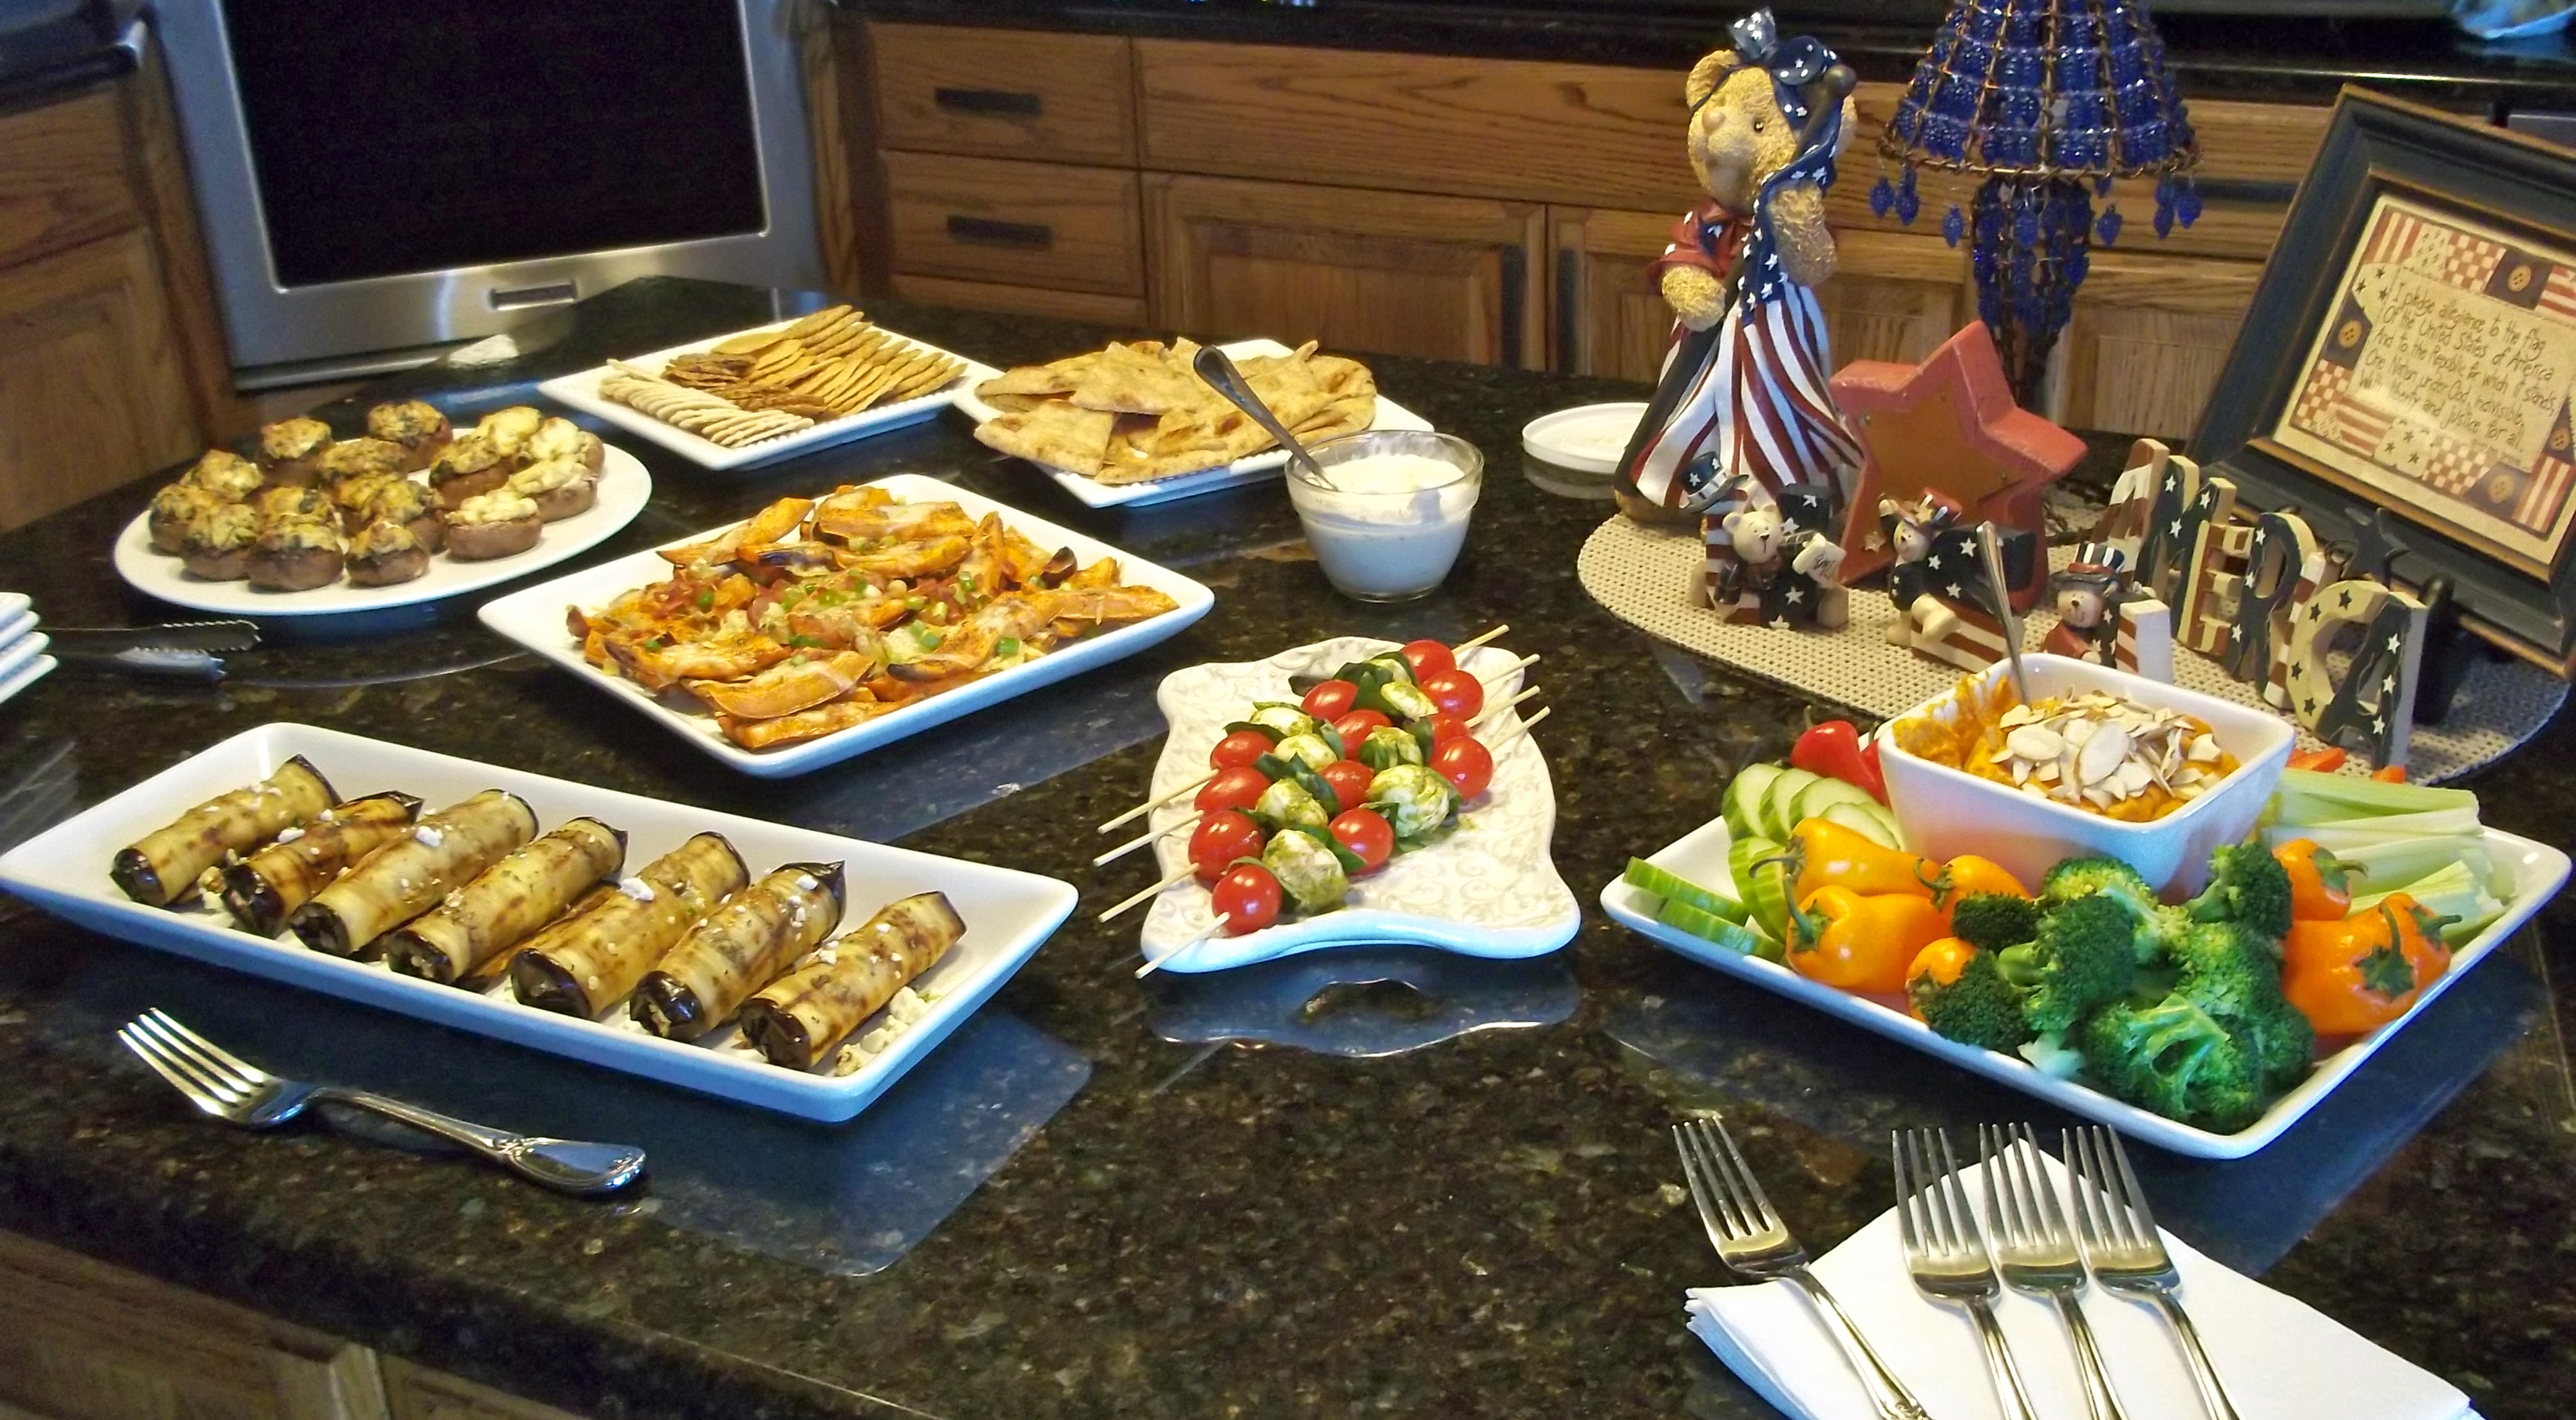
Our latest appetizer get together with the Caprese Skewers as the beautiful centerpiece!

This recipe is shared at:

5 Ingredient Monday, Slightly Indulgent Tuesday, Fat Tuesday, Gluten-Free Wednesday, Allergy Friendly Lunchbox Love, Allergy-Free Wednesday, Whole Food Wednesday, Gluten-Free Fridays, Wednesday Extravaganza

Grain-Free, Vegan PB&J Bars

Happy National Peanut Butter Day!

IMG_2872

In honor of National Peanut Butter Day I modified one of my favorite dessert bar recipes from Elana Amsterdam’s Gluten-Free Almond Flour Cookbook.  The Raspberry Bar recipe is simply scrumptious as is but today I thought I’d add a little oomph to it…and nothing goes better with jelly (for me, anyways!) than peanut butter!  The original recipe of course calls for Raspberry fruit spread but my favorite is Black Currant so that’s what I used, you can substitute your favorite flavor and any nut butter would work in place of the peanut butter. I replaced the egg in the recipe with a flax egg to make this a vegan-friendly treat as well.  These are great for an on-the-go snack too…I cut them up, wrap them in plastic wrap and freeze them, EASY!

PB&J Bars

Crust:

3 cups almond flour

1/2 tsp. salt

1/4 cup coconut oil, melted

1 Tbsp. vanilla extract

Blend the almond flour, salt, coconut oil and vanilla in a food processor or high-speed blender until a smooth dough forms.  Press the dough into a greased 9×13 baking dish.  Bake at 350 for 12-15 minutes, until lightly golden.  Prepare the topping and measure out the filling while the crust is baking.

IMG_2844

Filling:

1/2 cup peanut butter, room temperature or slightly warmed

1 cup fruit spread

Spread the peanut butter in a thin layer over the hot crust.  Top the peanut butter layer with your favorite fruit spread flavor, spreading evenly.

IMG_2846IMG_2850

Topping:

1 3/4 cups almond flour

1/4 tsp salt

1/2 tsp ground cinnamon

1/4 cup coconut oil, melted

2 Tbsp. coconut nectar

1 flax egg (1 Tbsp. flax meal mixed with 2 Tbsp. warm water…allow to thicken)

1 cup sliced almonds

Combine the almond flour, salt and cinnamon in a large bowl.  Stir in the coconut oil, coconut nectar and flax egg.  Gently fold in the almond slices.  Distribute the topping evenly over the fruit spread layer, pressing it down slightly with the back of a spoon.  Bake at 350 for 20-25 minutes or until the topping its lightly golden brown.  Let cool on a wire rack for 1 hour and then refrigerate.  Cut into bars and serve.  Makes 18-24 servings.

IMG_2854IMG_2869

This recipe is shared at:

Fight Back Fridays, Gluten-Free Fridays, Slightly Indulgent Tuesdays, Fat Tuesday, Tasty Tuesday, Tempt My Tummy Tuesday, Gluten-Free Wednesdays, Allergy-Free Wednesdays ,Wheat Free Wednesdays

The Easiest, Tastiest, Prettiest Homemade Christmas Treat, Perfect for Giving!

100_2307

Chocolate Drizzled Popcorn with M&M’s

I love making homemade Christmas treats for all of my friends and family.  For many years when my daughter was still home we spent a fun-filled day making all of our favorite Christmas cookie recipes and then packaged them up on beautiful plates with ribbons and bows for all of our friends…but for the last two years she has been in college and doesn’t get home for the holidays until a few days before Christmas…way too late for a timely delivery!  So, I have gone back to a tried and true Holiday favorite that I made for years when the kiddos were small and able to help with this simple yet beautiful and tasty treat.  It’s a much more manageable task to take on solo too!  You can customize this treat with anything your budget or dietary needs call for…homemade popped popcorn or simplify it with microwave popcorn, use gourmet white and dark chocolate or vanilla and chocolate CandiQuik and then top with healthy nuts and raisins or fun colorful toppings like M&M’s or chopped peppermint candies.  The beauty is in the creation, no matter what ingredients you choose!  The recipe is pretty vague due to the individuality of the treat…it’s really impossible to mess up.  If you need more popcorn on the pan, add more.  If you need more chocolate, add it.  Dump as many (or few) toppings on as you like…

I will include a more accurate (sort of, anyways!) recipe using microwave popcorn, CandiQuik and M&M’s for toppings as this was my original recipe from many years ago…I will have to say it has evolved, but the original is quick, easy and well…pretty hard to beat!

Chocolate Drizzzled Popcorn with Peppermints

Chocolate Drizzled Popcorn with Peppermints

Chocolate Drizzled Popcorn

12″ disposable foil pizza pan

6 cups of popped popcorn, buttered and salted

white chocolate, melted

dark chocolate, melted

festive toppings of your choice

  • Spread the popped popcorn on the pizza pan evenly taking care to not get any unpopped kernels in the mix!
  • Melt the white chocolate on the stove on low heat or in the microwave, drizzle heavily over the popcorn to hold it all together.
  • Melt the dark chocolate on the stove over low heat or in the microwave, drizzle lightly in a circular motion over the white chocolate.
  • While the dark chocolate is still melted, sprinkle your festive toppings over the top.
  • Place in the refrigerator or freezer for about 10-15 minutes to harden the chocolate.
  • Cover with plastic or cling wrap, add a bow and gift tag.
Ready for delivery!

Ready for delivery!

My Original Christmas Popcorn Recipe

3 – 12″ disposable foil pizza pans

3 – bags of microwave butter popcorn, popped

1 – 16 ounce package chocolate CandiQuik

2 – 16 ounce packages vanilla CandiQuik

1 – 16 ounce package Christmas (green and red) plain M&M’s

Pop all of the popcorn and spread evenly on the pizza pans, again taking care to not get any unpopped kernels on the pans.  Melt the vanilla CandiQuik according to package directions and drizzle heavily over each pan of popcorn to hold all the popcorn together…you will use almost all of both packages but not quite.  Allow the vanilla coating to slightly harden.  Melt the chocolate CandiQuik according to package directions and drizzle lightly in a circular (or fancy) pattern over the vanilla CandiQuik, you will have quite a bit left over..  While the chocolate drizzle is still melted, sprinkle the Christmas M&M’s over the top.  Allow the chocolate to harden either on the counter-top or in the refrigerator.  Wrap with plastic or cling wrap, add a bow and gift tag.  Deliver to all your friends and family!

IMG_0323

This recipe is shared at:

Tempt My Tummy Tuesday, Slightly Indulgent Tuesday, Tasty Tuesday, Fat Tuesday, Gluten-Free Wednesday, Wednesday Extravaganza, Whole Foods Wednesday, Allergy-Free Wednesday, Fill Those Jars Friday, All Gluten Free Desserts, Fight Back Friday, Gluten-Free Fridays, Made From Scratch Monday

Salmon Cakes with Cabbage and Avocado Slaw

This paleo friendly dish is so easy to throw together for a quick, healthy and satisfying meal, it literally took me about 20 minutes start to finish.  Now, with that said I will admit I did take a few shortcuts…I used canned salmon and pre-shredded cabbage mix so if you are cooking fresh salmon and shredding your own cabbage it will take a bit longer…but will still be well worth it!

Let’s start with the slaw…

So easy, so good!

Cabbage and Avocado Slaw (serves 2)

2 cups shredded cabbage or slaw mix

1 avocado, diced

1/4 cup diced pickled jalapeno (I like La Preferida Organic Jalapeno Nacho Slices)

2-3 Tbsp. jalapeno pickling liquid from the jalapeno jar

handful of fresh cilantro, chopped

celtic sea salt to taste

Combine all ingredients in a medium bowl and mix to coat with pickling liquid.  Set aside.

Now, the Salmon Cakes…

Salmon Cakes with Cabbage and Avocado Slaw

Salmon Cakes (serves 2)

2 – 6 oz cans Wild Caught Boneless Skinless Salmon, drained well

2 eggs, slightly beaten

4 green onions, chopped

pinch of celtic sea salt

1/4 tsp garlic powder

1/4 tsp fresh ground pepper

1/4 tsp crushed red pepper flakes

1/4 tsp chili powder

handful of cilantro, chopped

1/4 cup coconut oil, avocado oil or lard (for frying)

Heat oil in a large skillet over medium-high heat.  Combine all ingredients in a large bowl and mix well.  Form the mixture into patties and drop carefully into the hot oil.  Fry on each side about 5 minutes until golden brown.  Transfer from pan to a plate lined with a paper towel to remove some of the oil.  Serve warm.

Tips:

If your mixture feels too wet add a couple of tablespoons of coconut or almond flour.

Once your patties are in the pan do not mess with them until it is time to flip them…they might fall apart if you do!

Bonus Recipe:

If you eat dairy try serving with a side of Chili Lime Cream Sauce…

1/4 cup sour cream

1/8 tsp garlic powder

1/4 tsp chili powder

2 tsp. lime juice

Combine all ingredients in a small bowl, refrigerate until ready to serve.

This recipe is shared at:

Fight Back Friday, Make Ahead Monday, Slightly Indulgent Tuesday, Fat Tuesday & Tasty Tuesday, Gluten-Free Wednesdays

%d bloggers like this: