No-Bake Crispy Peanut Butter Chocolate Squares

Crispy Peanut Butter Chocolate Squares

Peanut Butter Chocolate Bars have been around for ages…this recipe is actually adapted from a recipe for Peanut Butter Balls that has been passed down from my great-grandmother.  Most recipes call for graham cracker crumbs or rice crispy cereal but I like the crunch that the corn flakes add in this recipe, for an extra crispy texture I use crunchy peanut butter too.  I decided to make them into squares and add the layer of chocolate but they are equally good plain as bars, squares or balls! 

Crispy Peanut Butter Chocolate Squares

Ingredients:

1/2 cup sugar

1/2 cup organic corn syrup

1/2 tsp. vanilla

1/2 Tbsp. butter

1/2 cup crunchy peanut butter

1/8 tsp. salt

3 cups organic gluten-free corn flakes

6 oz. semi-sweet chocolate

Butter for greasing baking dish

Directions:

Grease an 8×8 baking dish with butter.

In a large mixing bowl, measure 3 cups corn flakes, crush the corn flakes with your hands until fine.  Add 1/8 tsp. salt and mix, set aside.

In a small saucepan bring the sugar and corn syrup to a boil and then quickly remove from heat.  Stir in vanilla, butter and peanut butter until smooth and creamy.

Pour peanut butter mixture into the corn flakes and stir to combine.  Press into the greased baking dish using a rubber spatula or a piece of waxed paper.

Melt the chocolate in the microwave or on the stove.  Pour over the peanut butter and corn flake mixture and spread evenly to the edges with an offset spatula.

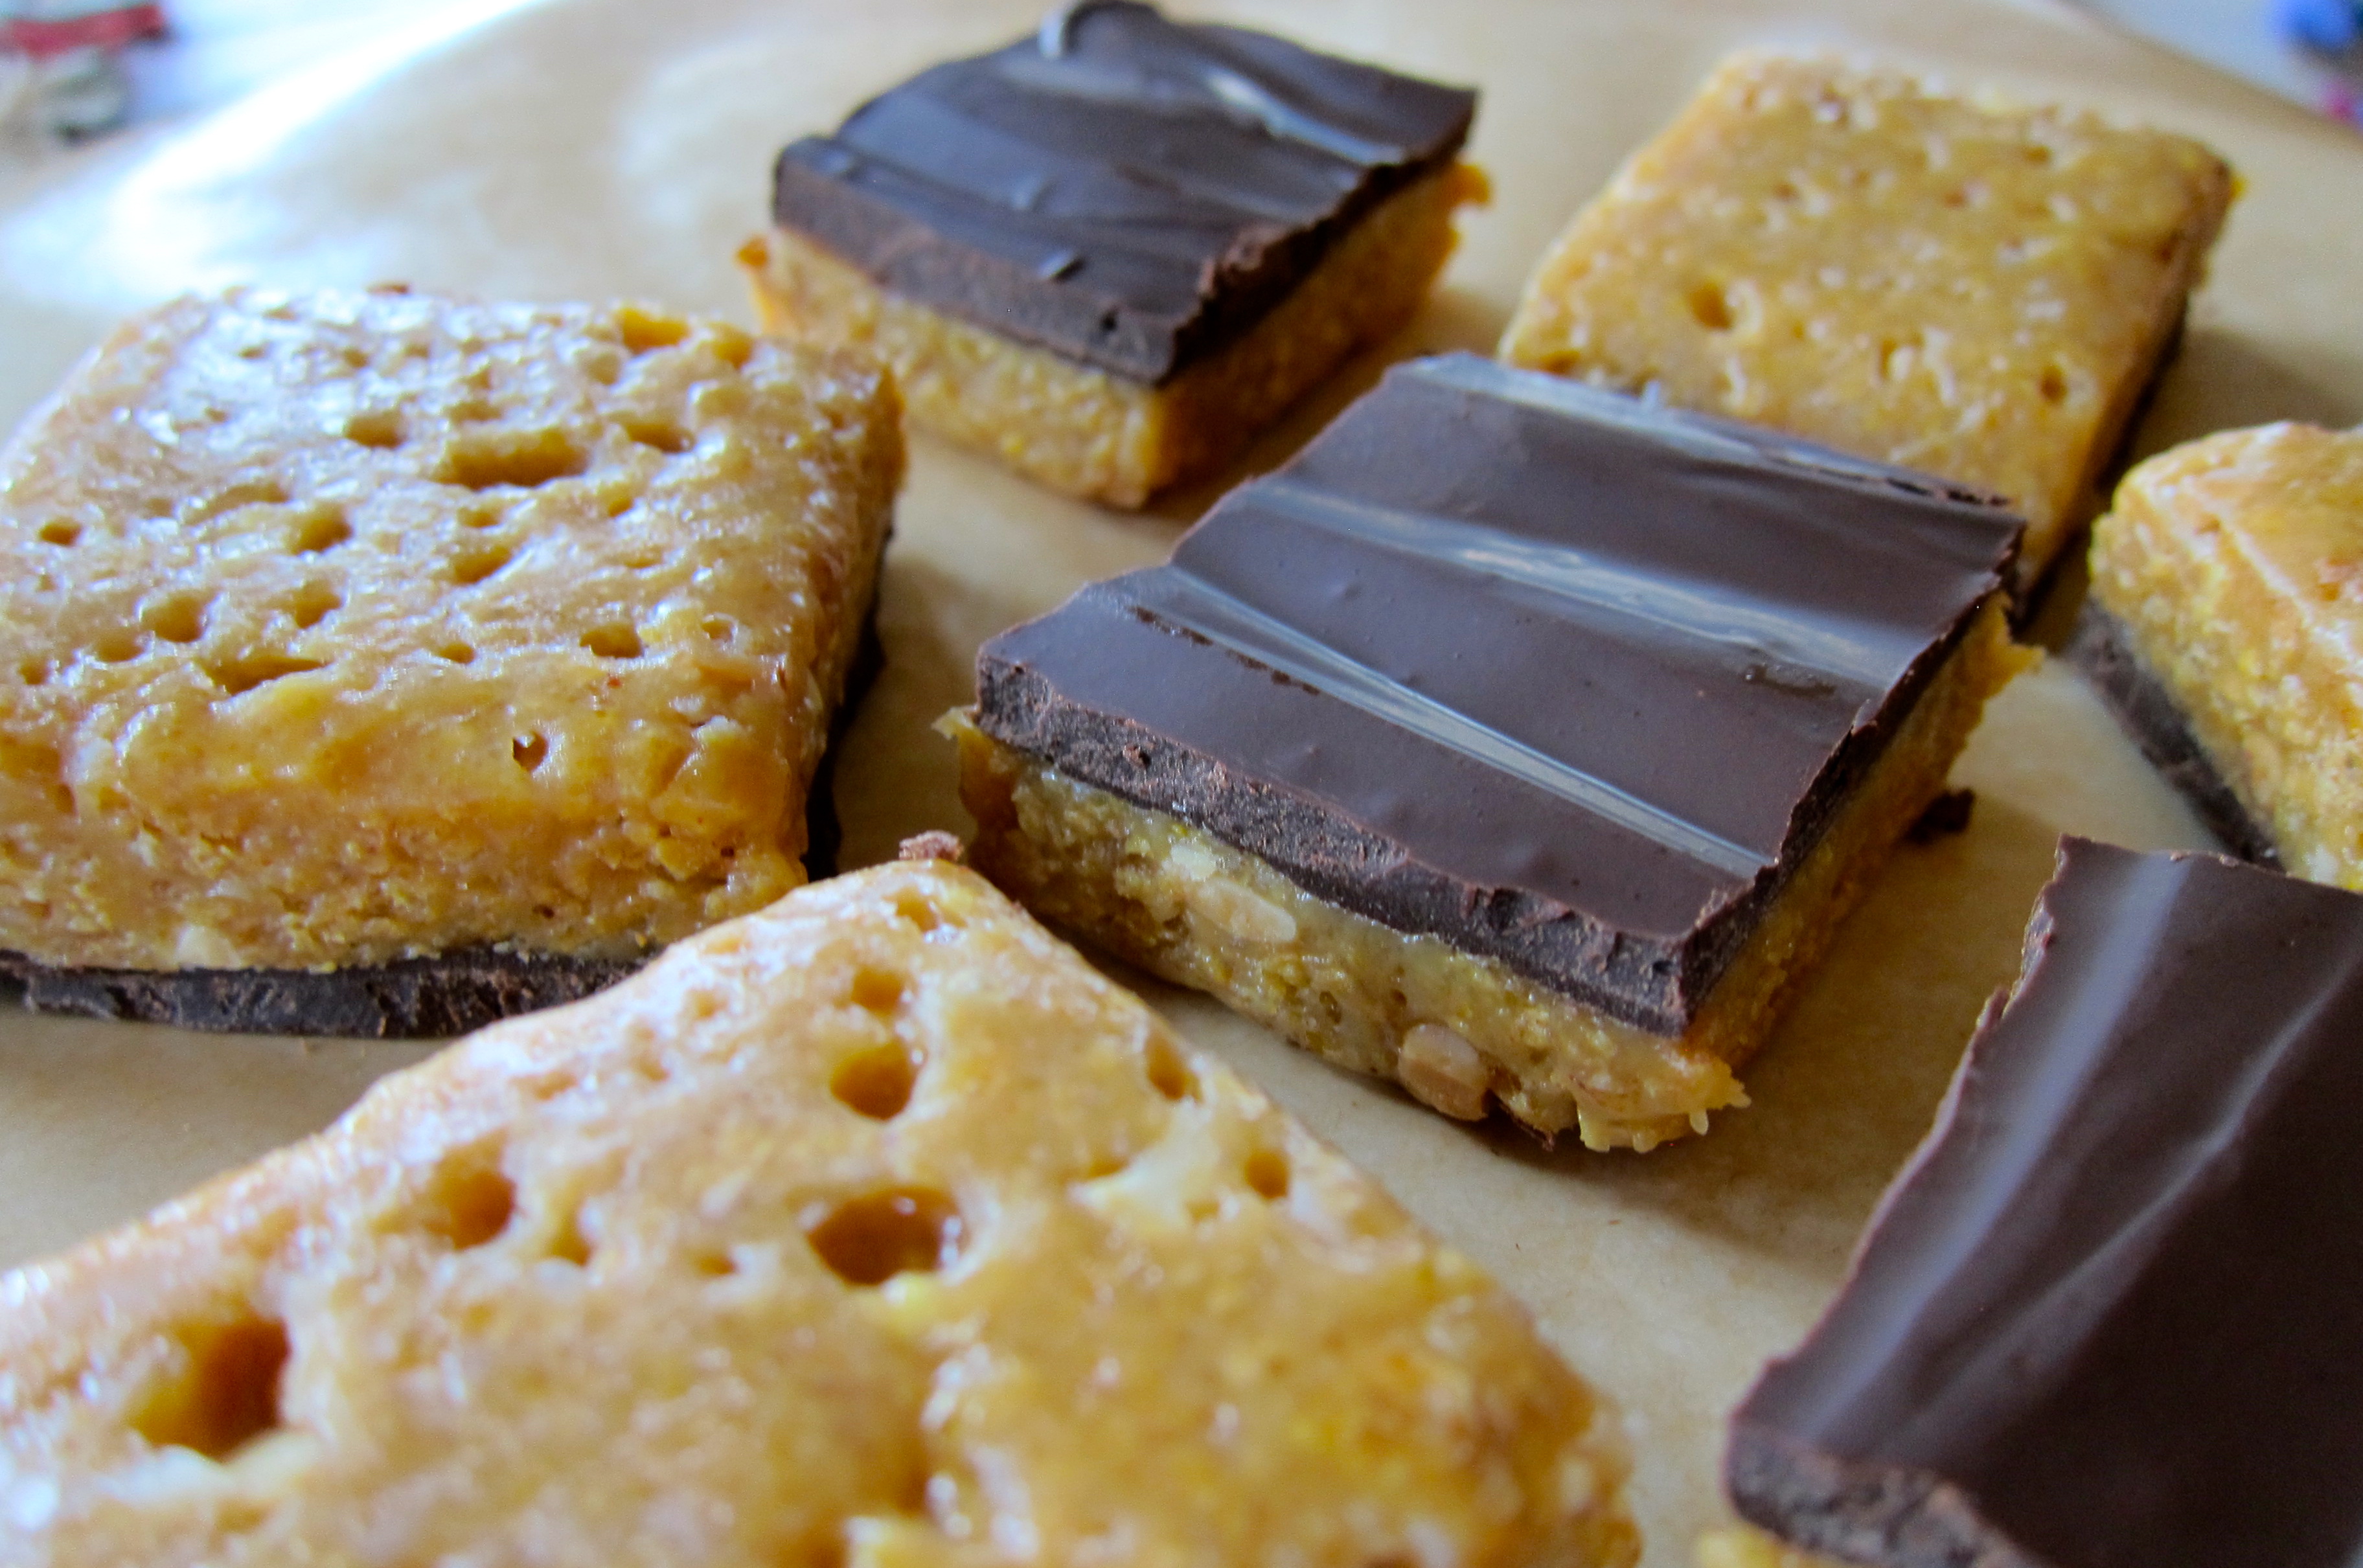
Place the dish in the refrigerator until set.  Once the squares are set loosen the sides with a metal spatula taking care not to break the chocolate topping.  Turn the square out onto a sheet of waxed paper, chocolate side down.  Using a sharp knife cut the candy into 16 squares.

Crispy Peanut Butter Chocolate Squares

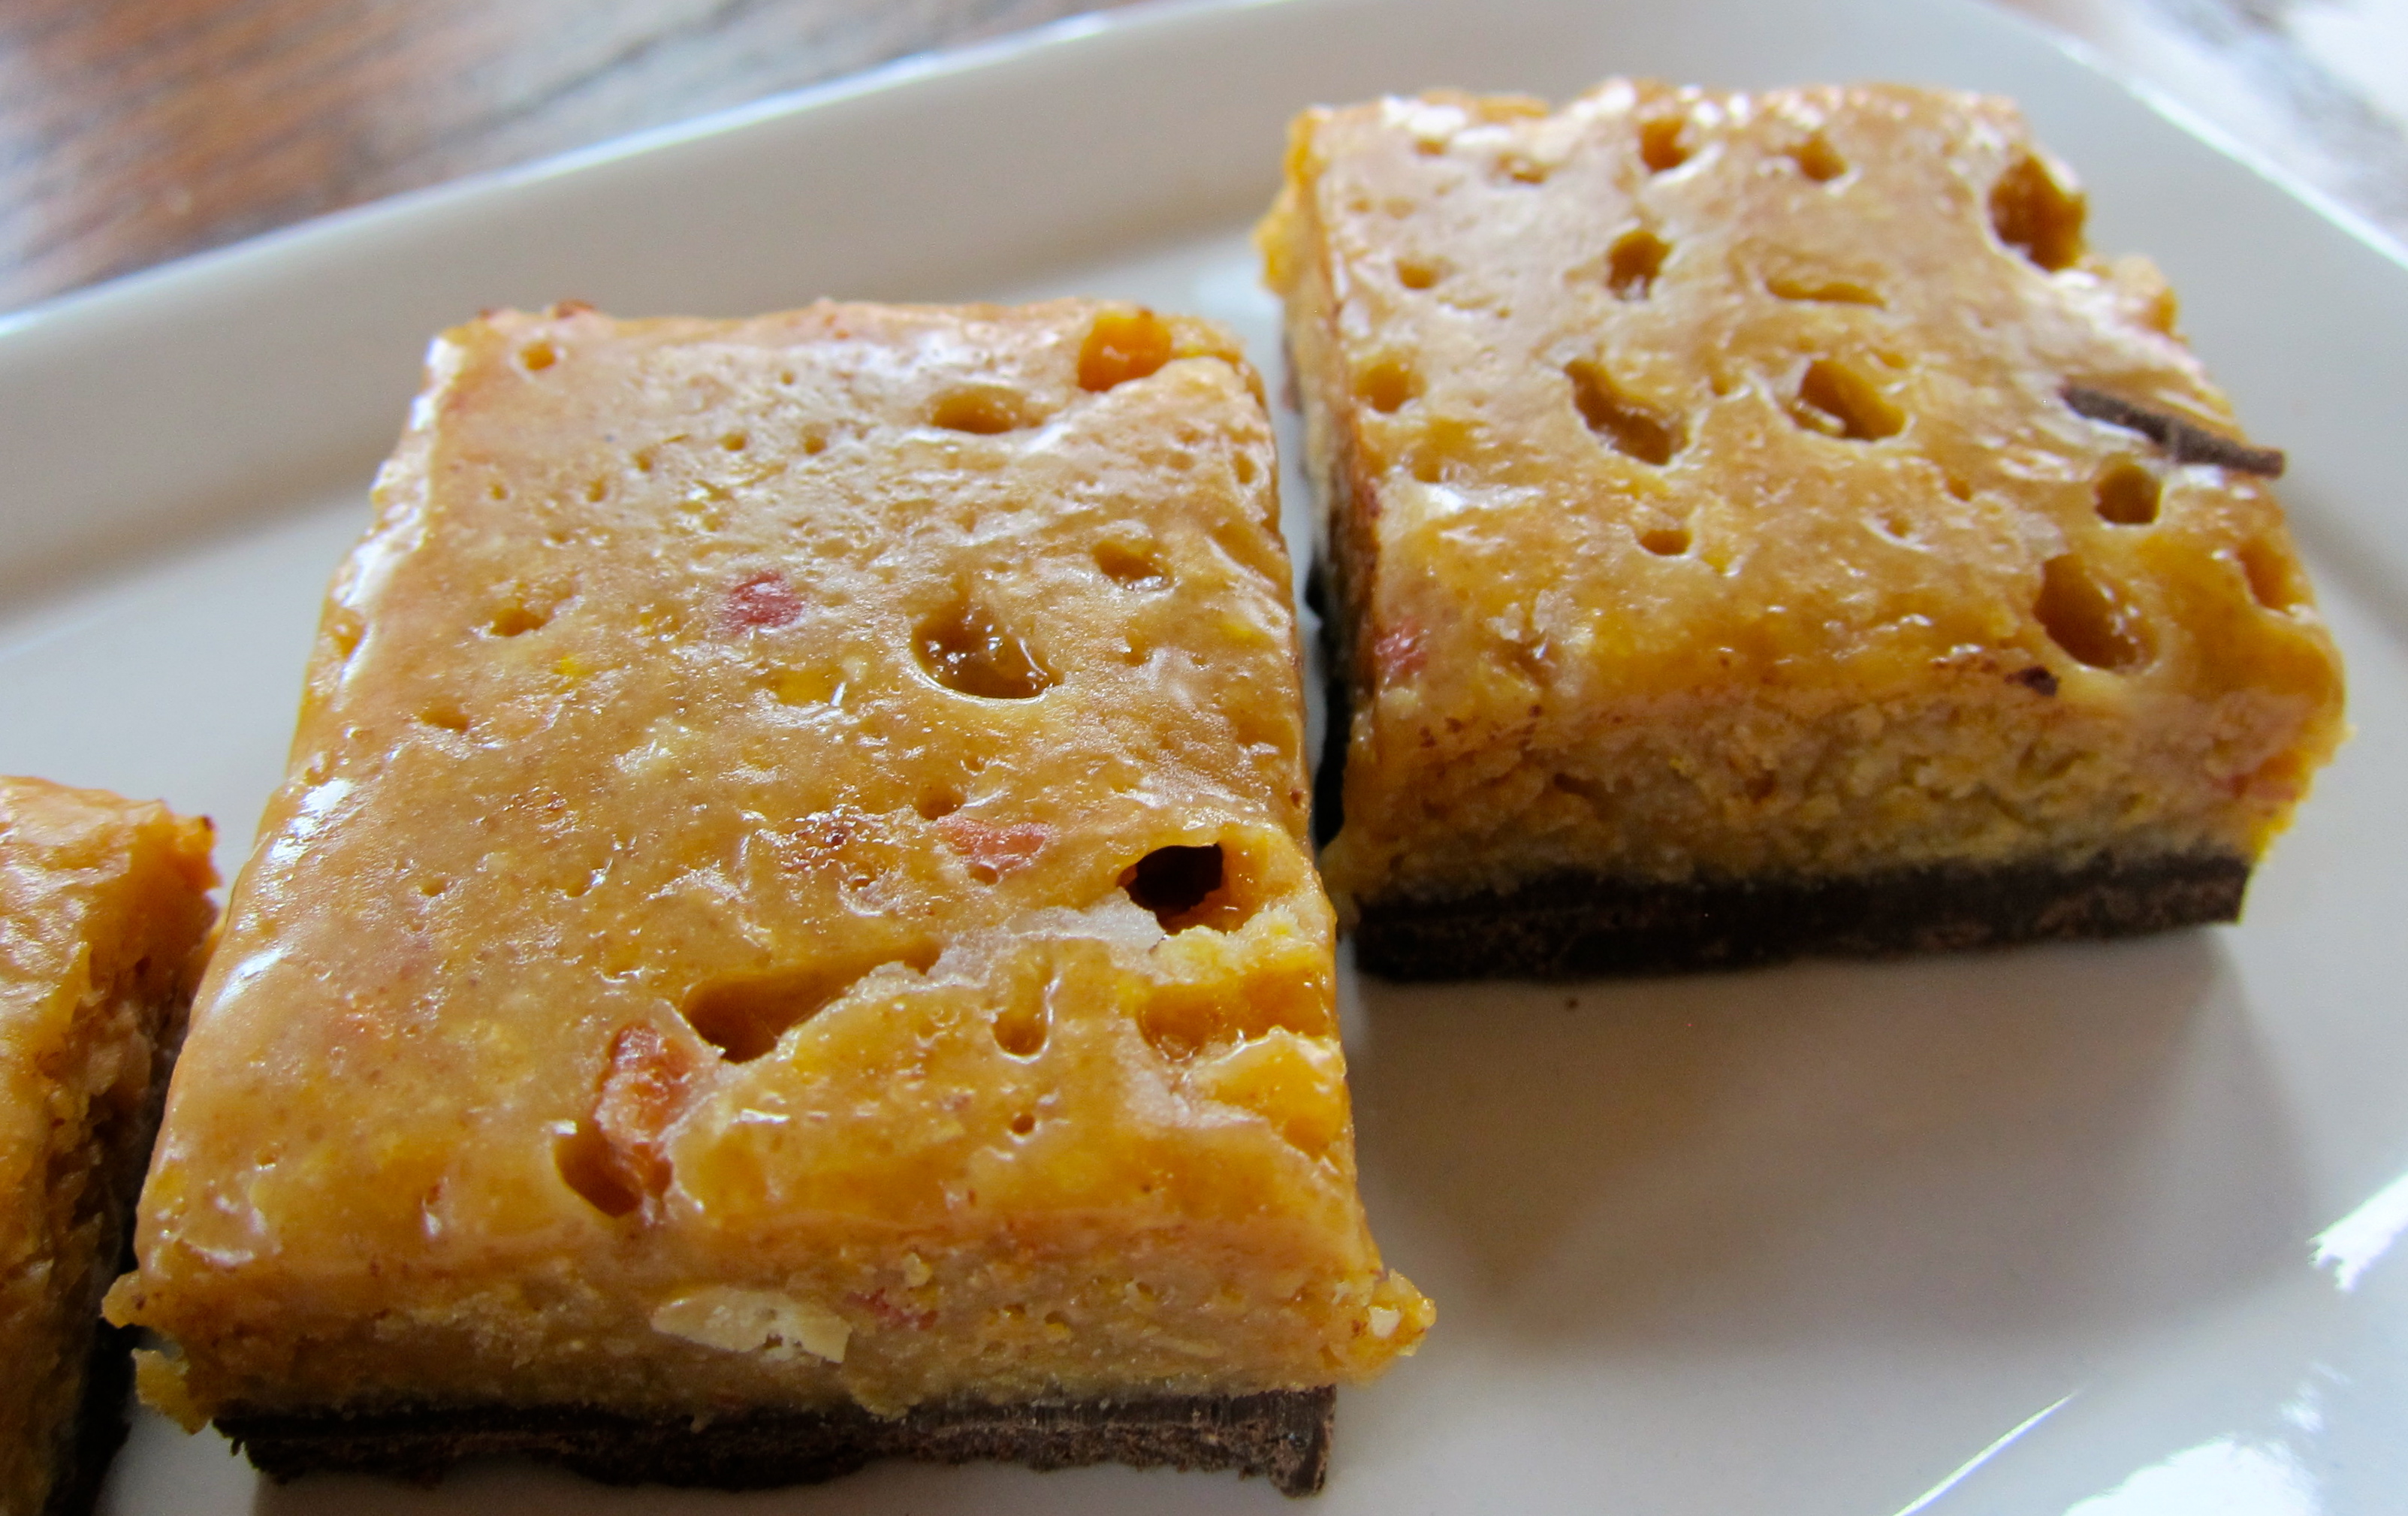
I like to serve the squares on a platter with some turned chocolate side up and some peanut butter side up…they will get softer at room temperature so keep them in the fridge until ready to serve.  We like them best at room temp.

Caramel Oatmeal Cookie Bars

Caramel Oatmeal Cookie Bars

Caramel and Chocolate and Oats…OH MY!

This year for Christmas I had intended on making a Caramel Pecan Pie so I bought a bag of those cute little individually wrapped caramels.  I ended up making a traditional Pecan Pie instead…

Then I was going to make a Caramel Apple Pie for New Year’s Day to use up the bag of cute little individually wrapped caramels that were lurking in the pantry.  But I made a Pear-Apple Galette instead…

Here it is the middle of January and those cute little individually wrapped caramels are still begging to be used, transformed into a yummy decadent dessert.  I simply had to oblige.  These kind of remind me of a Magic Cookie Bar in texture and richness…they really pack a sweet punch but have the buttery caramel flavor instead of coconut.

This recipe uses store-bought caramels but you could sub in homemade caramel or a jarred caramel sauce.  It also calls for heavy cream and butter but you could sub in coconut milk and coconut oil respectively 1:1.  If you are not gluten-free then regular all-purpose flour and any type of rolled oats can be used, I used Cup 4 Cup Gluten Free Flour and Bob’s Red Mill Gluten Free Rolled Oats.

Caramel Oatmeal Cookie Bars

Ingredients:

35 individually wrapped caramels (Kraft and Brach’s are gluten-free), unwrapped

4 T. heavy cream

3/4 cup gluten-free flour (I used Cup 4 Cup)

1 cup rolled oats

3/4 cup light brown sugar (palm sugar works here too)

1/2 tsp baking soda

1/4 tsp salt

1 stick butter, melted

1/2 cup dark chocolate chips

1/2 cup pecans, coarsely chopped

Directions:

Preheat oven to 350° F.  Grease an 8×8 glass baking dish and line with parchment paper, leave a few inches hanging over the sides for easier removal.

In a medium sauce pan, over low heat, melt together the caramels and heavy cream, stirring occasionally until smooth.  You could also use the microwave to do this!

In a separate bowl, stir together the flour, oats, brown sugar, baking soda and salt.  Stir in the melted butter until well combined.  Press half of the oat mixture firmly into the bottom of the prepared pan.  Set the other half of the mixture aside.

Bake the cookie crust for about 8 minutes.  Remove and while still warm sprinkle the crust with chocolate chips and pecans.  Pour the melted caramel over the chocolate and pecans and spread evenly, not all the way to the sides if possible (usually not though!).  Sprinkle the remaining oat mixture over the top of the caramel and press lightly into the warm caramel.

Return the pan to the oven and bake an additional 12-16 minutes, or until the top is lightly toasty brown.  Remove to a wire rack to cool COMPLETELY.  Yes, this means completely…about 2 hours on the cooling rack.  Loosen the sides without the parchment paper with a sharp knife, gently lift the entire square out onto a cutting board.  Using a large sharp knife cut into 24 cookie bars.  Store in an airtight container in the refrigerator…they are perfectly fine at room temperature but we found the texture to be better out of the fridge!

IMG_3597

Small, but super rich and delicious!

Double Chocolate Peanut Butter Chip Brownies (Gluten Free)

Double Chocolate Chip Peanut Butter Chip Brownies

Anybody who has ever baked a pan of brownies from scratch knows that they can be tricky…under cook them and they are too gooey, over cook them and they are dry and crumbly and the edges are hard as bricks…it takes practice to get them just right.  Anybody who has ever baked a pan of gluten-free brownies from scratch has probably thrown more than one batch in the trash.  Well…I have to admit I’ve thrown more than one in trash, probably even more than ten.  Yikes.  Not only is it disappointing to not get it right or to not get the reward of a delicious chewy brownie after the labor but gluten-free ingredients ain’t cheap!!!!  I came across a recipe in Food and Wine Magazine last month that I just had to try…Oh boy, am I glad I did!!!!  These brownies came out just about perfect…I live at high altitude so next time I may try a few adjustments but I think the recipe is definitely a keeper.  I typically don’t bake with a lot of sugar so these will be reserved for special occasions because they are SUPER RICH and SUPER SWEET!!!  This recipe comes from Tully Phillips of Tu-Lu’s Bakery in New York City and Dallas…I can’t wait to visit them in person!!!

Double Chocolate Peanut Butter Chip Brownies

Ingredients:
3 sticks unsalted butter, cut into tablespoons, plus more for greasing
12 ounces semi-sweet or dark chocolate, finely chopped
3/4 cup plus 2 tablespoons white rice flour
3/4 cup tapioca flour
1/2 teaspoon kosher salt
6 large eggs
3 cups sugar
1 tablespoon pure vanilla extract
1 cup peanut butter chips
1/2 cup semi-sweet chocolate chips

Directions:
Preheat the oven to 350°. Lightly grease a 9-by-13-inch metal baking pan.

Place the 3 sticks of butter in a heat-proof bowl and set the bowl over a saucepan of simmering water (the bottom of the bowl should not touch the water). Melt the butter, stirring occasionally. Add the chopped chocolate and stir until melted. Remove the bowl from the heat.

In a small bowl, whisk the rice flour with the tapioca flour and salt. In a large bowl, whisk the eggs with the sugar and vanilla until blended. Fold in the dry ingredients until incorporated, then fold in the peanut butter chips and chocolate chips. Fold in the melted chocolate mixture. Scrape the batter into the prepared dish.

Bake for about 1 hour and 15 minutes, until the brownies are slightly puffed and a tester inserted in the center of the brownies comes out with a few moist crumbs attached. Transfer the pan to a rack and let cool completely before turning out the brownies and cutting them into bars.

The brownies can be stored in an airtight container at room temperature for 3 days, or wrapped in foil and frozen for up to 1 month.

***Recipe reprinted with permission from Tully Phillips and Jennifer Wells***

Double Chocolate Peanut Butter Chip Brownies 2
This recipe is shared at:

Chocolate PB Cupcakes

IMG_9517

Better late than never!  Sorry for the delay in posting this awesome recipe…

This recipe is adapted from my absolute favorite cupcake cookbook, Gluten Free Cupcakes by Elana Amsterdam

Chocolate Peanut Butter Cupcakes

Cupcakes:

1/2 cup blanched almond flour

1/4 cup coconut flour

1/4 cup unsweetened cocoa powder

1/4 tsp. Celtic sea salt

1/2 tsp. baking soda

4 large eggs, room temperature

2 Tbsp. coconut oil or butter, melted

1/2 cup maple syrup (or agave, honey or coconut palm nectar)

1/4 cup chopped peanuts (for topping)

Filling:

1/2 cup creamy roasted peanut butter (almond butter is nice too!)

1/4 cup maple syrup

1 tsp. vanilla

1/2 tsp. Celtic sea salt

Directions:

Preheat oven to 350° F.  Line 9 muffin cups with paper or silicone liners.

For the cupcakes, in a large bowl, combine the almond flour, coconut flour, cocoa powder, salt and baking soda.  In a separate medium bowl, whisk together the eggs, oil and maple syrup.  Blend the wet ingredients into the dry ingredients with a handheld mixer until thoroughly combined.

For the filling, in a small bowl combine the peanut butter, maple syrup, vanilla and salt and stir until smooth.

To assemble, spoon one tablespoon of the cupcake batter into the bottom of each muffin cup. Next, spoon one tablespoon of filling into each muffin cup.  Divide the remaining batter evenly between the muffin cups covering the filling completely.

Bake for 20-22 minutes or until a toothpick inserted about 1/2″ from the edge of the cupcake (to avoid the filling) comes out with only a few moist crumbs.  Remove from oven and let the cupcakes cool in the pan for 1 hour, then frost with ganache and top with chopped nuts.

Chocolate Ganache:

3/4 cup heavy cream

8 ounces dark chocolate chips or chopped

1 tsp. vanilla

pinch of salt

Place the chocolate in a medium bowl and set aside.  In a small sauce pan, bring the heavy cream to a boil and immediately remove from heat.  Pour over the chocolate and let sit for 5 minutes.  Add the vanilla and salt and whisk together until smooth.  Let the ganache cool to room temp and then place in the refrigerator to thicken, about 15 – 20 minutes.  Store any leftover ganache in a glass container in the refrigerator for up to 3 days.

This post is shared at:

5 Ingredient Monday, Slightly Indulgent Tuesday, Fat Tuesday, Tasty Tuesday, Gluten-Free Wednesday, Allergy Friendly Lunchbox Love, Allergy-Free Wednesday, Whole Food Wednesday, Gluten-Free Fridays, All Gluten Free Desserts, Wednesday Extravaganza

Coffee Almond Stracciatella (Dairy-Free)

Dairy free coffee ice cream loaded with toasted almonds and Italian style chocolate chips

I know it’s the middle of winter but I’m one of those crazy people who thinks Ice Cream is a food group and should be enjoyed regularly in any season!  My fondest memories of traveling to Paris to visit my son in college are the ridiculous amount of trips we made all over town seeking out the best gelato…I tried the Stracciatella, Amorena and Pistache at each shop we visited, those are my three favorites.  This is my best attempt thus far at recreating Stracciatella.  You can easily add the Stracciatella to any flavor of ice cream you choose to make, it also goes beautifully in a cherry almond ice cream!

Coffee Almond Stracciatella

Ice cream base:

2 cans full fat coconut milk

1/2 cup coconut palm sugar (or equivalent sweetener of choice)

2 Tbsp. instant coffee (I used 2 packets of Starbucks Via)

4 egg yolks

1/4 tsp liquid stevia

2 Tbsp. dark rum (optional)

Mix-Ins:

3/4 cup sliced almonds, lightly toasted

4 ounces dark chocolate, coarsely chopped and melted

Heat the coconut milk, sugar and instant coffee in a medium saucepan over medium heat.  Stir until the sugar and coffee are dissolved and the mixture reaches 170 degrees.  In a separate bowl whisk together egg yolks, stevia and rum until smooth.  Temper the egg yolks by slowly adding 1 cup of the hot coconut milk mixture to the bowl while whisking continuously.  Slowly add the tempered yolks back into the remaining coconut milk mixture, stirring or whisking constantly.  Continue to heat the coconut milk mixture until it reaches 180 degrees, it will be steaming but not quite boiling.  Pour the mixture though a mesh strainer into a bowl set over ice water and cool for 10-15 minutes, stirring occasionally.  Remove from ice bath, cover and chill in the refrigerator for at least 3 hours.  Pour chilled mixture into ice cream maker and churn according to manufacturers directions.

During the last few minutes of churning add the sliced almonds and then the dark chocolate (stracciatella).

Stracciatella – melt dark chocolate over low heat or in the microwave until smooth.  Drizzle a very thin stream of the warm chocolate into the ice cream during the last few minutes of churning.  If the chocolate is clinging too much to the dasher you can drizzle the chocolate over the ice cream as you layer it into the storage container, stirring it slightly while you are pouring.

When the ice cream is finished churning and mix-ins have been added transfer to a chilled air tight container and place in the freezer until firm (about 2 hours), recipe makes about 1 quart.

Scooped right from the freezer…

The Easiest, Tastiest, Prettiest Homemade Christmas Treat, Perfect for Giving!

100_2307

Chocolate Drizzled Popcorn with M&M’s

I love making homemade Christmas treats for all of my friends and family.  For many years when my daughter was still home we spent a fun-filled day making all of our favorite Christmas cookie recipes and then packaged them up on beautiful plates with ribbons and bows for all of our friends…but for the last two years she has been in college and doesn’t get home for the holidays until a few days before Christmas…way too late for a timely delivery!  So, I have gone back to a tried and true Holiday favorite that I made for years when the kiddos were small and able to help with this simple yet beautiful and tasty treat.  It’s a much more manageable task to take on solo too!  You can customize this treat with anything your budget or dietary needs call for…homemade popped popcorn or simplify it with microwave popcorn, use gourmet white and dark chocolate or vanilla and chocolate CandiQuik and then top with healthy nuts and raisins or fun colorful toppings like M&M’s or chopped peppermint candies.  The beauty is in the creation, no matter what ingredients you choose!  The recipe is pretty vague due to the individuality of the treat…it’s really impossible to mess up.  If you need more popcorn on the pan, add more.  If you need more chocolate, add it.  Dump as many (or few) toppings on as you like…

I will include a more accurate (sort of, anyways!) recipe using microwave popcorn, CandiQuik and M&M’s for toppings as this was my original recipe from many years ago…I will have to say it has evolved, but the original is quick, easy and well…pretty hard to beat!

Chocolate Drizzzled Popcorn with Peppermints

Chocolate Drizzled Popcorn with Peppermints

Chocolate Drizzled Popcorn

12″ disposable foil pizza pan

6 cups of popped popcorn, buttered and salted

white chocolate, melted

dark chocolate, melted

festive toppings of your choice

  • Spread the popped popcorn on the pizza pan evenly taking care to not get any unpopped kernels in the mix!
  • Melt the white chocolate on the stove on low heat or in the microwave, drizzle heavily over the popcorn to hold it all together.
  • Melt the dark chocolate on the stove over low heat or in the microwave, drizzle lightly in a circular motion over the white chocolate.
  • While the dark chocolate is still melted, sprinkle your festive toppings over the top.
  • Place in the refrigerator or freezer for about 10-15 minutes to harden the chocolate.
  • Cover with plastic or cling wrap, add a bow and gift tag.
Ready for delivery!

Ready for delivery!

My Original Christmas Popcorn Recipe

3 – 12″ disposable foil pizza pans

3 – bags of microwave butter popcorn, popped

1 – 16 ounce package chocolate CandiQuik

2 – 16 ounce packages vanilla CandiQuik

1 – 16 ounce package Christmas (green and red) plain M&M’s

Pop all of the popcorn and spread evenly on the pizza pans, again taking care to not get any unpopped kernels on the pans.  Melt the vanilla CandiQuik according to package directions and drizzle heavily over each pan of popcorn to hold all the popcorn together…you will use almost all of both packages but not quite.  Allow the vanilla coating to slightly harden.  Melt the chocolate CandiQuik according to package directions and drizzle lightly in a circular (or fancy) pattern over the vanilla CandiQuik, you will have quite a bit left over..  While the chocolate drizzle is still melted, sprinkle the Christmas M&M’s over the top.  Allow the chocolate to harden either on the counter-top or in the refrigerator.  Wrap with plastic or cling wrap, add a bow and gift tag.  Deliver to all your friends and family!

IMG_0323

This recipe is shared at:

Tempt My Tummy Tuesday, Slightly Indulgent Tuesday, Tasty Tuesday, Fat Tuesday, Gluten-Free Wednesday, Wednesday Extravaganza, Whole Foods Wednesday, Allergy-Free Wednesday, Fill Those Jars Friday, All Gluten Free Desserts, Fight Back Friday, Gluten-Free Fridays, Made From Scratch Monday

Gooey Sunbutter Brownies

I love to get my Clean Eating Magazine in the mailbox every month…I am totally guilty of immediately opening the magazine to the last page (seriously, every time.) which is cleverly titled “happy ending”…where there is always a “clean” dessert recipe.  Clean Eating Magazine has beautiful recipes that are easily adaptable to most styles of eating be it gluten, grain, dairy or refined sugar-free.  The “happy ending” in this issue uses spelt flour, peanut butter and organic evaporated cane juice which I substituted coconut flour, Sunbutter and a combination of coconut nectar and palm sugar to make it grain, legume and refined sugar-free.

Grain free, refined sugar-free brownies…sounds less than decadent, right?  Not so with this recipe that I adapted from the Peanut Butter Brownie recipe featured in this months (October 2012) Clean Eating Magazine.  These brownies have a “gooey” texture…not too dense,  eggy or cake-like.  The generous swirl of sunflower seed butter adds an extra layer of decadence to these “clean” dark chocolate brownies. Enjoy!

A decadent and guilt-free happy ending to any meal!

Sunflower Seed Butter Brownies

Ingredients:

4 oz dark chocolate (70% or greater)

4 Tbsp. butter or coconut oil

3 large eggs, room temperature

1/4 cup coconut nectar

1 Tbsp. coconut palm sugar

1 tsp. vanilla extract

1/4 cup coconut flour, sifted

2 Tbsp. cacao powder

3 Tbsp. smooth sunflower seed butter, room temperature

Directions:

Preheat oven to 350 degrees F. Lightly grease an 8-inch square baking dish with coconut oil and line with parchment paper leaving 2 inches hanging over 2 opposing sides.

In a large microwave-safe bowl, combine chocolate and butter.  Microwave on 50% power for 30 seconds.  Stir and cook 30 more seconds; repeat until chocolate and butter melt, being careful not to overcook. (Alternatively, bring a pot of water to a very gentle simmer; place a stainless steel bowl over pot and add chocolate and butter to bowl.  Cook, stirring until melted, 2 to 3 minutes.)

Stir in eggs, coconut nectar, palm sugar and vanilla until combined.  Add flour and cacao powder and stir until just incorporated and no white streaks remain; do not over-mix.

Pour into baking dish, spreading evenly with a rubber spatula.  Working in small dollops (about 1/2 Tbsp. each), dot the surface of batter with Sunbutter.  With a butter knife or spatula, swirl Sunbutter through batter.

Bake until toothpick comes out with only a few crumbs when inserted in center, 15 to 18 minutes.  Transfer to a wire rack and let cool completely, about 20 minutes.  Remove brownies from dish by lifting parchment paper.  Slice into 12 pieces.

Recipe Variations:

  • Substitute your favorite nut butter for the Sunbutter
  • Substitute honey, maple syrup or agave for the coconut nectar
  • Add chocolate chips
  • Add chopped nuts or seeds that complement your favorite nut/seed butter
  • If you are not grain free, omit one egg and sub 1/3 cup quinoa flour for the coconut flour
  • Make in a 12 cup muffin pan, be sure to use paper liners.

This recipe is shared at:

Made From Scratch Mondays, Slightly Indulgent Tuesday, Tasty Tuesday, Fat Tuesday, Whole Foods Wednesday, Fill Those Jars Fridays, Allergy Free Wednesday, Fight Back Friday, Gluten-Free MondayGluten-Free Wednesdays

Texas Sheet Cake – Gluten and Refined Sugar-Free

Texas Sheet Cake…just like I remember it.

Have you ever heard of a Texas Sheet Cake? Yeah, me neither.  When I grew up we just called it Sheet Cake…of course we lived in Texas so maybe that’s why we didn’t need to include the “Texas” part.  I have very fond memories of this moist, intensely chocolatey (almost brownie like…but not) cake with a super sweet icing that looked almost crackle-y (is that even a word?) on top when you cut into it.   I remember this cake being a part of just about every family celebration we had and after much research on this heavenly cake so do a lot of other southerners!  No one really knows the origin of the “Texas Sheet Cake” that may date back as far as the 1900’s but almost every recipe I came across has a slightly different name (Aunt Velma’s Chocolate Cake, Texas Sheet Cake, Cocoa Sheath Cake, Mexican Chocolate Cake, Chocolate Cookie Sheet Cake…) but nearly identical ingredients.  The most information I found as to why it’s called “Texas Sheet Cake” can be found here, you can follow the links in the post for some fun information on this wonderful traditional southern dessert.

I had a hankering for this dessert today but I didn’t feel like messing around with the recipe to come up with a grain-free version…mostly because I really wanted it to taste, look and feel like the chocolate cake I remember having at my grandmother’s house.  I opted to make a gluten and refined sugar-free version using quinoa flour and coconut palm sugar, all the other ingredients are the same as the original recipe.  Now, one theory on the name “Texas Sheet Cake” is because it makes a cake the size of Texas since it is traditionally baked in an 12×18 half sheet pan, which is HUGE.  I cut the original recipe in half to make a 9×12 quarter sheet cake, which still yields 12 generous servings!

Gluten-Free Texas Sheet Cake

Ingredients:

1 cup quinoa flour

1 cup palm sugar

1/8 tsp. salt

2 Tbsp. cocoa, heaping

1 stick butter

1/2 cup boiling water

1/4 cup buttermilk

 1 egg beaten

1/2 tsp. baking soda

1/2 tsp. vanilla

Icing:

1/4 cup pecans, chopped

7 Tbsp. butter

2 Tbsp. cocoa, heaping

3 Tbsp. milk

1/2 tsp. vanilla

8 ounces coconut palm sugar, powdered**

**Powder the coconut palm sugar by placing it in a high-speed blender or food processor and blend on high until it reaches the consistency of finely powdered sugar.

Directions:

In a mixing bowl, combine flour, sugar, and salt.

In a saucepan, melt butter. Add cocoa. Stir together.
Add boiling water, allow mixture to boil for 30 seconds, then turn off heat. Pour over flour mixture, and stir lightly to cool.

In a measuring cup, pour the buttermilk and add beaten eggs, baking soda, and vanilla. Stir buttermilk mixture into butter/chocolate mixture. Pour into sheet cake pan and bake at 350-degrees for 20 minutes.

While cake is baking, make the icing. Chop pecans finely. Melt butter in a saucepan. Add cocoa, stir to combine, then turn off heat. Add the milk, vanilla, and powdered sugar. Stir together. Add the pecans, stir together, and pour over warm cake.

Cut into squares, eat and enjoy!

Just a few thoughts…

This cake turned out just as I remembered it.  I was completely thrilled with this recipe and how well the quinoa flour and coconut palm sugar didn’t change the texture or taste of the original recipe.  With that said…this cake was WAY too sweet for my taste now!!!! Did I love it? Yes.  Did it satisfy the craving I was having for a childhood memory? Yes.  Will I make it again? Yes.  Will I play around with the recipe to make it grain-free and less sweet? Probably not…This will be one of those recipes that is pulled out on a special occasion or when in need of a comfort food fix, anything different would defeat the purpose of this recipe!

Moist and dense…but not too much of either one…

the perfect combination.

See…crackle-y!

The best way to eat it is warm with a scoop of homemade vanilla bean ice cream!

This post is shared at:

Fat Tuesday, Slightly Indulgent Tuesday, Gluten-Free Wednesday, Whole Foods Wednesday, Fill Those Jars Friday, Fresh Bites Fridays, Tasty Tuesday, Fight Back Fridays, Allergy Free Wednesdays

Almond Butter Brownie Bites

I love chocolate.  My dad loves chocolate.  We both admittedly have a little problem with chocolate portion control…so we love any recipe for a treat that is small and bite-sized (and therefore “naturally” portion controlled) but still packs a satisfying punch!

This year for Father’s Day I made a variation of this recipe from All Day I Dream About Food and it was a huge hit.  It’s rich and chocolatey and one (ok, maybe two) will satisfy even the biggest sweet tooth.  We have had an unusual few weeks here in Colorado Springs with the Waldo Canyon Fire and my parents have been staying with me due to the evacuations…we decided we needed a sweet treat and these babies fit the bill perfectly…we could enjoy without over-indulging!

Now, when I say “naturally” portion-controlled…that statement can only be true if you don’t eat all of them in one sitting…I’m proud to say that I made these on June 30th and we still have four in the fridge!

Almond Butter Brownie Bites (makes 16)

Brownies:

1/4 cup butter

1/4 cup almond butter

3 oz unsweetened chocolate, chopped

1/4 tsp. liquid stevia

1/2 tsp vanilla extract

1/4 cup coconut flour

2 Tbsp. coconut palm sugar

2 Tbsp. cacao powder

2 eggs

1/2 cup coconut milk

Frosting:

1 oz cream cheese, softened

3 Tbsp. almond butter

2 Tbsp. heavy cream

2 packets stevia (or 2 Tbsp. maple syrup or coconut sugar)

1/4 tsp. vanilla extract

For the cakes, preheat the oven to 280F and grease 16 cups of a mini-muffin pan.

In a medium saucepan, melt butter, almond butter and chocolate together over low heat and stir until smooth. Add stevia and vanilla extracts and stir until thoroughly combined. Set aside.

In a medium bowl, sift together coconut flour, coconut palm sugar and cocoa, breaking up clumps with the back of a fork. Add the chocolate mixture and stir to combine (will be very thick). Stir in eggs, one at a time, and then coconut milk until mixture thins out somewhat and becomes a smooth batter.

Spoon batter into prepared muffin tins. Because the batter is quite thick, you will need to press the batter into the cups using the back of a spoon. Smooth the tops.

Bake for 20 minutes, until the cakes are just set and the middle is firm to the touch. Allow to cool in the tins.

For the frosting, beat cream cheese, almond butter and cream together until smooth. Stir in vanilla and stevia. Pipe or spread onto brownie bites.

Bet you can’t eat just one…

This recipe is shared at:

Slightly Indulgent Tuesday, Fight Back Friday, Fat Tuesday, Tasty Tuesday, Gluten-Free Wednesdays, Whole Foods Wednesdays

Grammy’s Famous Mile-Hi Mudd Pie

Mile-Hi Mudd Pie

***Disclaimer***

This is not a recipe for a “healthy” dessert.  It is an off-the-rails, special occasion, treat with consequences (or not).  It can certainly be made with “healthier” substitutions successfully but the recipe that follows is in its original full glorious sugar-filled (although gluten-free) form.  This is my daughter’s favorite dessert and she is coming home from her freshman year of college this weekend and has requested it…what’s a mom to do? Uh, well…say heck yes and get in the kitchen to make it!!! 

Grammy’s Mile-Hi Mudd Pie (serves 12, generously)

1 chocolate cookie pie crust, cooled (I use Pamela’s Gluten-Free Chocolate Cookies, 1 bag for the crust)

2 pints caramel ice cream, softened

2 pints coffee ice cream, softened

1-2 cups chocolate ganache (recipe follows)

1/2 cup sliced almonds

1-2 cups crushed chocolate cookies (about ½ bag of Pamela’s)

Bake the chocolate cookie pie crust in a 9″ springform pan or deep pie pan and completely cool.

Spread 2 pints of softened caramel ice cream on top of cooled crust. Sprinkle the crushed cookies on top of the caramel ice cream. Place in the freezer until ice cream is firm (at least 2 hours). Spread 2 pints of coffee ice cream on top of cookie layer.  Freeze for 2-4 hours until very firm.

Spread room temperature ganache over the frozen coffee ice cream layer and sprinkle on the sliced almonds (I left these off in the photos).  Cover with plastic wrap and freeze overnight.

Take pie out of the freezer 20-30 minutes prior to serving.  Garnish with fresh whipped cream, chocolate ganache drizzle and sliced almonds.

Chocolate Ganache (yields 2 cups)

8 ounces dark chocolate

¾ cup heavy cream

½ Tbsp. butter or coconut oil

1 tsp. vanilla

Place dark chocolate in a heat-proof bowl.  Bring heavy cream and butter to a boil, remove from heat and stir in vanilla.  Pour cream over the dark chocolate and let rest for 5 minutes.  Whisk together until smooth.  Let set on counter until cooled to room temperature.

Normally garnished with almonds and whipped cream but the girl likes it plain.

This is an old photo showing the Mudd Pie garnished with whip and ganache…also made in a pie pan so you get the lovely domed shape!

This recipe is shared at:

Slightly Indulgent Tuesday, Gluten-Free Wednesdays