Grain-Free, Vegan PB&J Bars

Happy National Peanut Butter Day!

IMG_2872

In honor of National Peanut Butter Day I modified one of my favorite dessert bar recipes from Elana Amsterdam’s Gluten-Free Almond Flour Cookbook.  The Raspberry Bar recipe is simply scrumptious as is but today I thought I’d add a little oomph to it…and nothing goes better with jelly (for me, anyways!) than peanut butter!  The original recipe of course calls for Raspberry fruit spread but my favorite is Black Currant so that’s what I used, you can substitute your favorite flavor and any nut butter would work in place of the peanut butter. I replaced the egg in the recipe with a flax egg to make this a vegan-friendly treat as well.  These are great for an on-the-go snack too…I cut them up, wrap them in plastic wrap and freeze them, EASY!

PB&J Bars

Crust:

3 cups almond flour

1/2 tsp. salt

1/4 cup coconut oil, melted

1 Tbsp. vanilla extract

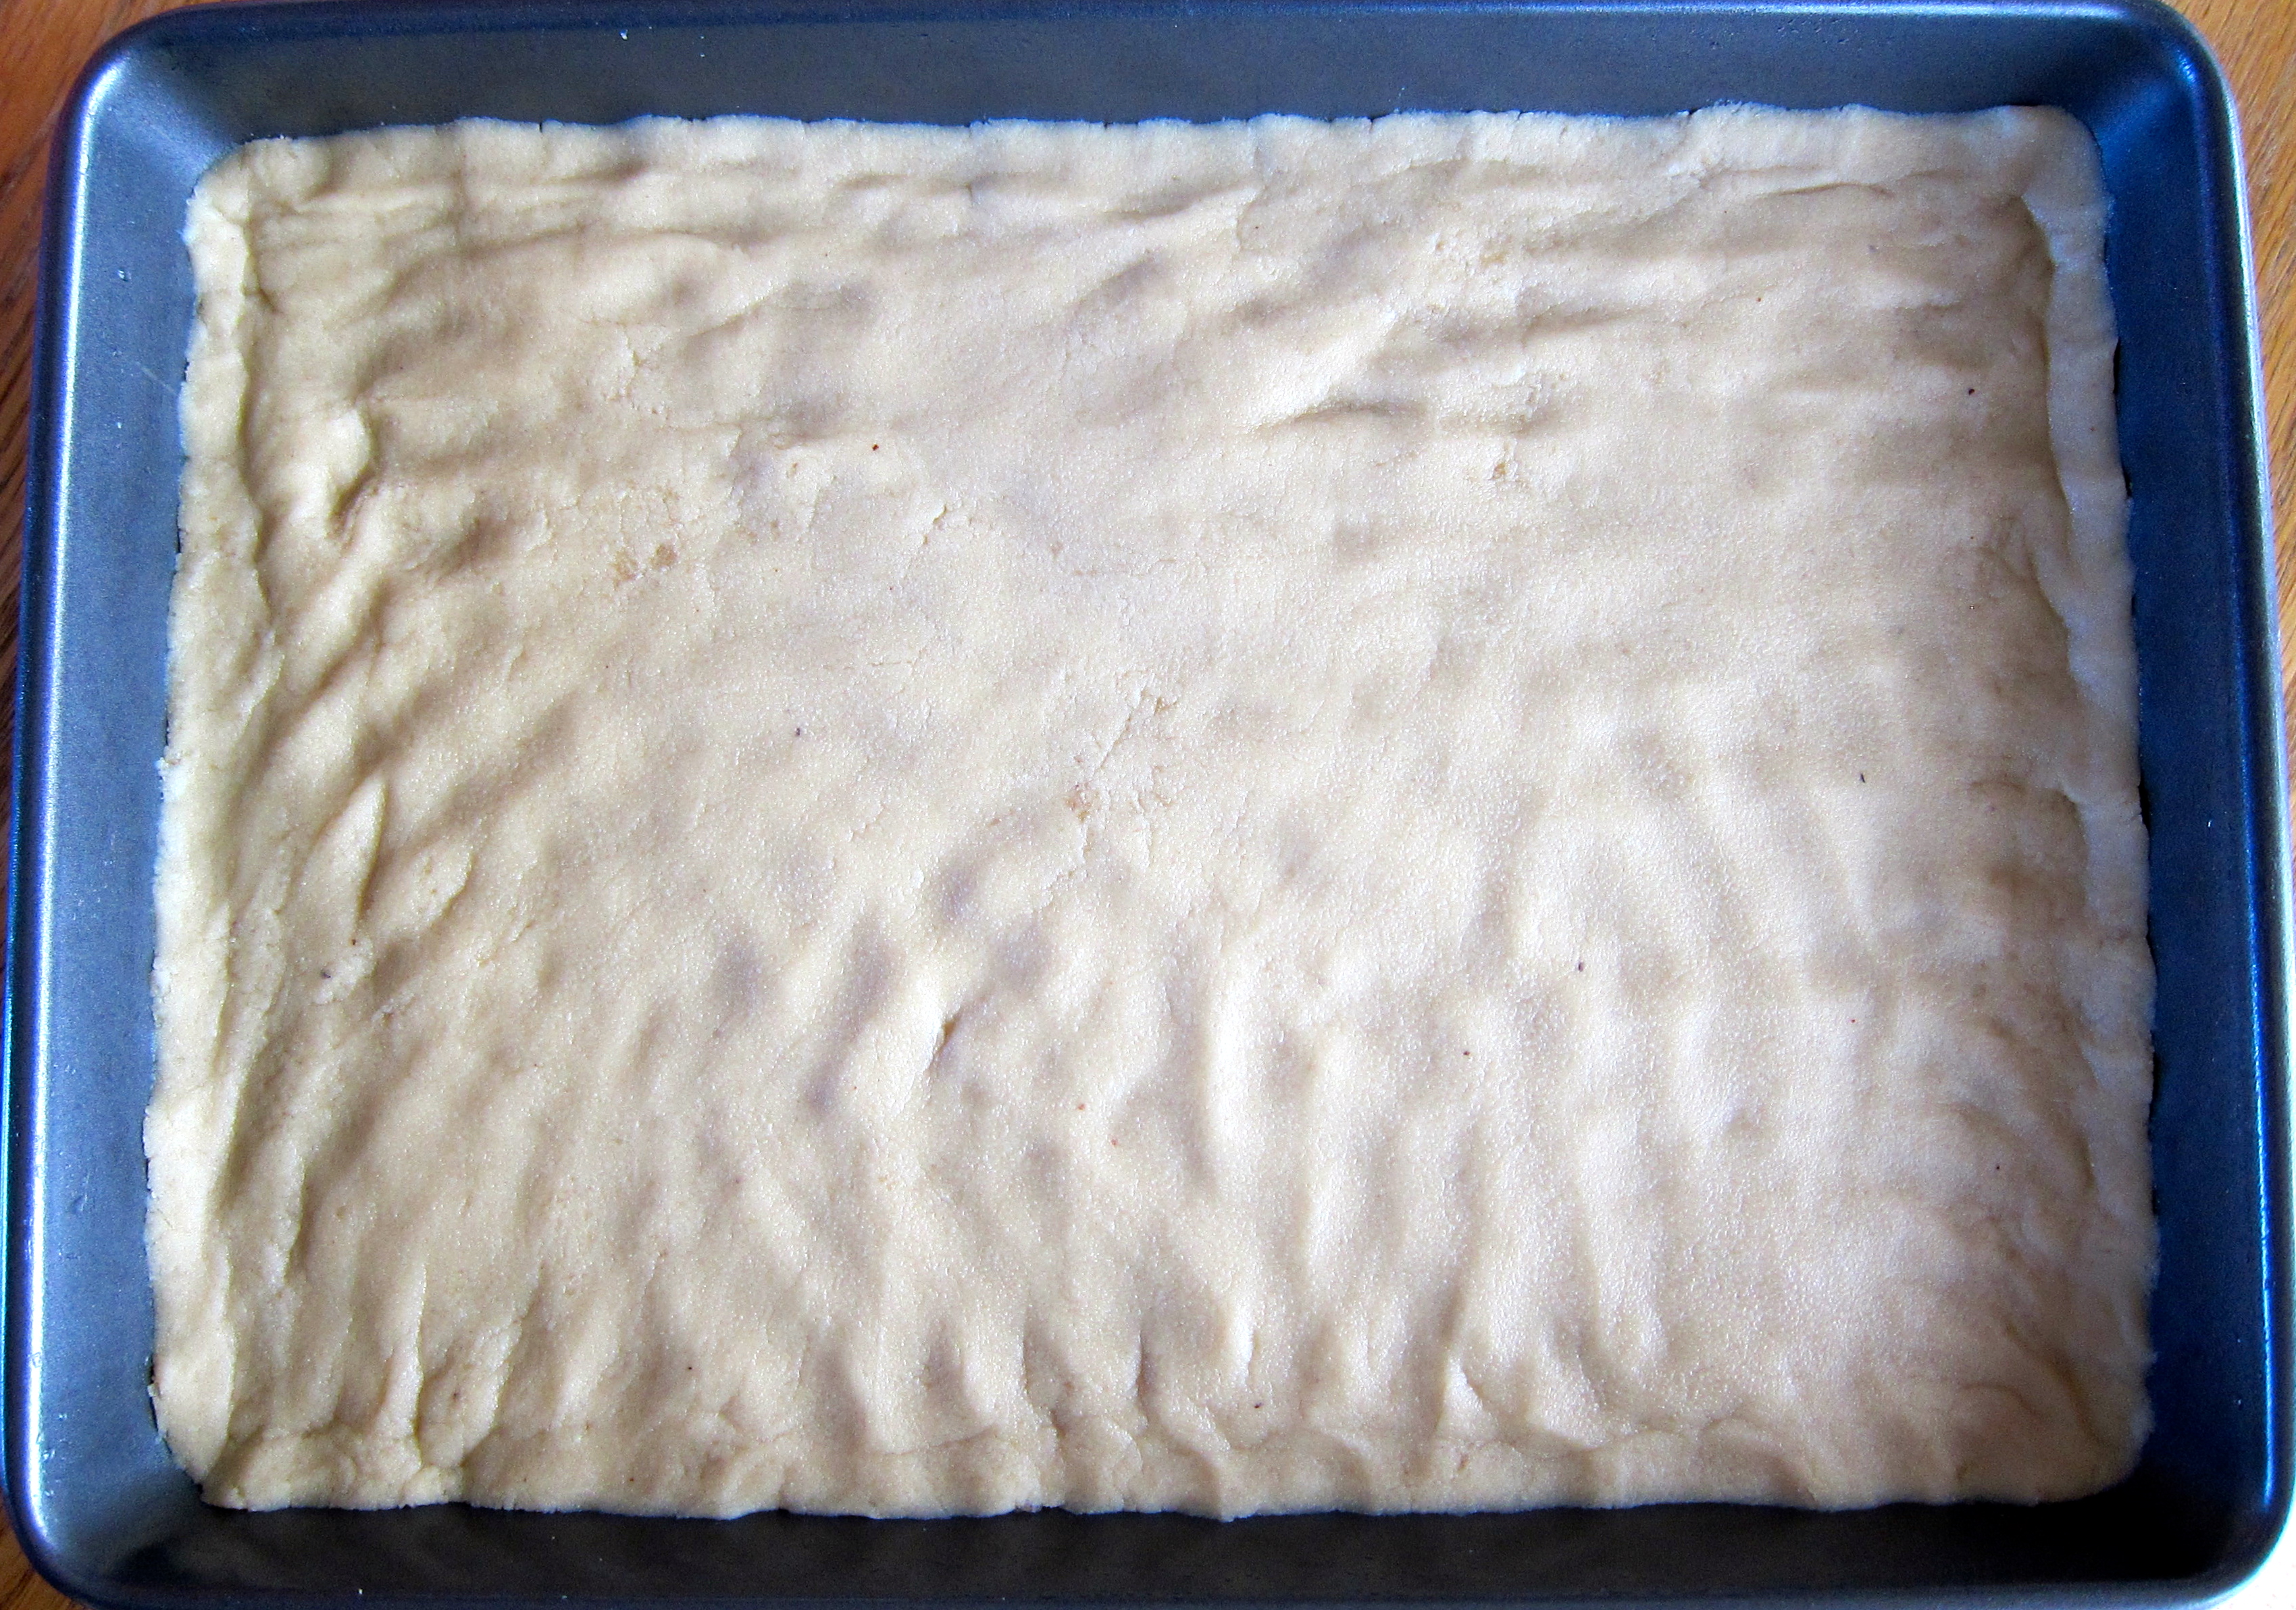
Blend the almond flour, salt, coconut oil and vanilla in a food processor or high-speed blender until a smooth dough forms.  Press the dough into a greased 9×13 baking dish.  Bake at 350 for 12-15 minutes, until lightly golden.  Prepare the topping and measure out the filling while the crust is baking.

IMG_2844

Filling:

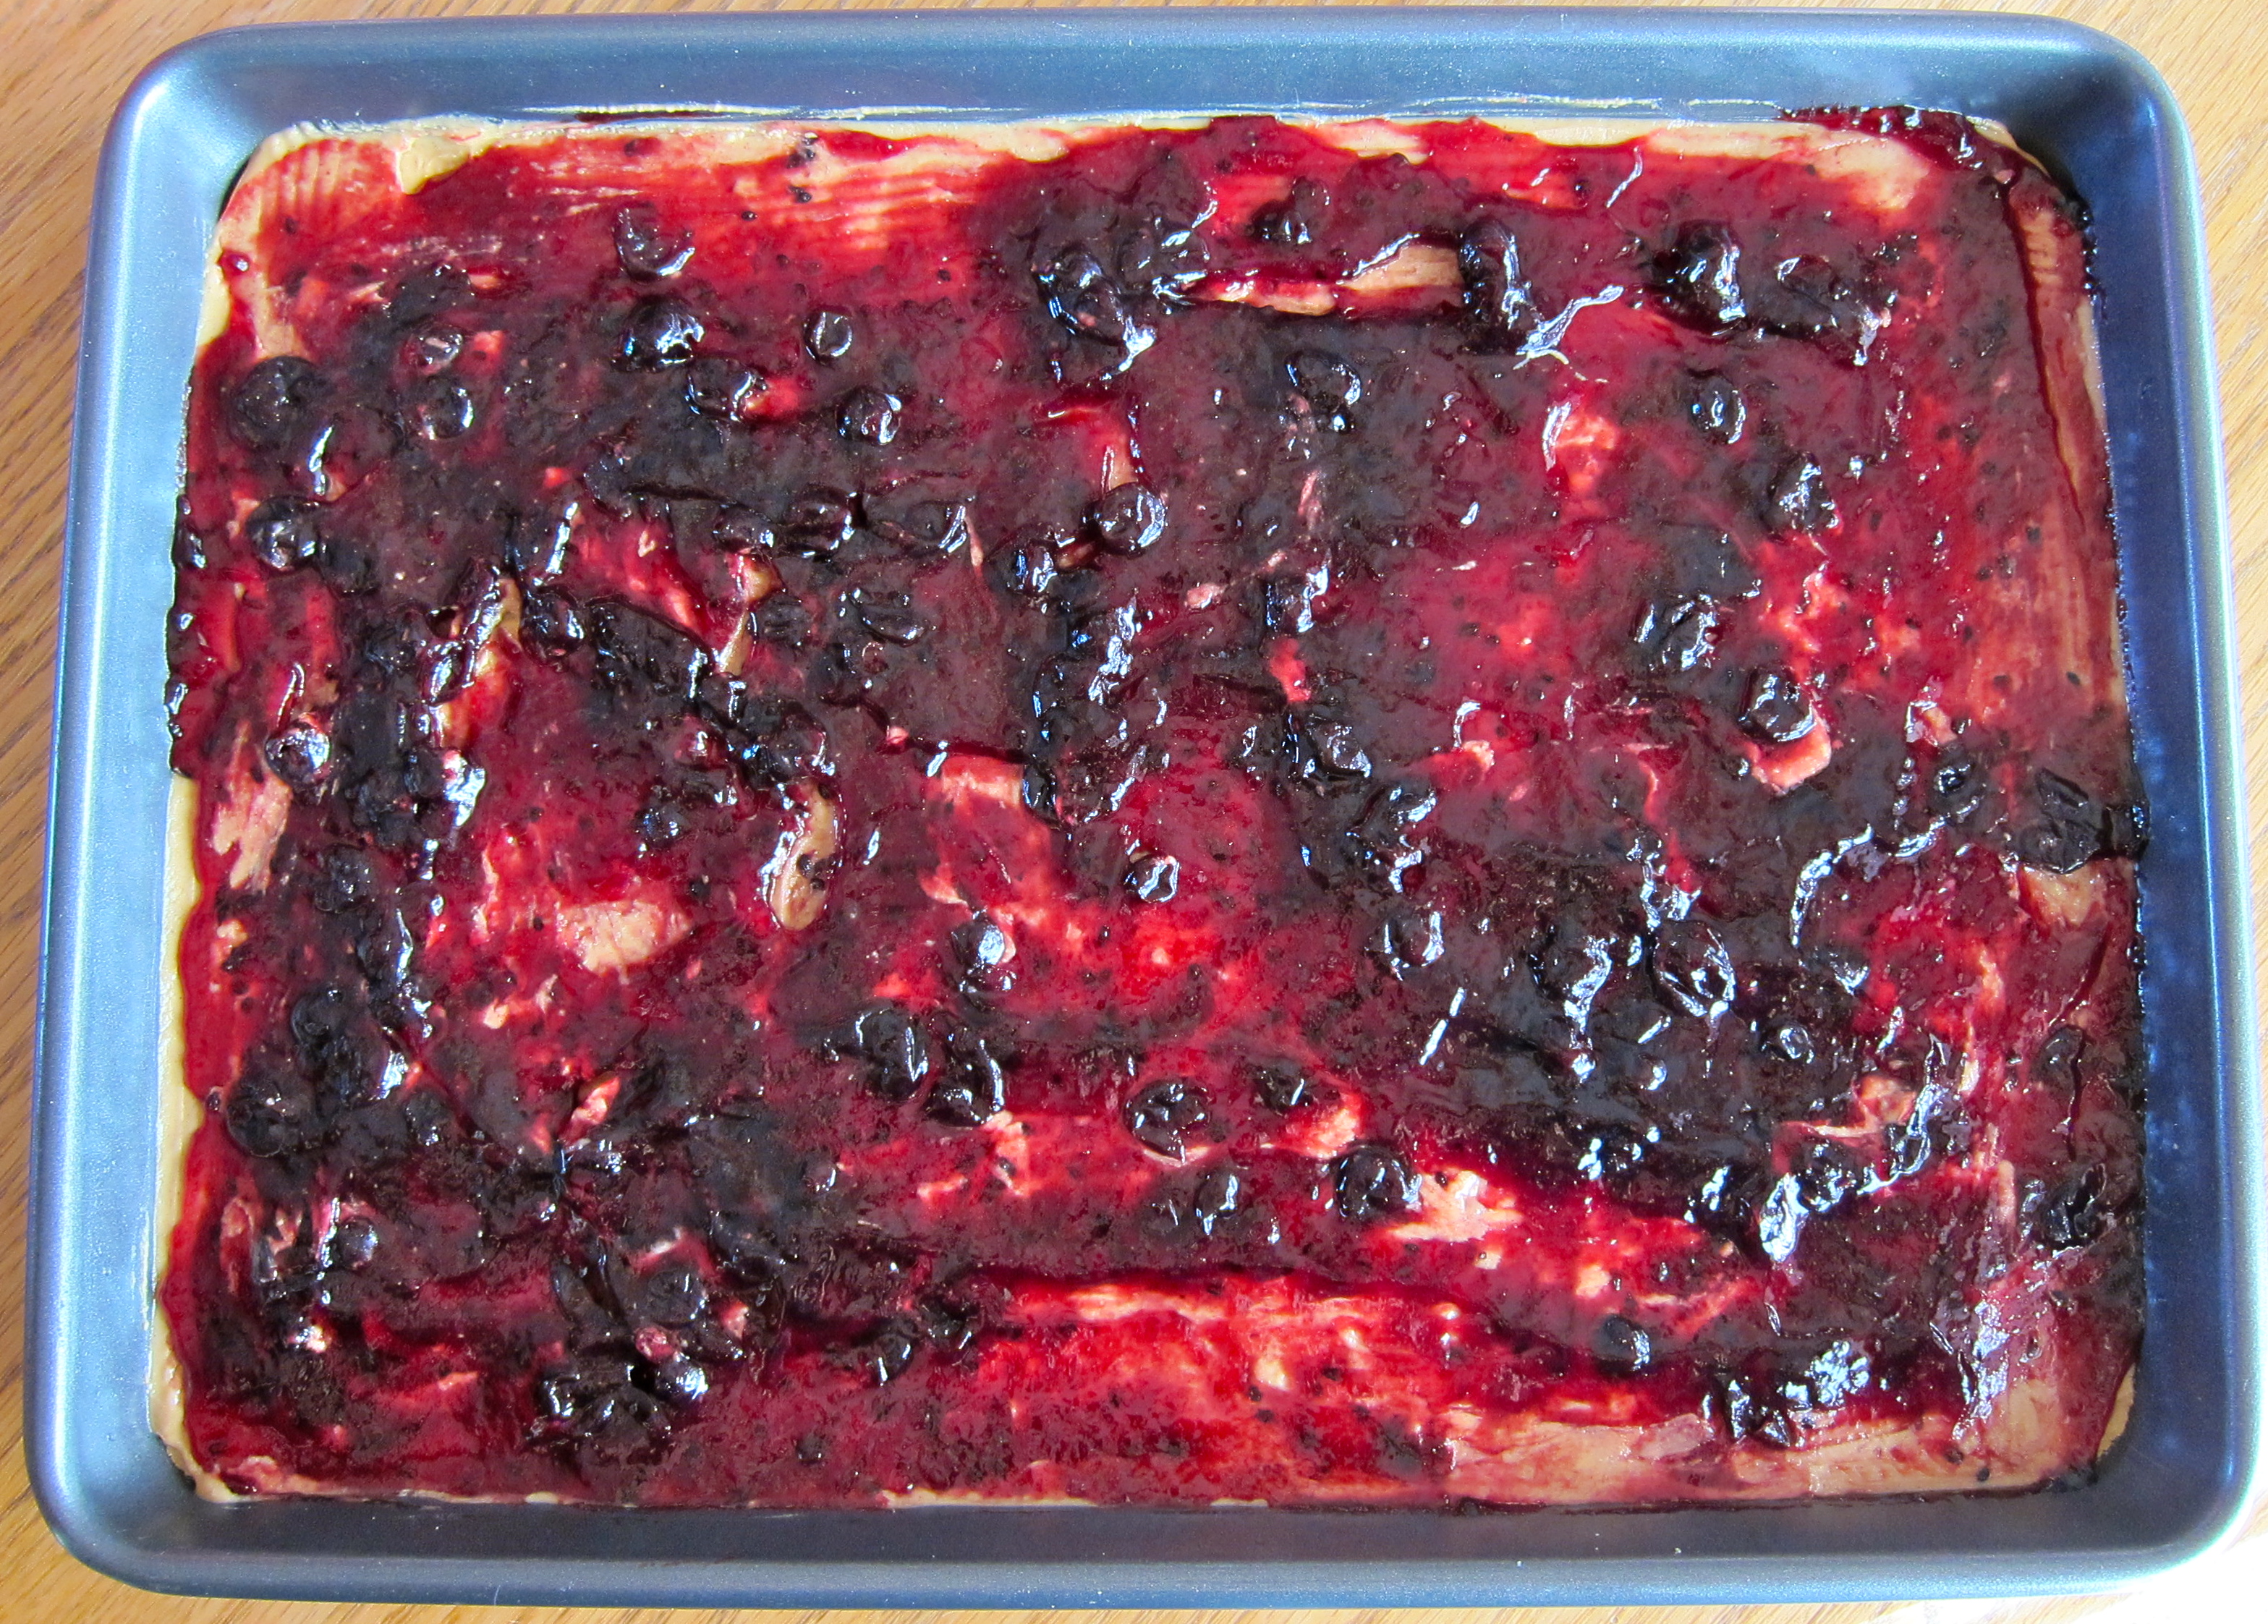
1/2 cup peanut butter, room temperature or slightly warmed

1 cup fruit spread

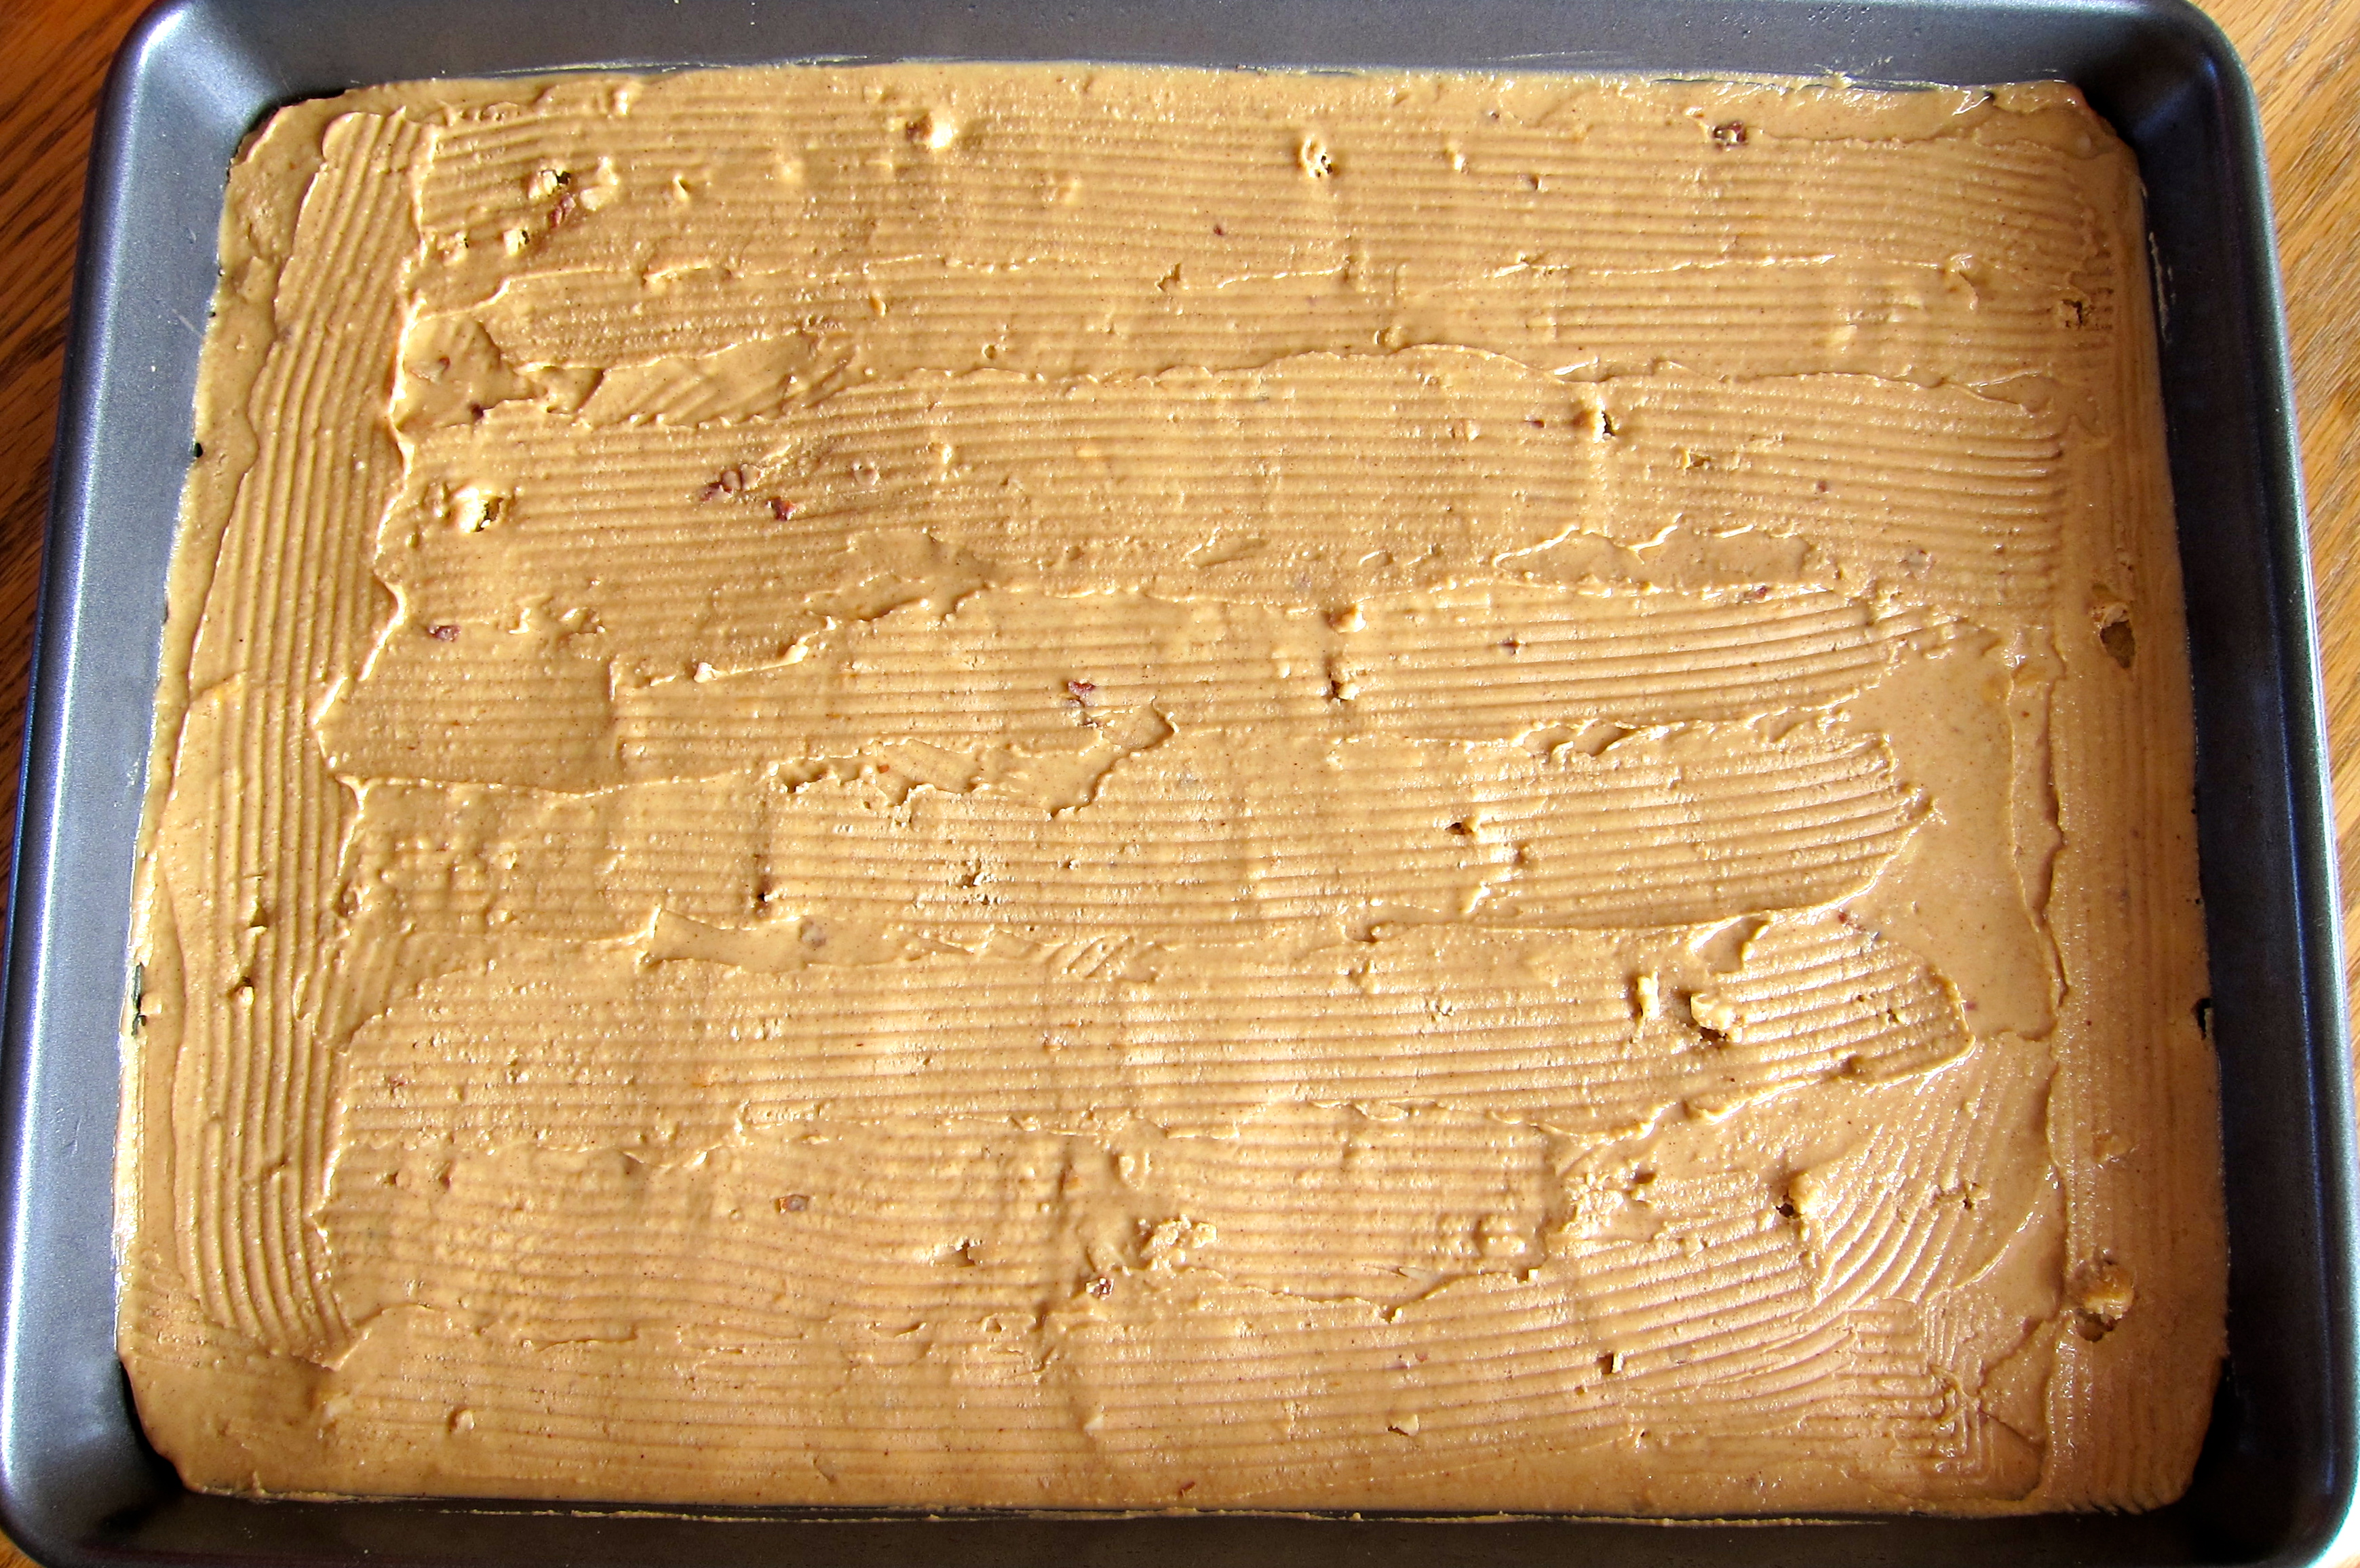
Spread the peanut butter in a thin layer over the hot crust.  Top the peanut butter layer with your favorite fruit spread flavor, spreading evenly.

IMG_2846IMG_2850

Topping:

1 3/4 cups almond flour

1/4 tsp salt

1/2 tsp ground cinnamon

1/4 cup coconut oil, melted

2 Tbsp. coconut nectar

1 flax egg (1 Tbsp. flax meal mixed with 2 Tbsp. warm water…allow to thicken)

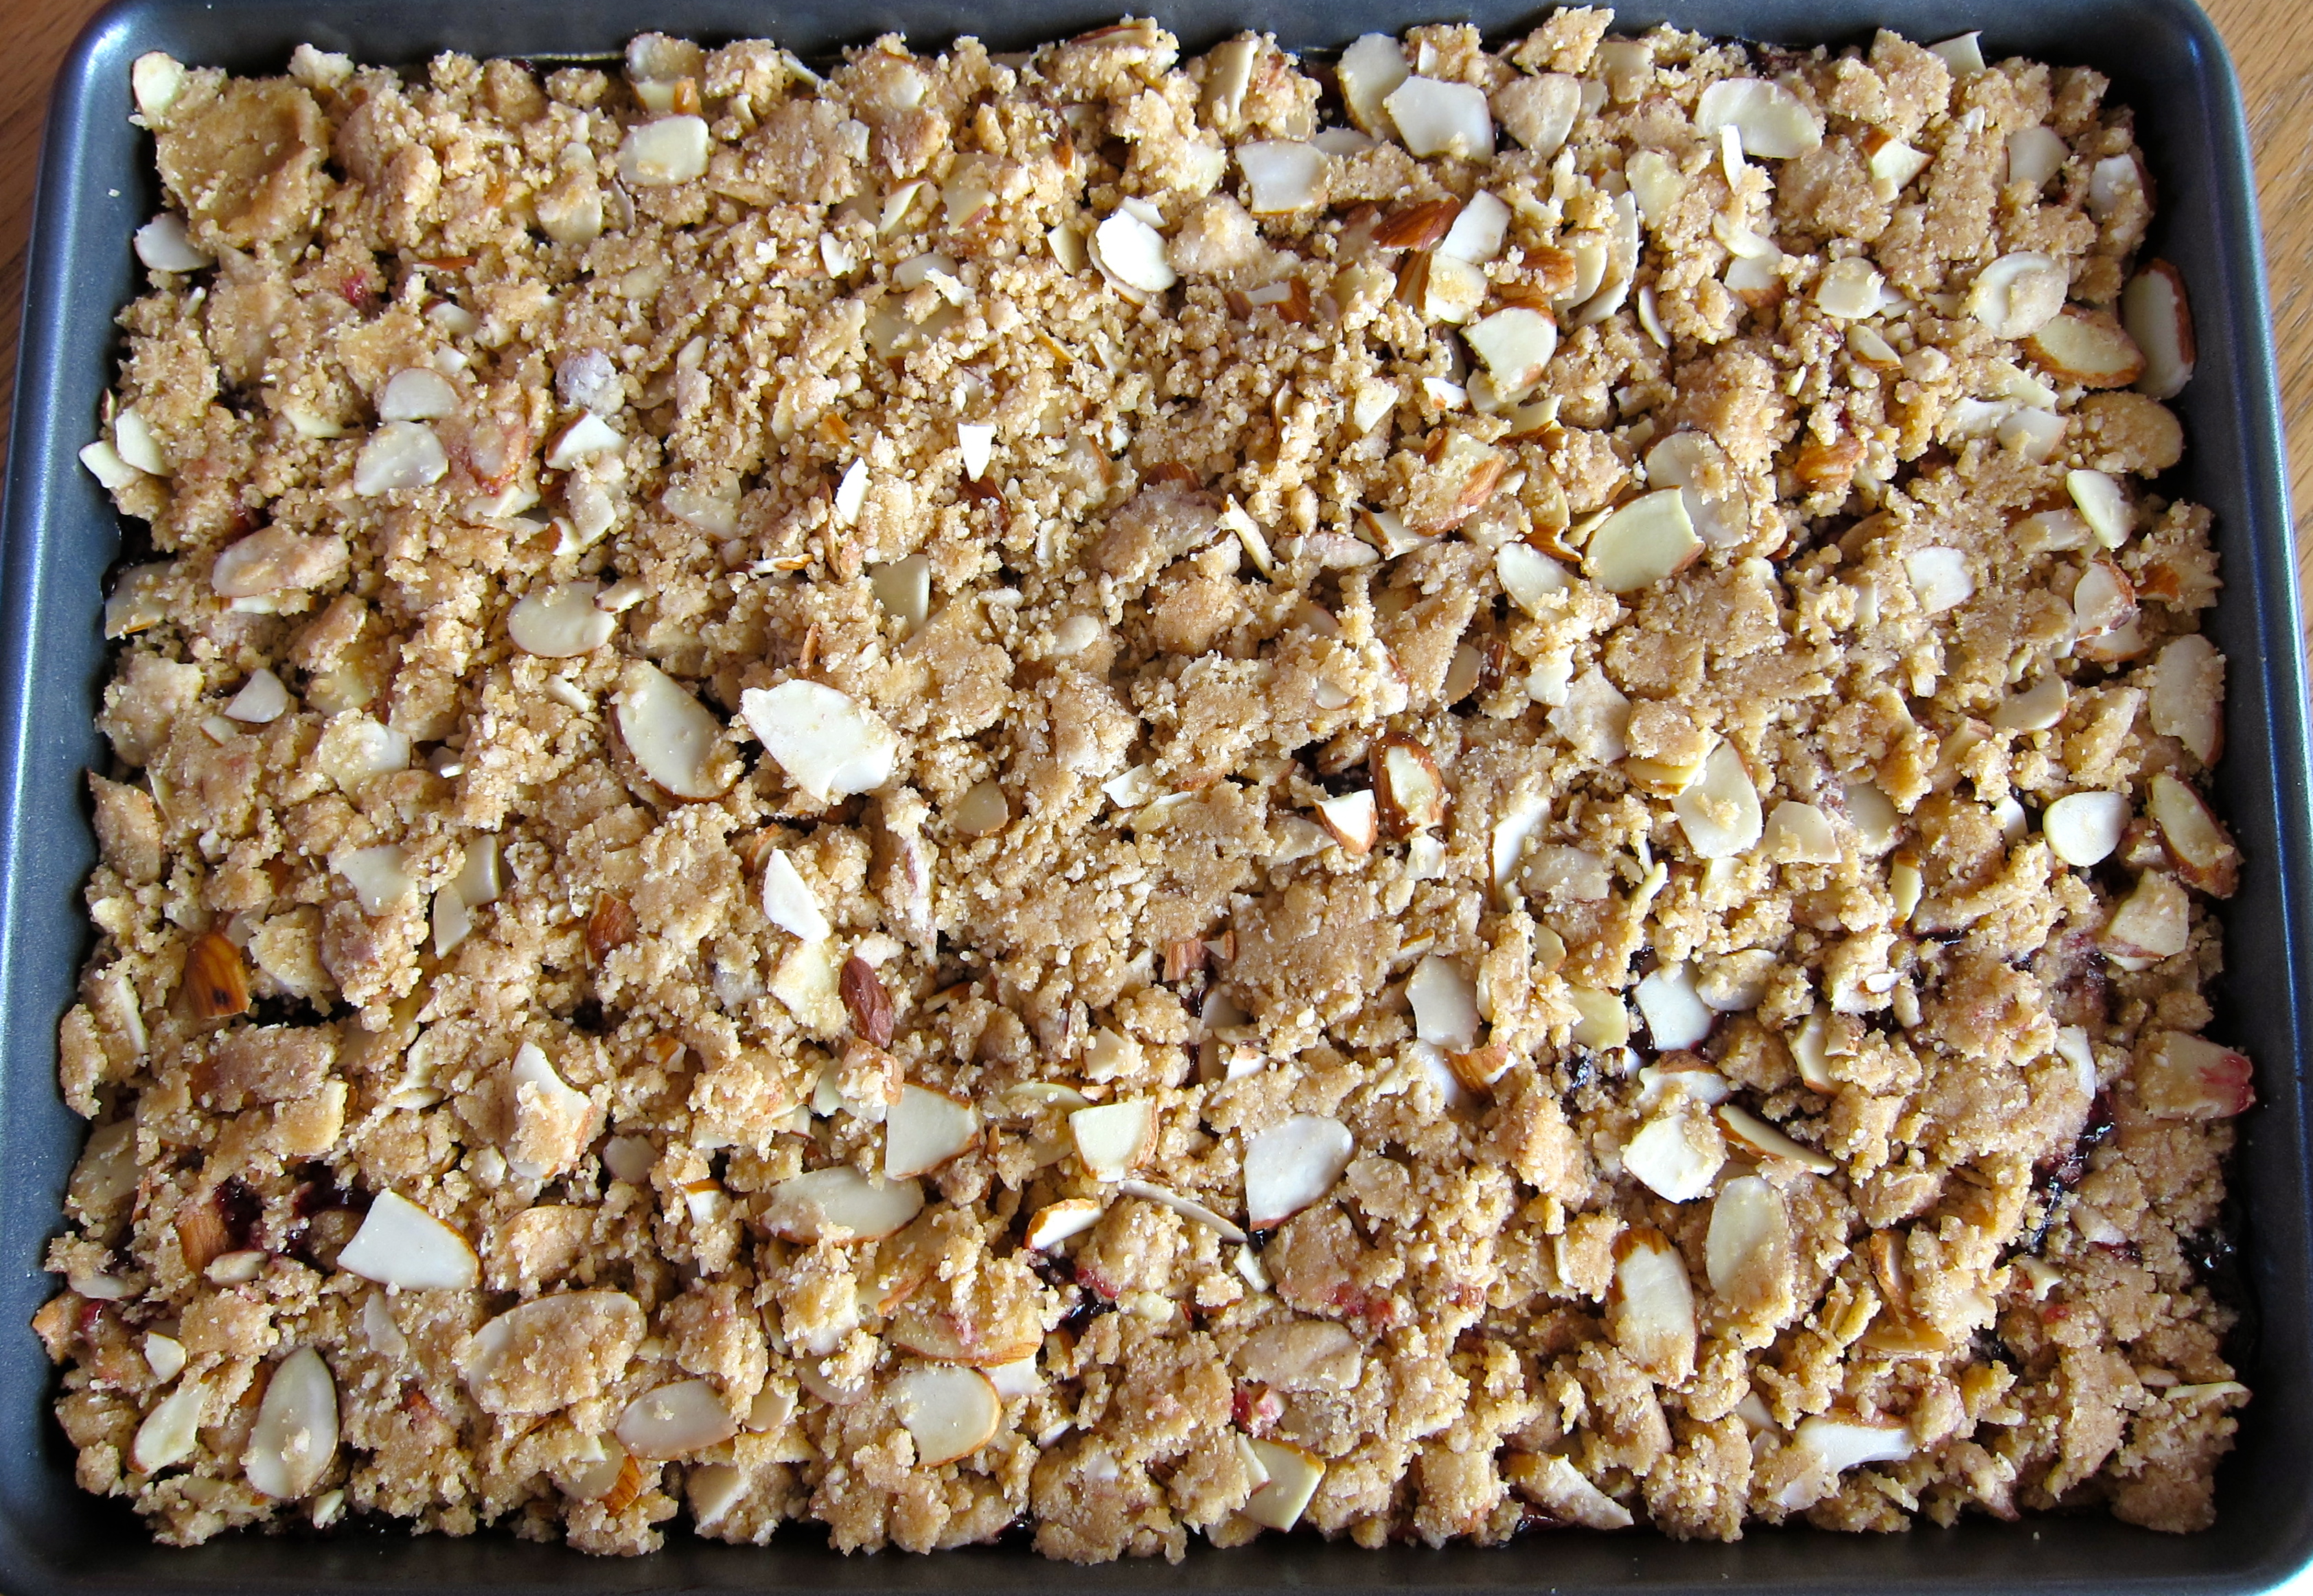
1 cup sliced almonds

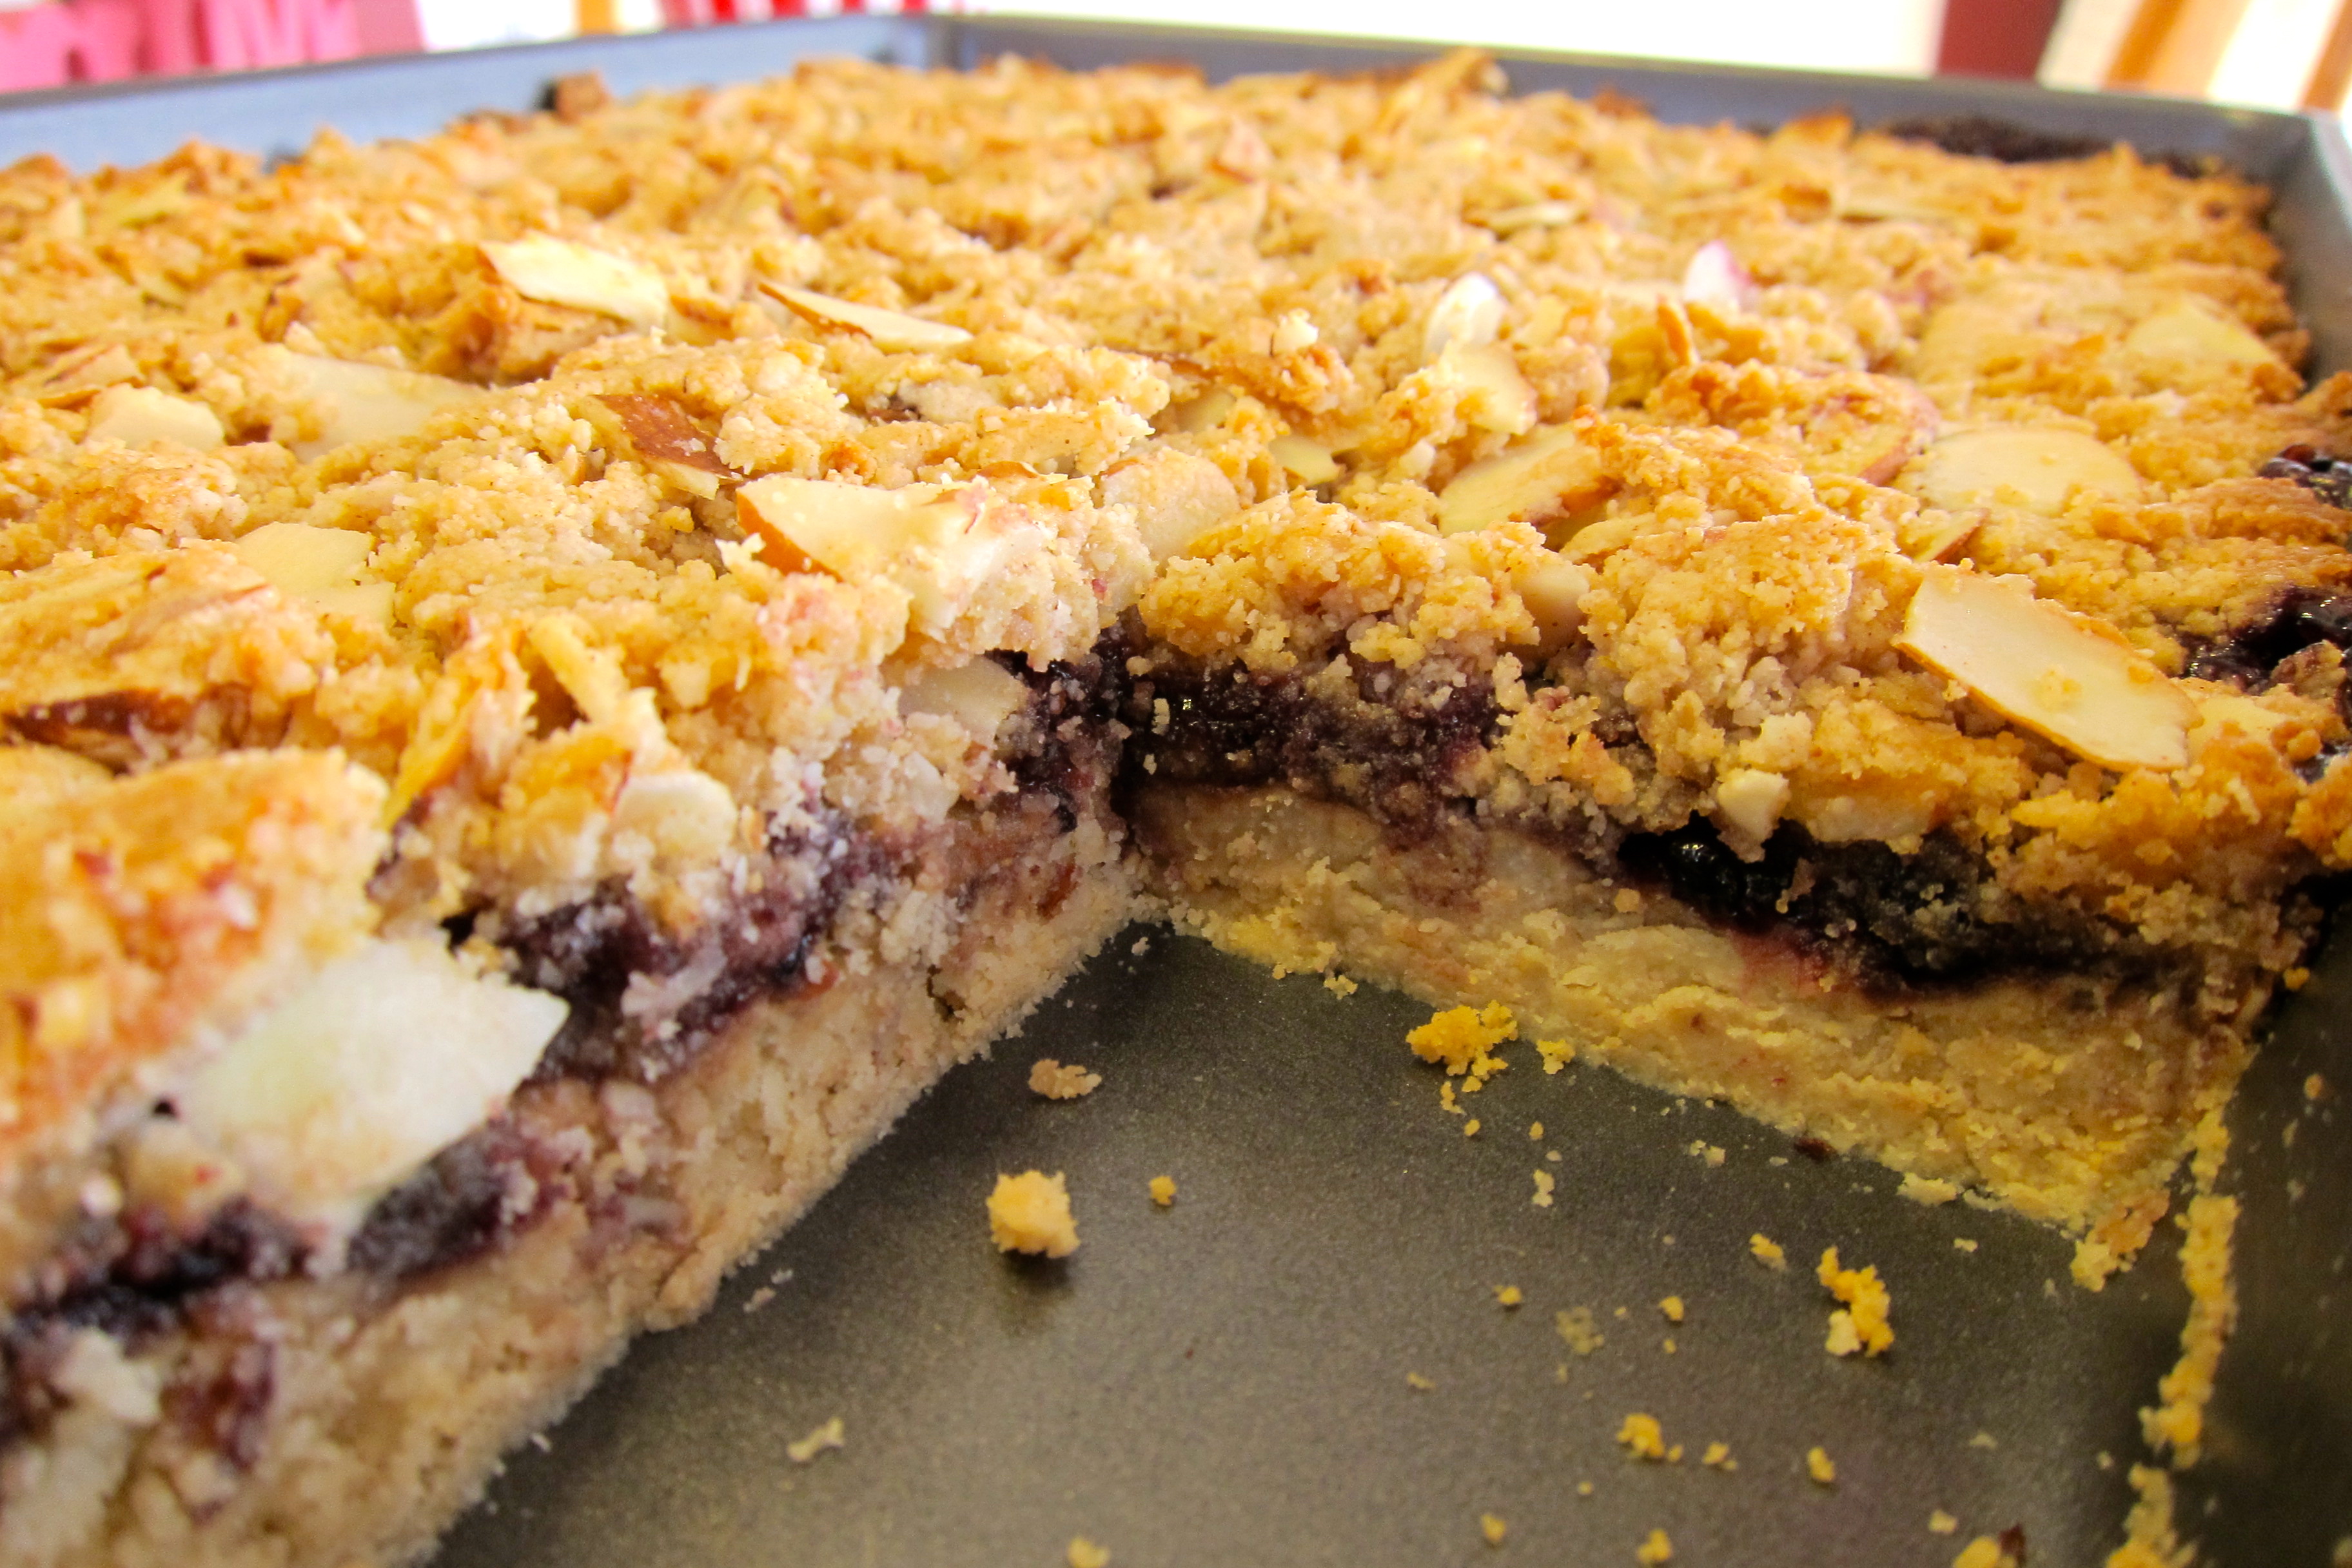
Combine the almond flour, salt and cinnamon in a large bowl.  Stir in the coconut oil, coconut nectar and flax egg.  Gently fold in the almond slices.  Distribute the topping evenly over the fruit spread layer, pressing it down slightly with the back of a spoon.  Bake at 350 for 20-25 minutes or until the topping its lightly golden brown.  Let cool on a wire rack for 1 hour and then refrigerate.  Cut into bars and serve.  Makes 18-24 servings.

IMG_2854IMG_2869

This recipe is shared at:

Fight Back Fridays, Gluten-Free Fridays, Slightly Indulgent Tuesdays, Fat Tuesday, Tasty Tuesday, Tempt My Tummy Tuesday, Gluten-Free Wednesdays, Allergy-Free Wednesdays ,Wheat Free Wednesdays

The BEST Monster Cookie You Will EVER Eat!!!

Everyone knows who Cookie Monster is but what about a Monster Cookie?  Well, let me just tell ya…it’s the best cookie you will ever eat.  It’s chewy, chocolatey, peanut buttery bliss…all wrapped up in a big giant cookie!  Paula Deen has a recipe for a Monster Cookie that is full of store-bought candies, brown and white sugars, oats, eggs and of course tons of BUTTER and The Pioneer Woman’s recipe has white flour, rice crispy cereal AND two and a half sticks of butter for 18 cookies!  I stopped eating that kind of cookie years ago…but I came across a Monster Cookie at Whole Foods Market that I thought might be a better alternative…Ha, I was lucky enough to be able to get a peek at the recipe and decided DEFINITELY not a better option.  I actually calculated out the approximate calorie count for the cookie and it was well over 500 calories…per cookie!  Better ingredients don’t always make a healthier choice.  I have tried and tried to replicate the recipe using different ingredient options here and there and could never quite get it right…until today.  Now, let’s be clear…cookies are a treat and no matter what kind they are and how “healthy” the ingredients may be they still should be enjoyed on special occasions (yeah, yeah, yeah…I know, whatever!).  Anyway, cookies are my treat of choice so this recipe is a complete and total victory for me!

Bliss.

Monster Cookies

Ingredients

1/2 cup quinoa flour

2/3 cup quinoa flakes

1/2 tsp. baking soda

1/2 tsp. baking powder

1/2 tsp. cinnamon

1/4 tsp. celtic sea salt (omit if your peanut butter is salted)

1/4 cup butter, melted (or coconut oil for vegan option)

1/4 cup peanut butter (or roasted almond butter)

6 Tbsp. coconut palm sugar

1 Tbsp. maple syrup

1/2 tsp. vanilla

2 Tbsp. water, if needed

1/4 cup walnuts, chopped

1/4 cup dark chocolate chips

Directions

Position a rack in the center of the oven and preheat to 350°F. Line a large baking sheet with parchment paper.

In a medium bowl combine the quinoa flour, quinoa flakes, cinnamon, baking soda, baking powder and salt.   Stir to blend well. In a large bowl combine the sugar, peanut butter, melted butter (or oil), syrup and vanilla; whisk to blend. Using a flexible rubber spatula, gradually stir the dry ingredients into the peanut butter mixture, if the mixture is too dry and not holding together add the water by tablespoon until it’s combined. Stir in the walnuts and chocolate chips.

For each cookie, drop 2 generous tablespoons of batter onto the prepared sheet, spacing the mounds about 2 inches apart. (Or use an ice cream scoop.) Using moistened fingertips, flatten each to a 3-inch-diameter round.

Bake the cookies until brown and a bit firm to the touch, 17 to 20 minutes. Using a metal spatula, transfer the cookies to a rack and cool completely.

Makes 8 GIANT Cookies!

Cookies and Ice Cream…Does dessert get any better than a Cookie Sundae? I think not.

This recipe is shared at:

Slightly Indulgent Tuesday, Fat Tuesday, Tempt My Tummy Tuesday, Gluten-Free Wednesday, Allergy-Free Wednesday, Whole Foods Wednesday, Gluten-Free Friday, Fight Back Friday, Fill Those Jars Friday, Made From Scratch Monday

Pumpkin Spice Cakes with Pecan Praline Sauce

Pumpkin Cake with Maple-Vanilla Ice Cream and Pecan Praline Sauce

Pumpkin Spice Cake with Maple-Vanilla Ice Cream and Pecan Praline Sauce

Anyone that knows me knows that I love dessert AND that dessert really isn’t dessert for me unless it has some sort of ice cream in it or on it!  This recipe for Pumpkin Cakes with Pecan Praline Sauce was featured in the Paleo Magazine last year but didn’t list the recipe creator so I don’t have a link to the original recipe for credit, the only thing I changed was adding pumpkin pie spice rather than cinnamon and nutmeg.  I took the liberty of adding a nice healthy scoop of Homemade Maple-Vanilla Ice Cream to the top of this delightful holiday treat to help usher it into the “perfect dessert” category, the addition of the Pecan Praline topping is just enough to put it over the top!!!  These are equally good without the ice cream and even without the topping…but it’s dessert after all…just go for it!  You could even skip the cakes and just have the Maple-Vanilla Ice Cream drizzled with the Pecan Praline Topping!

Pumpkin Spice Cakes

  • 3/4 cup almond flour
  • 1 Tbsp. coconut flour
  • 1 Tbsp. pumpkin pie spice
  • 1/2 tsp. sea salt
  • 1/2 tsp. baking powder
  • 2 eggs, room temperature
  • 1/2 cup organic pumpkin puree
  • 1 Tbsp. coconut oil or butter, melted
  • 3 Tbsp. maple syrup
  • 1 tsp. vanilla

Preheat oven to 350° F.  Lightly grease 6 ramekins and set on a baking sheet.  In a medium bowl, whisk together dry ingredients.  With a hand mixer blend eggs, oil or butter, maple syrup, pumpkin and vanilla until well combined.  Add in dry ingredients and mix well.  Divide batter among the prepared ramekins and smooth the tops with the back of a spoon.  Bake for 20-25 minutes or until the center is set and springs back when lightly pressed.  Remove from oven and cool on a wire rack for 10 minutes.  Carefully remove the cakes from the ramekins and cool completely.

Pecan Praline Topping

  • 1/3 cup maple syrup
  • 1/4 cup canned coconut milk
  • 1/4 cup chopped pecans
  • 1 Tbsp. butter

In a small saucepan, combine all ingredients.  Over medium-high heat, bring to a boil.  Reduce the heat to medium low and simmer until the mixture thickens and reduces a bit, about 10 minutes or so.  Remove from heat and allow to cool slightly.  Serve while still warm or refrigerate in a glass container for up to 10 days.  If storing in the refrigerator, warm the topping in the microwave or on the stove before serving.

No ice cream necessary...

No ice cream necessary…

This recipe is shared at:

 Tempt My Tummy Tuesday, Slightly Indulgent Tuesday, Tasty Tuesday, Fat Tuesday, Gluten-Free Wednesday, Whole Foods Wednesday, Allergy-Free Wednesday, Fight Back Friday, Gluten-Free Fridays

The Easiest, Tastiest, Prettiest Homemade Christmas Treat, Perfect for Giving!

100_2307

Chocolate Drizzled Popcorn with M&M’s

I love making homemade Christmas treats for all of my friends and family.  For many years when my daughter was still home we spent a fun-filled day making all of our favorite Christmas cookie recipes and then packaged them up on beautiful plates with ribbons and bows for all of our friends…but for the last two years she has been in college and doesn’t get home for the holidays until a few days before Christmas…way too late for a timely delivery!  So, I have gone back to a tried and true Holiday favorite that I made for years when the kiddos were small and able to help with this simple yet beautiful and tasty treat.  It’s a much more manageable task to take on solo too!  You can customize this treat with anything your budget or dietary needs call for…homemade popped popcorn or simplify it with microwave popcorn, use gourmet white and dark chocolate or vanilla and chocolate CandiQuik and then top with healthy nuts and raisins or fun colorful toppings like M&M’s or chopped peppermint candies.  The beauty is in the creation, no matter what ingredients you choose!  The recipe is pretty vague due to the individuality of the treat…it’s really impossible to mess up.  If you need more popcorn on the pan, add more.  If you need more chocolate, add it.  Dump as many (or few) toppings on as you like…

I will include a more accurate (sort of, anyways!) recipe using microwave popcorn, CandiQuik and M&M’s for toppings as this was my original recipe from many years ago…I will have to say it has evolved, but the original is quick, easy and well…pretty hard to beat!

Chocolate Drizzzled Popcorn with Peppermints

Chocolate Drizzled Popcorn with Peppermints

Chocolate Drizzled Popcorn

12″ disposable foil pizza pan

6 cups of popped popcorn, buttered and salted

white chocolate, melted

dark chocolate, melted

festive toppings of your choice

  • Spread the popped popcorn on the pizza pan evenly taking care to not get any unpopped kernels in the mix!
  • Melt the white chocolate on the stove on low heat or in the microwave, drizzle heavily over the popcorn to hold it all together.
  • Melt the dark chocolate on the stove over low heat or in the microwave, drizzle lightly in a circular motion over the white chocolate.
  • While the dark chocolate is still melted, sprinkle your festive toppings over the top.
  • Place in the refrigerator or freezer for about 10-15 minutes to harden the chocolate.
  • Cover with plastic or cling wrap, add a bow and gift tag.
Ready for delivery!

Ready for delivery!

My Original Christmas Popcorn Recipe

3 – 12″ disposable foil pizza pans

3 – bags of microwave butter popcorn, popped

1 – 16 ounce package chocolate CandiQuik

2 – 16 ounce packages vanilla CandiQuik

1 – 16 ounce package Christmas (green and red) plain M&M’s

Pop all of the popcorn and spread evenly on the pizza pans, again taking care to not get any unpopped kernels on the pans.  Melt the vanilla CandiQuik according to package directions and drizzle heavily over each pan of popcorn to hold all the popcorn together…you will use almost all of both packages but not quite.  Allow the vanilla coating to slightly harden.  Melt the chocolate CandiQuik according to package directions and drizzle lightly in a circular (or fancy) pattern over the vanilla CandiQuik, you will have quite a bit left over..  While the chocolate drizzle is still melted, sprinkle the Christmas M&M’s over the top.  Allow the chocolate to harden either on the counter-top or in the refrigerator.  Wrap with plastic or cling wrap, add a bow and gift tag.  Deliver to all your friends and family!

IMG_0323

This recipe is shared at:

Tempt My Tummy Tuesday, Slightly Indulgent Tuesday, Tasty Tuesday, Fat Tuesday, Gluten-Free Wednesday, Wednesday Extravaganza, Whole Foods Wednesday, Allergy-Free Wednesday, Fill Those Jars Friday, All Gluten Free Desserts, Fight Back Friday, Gluten-Free Fridays, Made From Scratch Monday

Crispy Sweet Potato Fries

I love sweet potato fries.  I don’t eat out much, well hardly at all really, and only at a handful of local restaurants.  One of my favorite places to eat used to be California Cafe in Denver because they had a lovely gluten-free menu, used local and seasonal ingredients and had the best fresh, hand cut sweet potato fries, ever.  It was a sad day for me when they closed!  I’ve tried many different methods of cooking, frying and baking sweet potatoes to recreate the light crispy texture of those wonderful fries at California Cafe but never could get it just right…until now.  Double frying is definitely the secret to getting a crispy fry that is still light and fluffy on the inside.  This is really a process but totally worth it.  If you don’t have the time or the patience for frying I also have perfected the oven-baking method too and I have included the instructions for that as well!

Ingredients

  • 2 1/2 pounds sweet potatoes
  • 1 Tbsp. arrowroot powder
  • coconut oil, for frying or baking
  • sea salt, for sprinkling
  • Ketchup and sour cream, for serving

Directions

Peel and rinse the sweet potatoes. Cut each potato lengthwise into 4 or 5 pieces, then cut each piece into sticks. The thinner these are, the crispier they will be. Place the fries in a large bowl. Cover with cold water, then allow them to soak 2 or 3 hours (or you can stick them in the fridge and let them soak overnight).

When you’re ready to make the fries, drain the water and lay the potatoes on 2 baking sheets lined with paper towels. Blot with paper towels to dry.  Place the patted dry sweet potatoes into a dry bowl and sprinkle with the arrowroot powder and toss the potatoes to coat evenly.

For Frying:

Heat a few inches of coconut oil to 300° F in a heavy pot. In 3 or 4 batches, fry the potatoes about 4 to 5 minutes per batch, or until soft. They should not be brown at all at this point-you just want to start the cooking process. Remove each batch and drain them on new, dry paper towels or a brown paper bag.

Once all the potatoes have been fried at 300 degrees F, turn up the heat until the oil temperature reaches 400 degrees F. When the oil is hot, start frying the potatoes in batches again, cooking until golden and crisp. Remove from the oil and drain on fresh paper towels or a fresh brown paper bag. Sprinkle the fries with sea salt and serve with the ketchup and sour cream for dipping.

Baked Sweet Potato Fries

For Baking:

Preheat the oven to 425° F. Line a baking sheet with parchment paper.  Place the patted dry sweet potatoes into a dry bowl and sprinkle with the arrowroot powder and toss the potatoes to coat evenly.  Once the potatoes are coated with the arrowroot, drizzle with 2 Tbsp. of melted coconut oil again tossing to coat evenly, sprinkle with sea salt.  Spread the sweet potatoes onto the prepared baking sheet in a single layer making sure not to overcrowd, use two baking sheets if necessary.  Bake for 45-50 minutes, turning occasionally, until the sweet potatoes are crispy and browned.  Let cool on the pan for a few minutes before serving.

This recipe is shared at:

Made From Scratch Monday, Slightly Indulgent Tuesday, Fat Tuesday, Tempt My Tummy Tuesday, Tasty Tuesday, Gluten-Free Wednesday, Whole Food Wednesday, Allergy-Free Wednesday, Fight Back Friday, Gluten-Free Fridays, Foodie Friends Friday

Spiced Pumpkin-Raisin Cookies

Did I mention that Fall is my favorite season?

Pumpkins, pumpkin pie spice, raisins, mulling spices, chilly evenings, falling leaves…oh, I could go on forever.  This is a wonderful recipe that will definitely be a part of my holiday baking for years to come.  The spices are just right, the texture is perfectly chewy like an old-fashioned oatmeal raisin cookie and it’s gluten-free and vegan!  It is also very easy to throw together, you won’t even need your mixer!  I adapted this recipe from Giada De Laurentiis.

There is nothing better than a warm holiday cookie…well, except maybe a whole plate full of them!

Ingredients

1 cup quinoa flour

1 1⁄3 cup quinoa flakes

1 1⁄2 Tbsp. pumpkin pie spice

1 tsp. baking soda

1⁄2 tsp. celtic sea salt

3⁄4 cup coconut palm sugar

1⁄2 cup pumpkin puree

6 Tbsp. butter, melted (or coconut oil for vegan option)

1 Tbsp. pure maple syrup

1 tsp. vanilla extract

1⁄2 cup raisins (or you could be naughty and substitute dark chocolate chips here! ;))

Directions

Position a rack in the center of the oven and preheat to 350°F. Line 2 heavy large baking sheets with parchment paper.

In a medium bowl combine the quinoa flour, quinoa flakes, pumpkin pie spice, baking soda and salt.   Stir to blend well. In a large bowl combine the sugar, pumpkin puree, butter (or oil), syrup and vanilla; whisk to blend. Using a flexible rubber spatula, gradually stir the dry ingredients into the pumpkin mixture. Stir in raisins (or chocolate chips!).

For each cookie, drop 1 generous tablespoon batter onto the prepared sheet, spacing the mounds about 1 inch apart. (Or use a mini ice cream scoop.) Using moistened fingertips, flatten each to a 2-inch-diameter round.

Bake the cookies until brown and a bit firm to the touch, 17 to 20 minutes. Using a metal spatula, transfer the cookies to a rack and cool completely.

Makes 2 dozen cookies.

Did I do that????

Yes, actually I DID do that…I had some leftover Whipped Cream Cheese Frosting in the fridge so I mixed some up with 1⁄2 a tsp. of pumpkin pie spice, dipped one half of the cookie and placed them on parchment paper in the freezer to firm up the frosting…oh my.  This was decadent…and the cookies stayed soft and moist right out of the freezer too!

This recipe is shared at:

Gluten-Free Monday, Tempt My Tummy Tuesdays, Slightly Indulgent Tuesday, Tasty Tuesday, Fat Tuesday, Whole Foods Wednesday, Allergy Free Wednesday, Gluten-Free Wednesdays, Gluten Free Fridays, Fight Back Friday, Fill Those Jars Fridays

Cream Cheese Frosting

If I’m going to use frosting on a dessert I generally use a cream cheese based recipe, these are two of my favorites!  I like to use maple syrup as my sweetener but you substitute any liquid sweetener of your choice, if you are using a granulated sugar it’s best to use a powdered version.

Whipped Cream Cheese Frosting

¾ cup heavy cream
8 ounces cream cheese, softened
¼ cup maple syrup (or your preferred sweetener)
1 Tbsp. vanilla

Whip heavy cream until stiff
In a separate larger bowl, whip cream cheese until smooth, then blend in maple syrup and vanilla
With a rubber spatula, gently blend whip cream into cream cheese mixture
Store frosting in an airtight jar in the refrigerator until ready to use

Classic Cream Cheese Frosting

1 stick butter, softened
8 ounces cream cheese, softened
¼ cup maple syrup (or your preferred sweetener)
1 Tbsp. vanilla

In a large bowl, whip cream cheese and butter with a hand mixer until smooth, then blend in maple syrup and vanilla
Store frosting in an airtight jar in the refrigerator until ready to use

Roasted Butternut Squash and Spinach Lasagna

Who needs dairy when you can have this?

It’s fall and time for comfort food…what better way to indulge than with a Butternut Squash and Spinach Lasagna.  I struggle with calling this dish “lasagna” since that dish traditionally defined as a baked dish containing layers of boiled lasagna noodles, and usually cheese, a seasoned sauce of tomatoes, and meat or vegetables…Well, we have a seasoned sauce of tomatoes and loads of meat and vegetables so I guess we are half-way there!  This recipe is pretty simple to throw together and can certainly be modified to include dairy by adding layers of ricotta and mozzarella (I’ve made it this way too and it is certainly delicious!).  Adapted from this recipe on Health-Bent.

Ingredients

  • 1 lb ground meat (beef, pork, turkey, or bison)
  • 2 Tbsp. Italian seasoning
  • 1/2 red onion, chopped
  • 3 cloves garlic, minced
  • 1/2 c red pepper, chopped
  • 4 oz mushrooms, chopped
  • 1 Tbsp. extra virgin olive oil
  • 1 24 oz jar tomato sauce
  • couple leaves of fresh basil
  • 5 ounces baby spinach
  • 1 small butternut squash

Directions

Preheat oven to 400ºF.  Cut the top and ends of the squash off and peel it. Split it into 1/4′s. What I mean by that is, right where the squash starts to turn bulbous, cut it in 1/2, width-wise. Split those two halves in half, lengthwise. This will make it much easier to cut into planks. Scrape out the seeds. Slice the squash into planks.  Roast the squash on a parchment lined baking sheet until tender, about 25 minutes.

While the squash is roasting, in a saute pan heat the oil and saute the onions, peppers, mushrooms and garlic.  Add the ground meat and Italian seasoning and continue to saute until the meat is browned.  Remove from heat and set aside.

Using a 9×9 oven safe baking dish, put down enough sauce to lightly cover the bottom of the dish. (This keeps the squash from sticking to the pan.) Next add a layer of squash planks and top with a layer of baby spinach, then spoon on the sausage mixture, followed by the sauce. Repeat until all your ingredients are used up (I usually get three layers)…trying to reserve enough sauce to cover the top of the lasagna, sprinkle the fresh basil over the top layer of sauce.

Cover the dish tightly with foil and bake for 45 minutes. Remove the foil and bake for an additional 15 minutes.  Look for a bubbly pan with a crispy, browned top. Right out of the oven, the lasagna may by liquidy, let it set for a good half hour before cutting into it, as it will solidify.  Serves 6 generously.

This recipe is shared at:

Gluten-Free Monday, Tempt My Tummy Tuesdays, Slightly Indulgent Tuesday, Tasty Tuesday, Fat Tuesday, Whole Foods Wednesday, Allergy Free Wednesday, Gluten-Free Wednesdays , Gluten Free Fridays, Fight Back Friday, Fill Those Jars Fridays

Frosted Pumpkin Spice Muffins

Is a frosted muffin really just a cupcake?

Autumn.

My absolute favorite time of year…I love the colors, the smells and the weather.  I love that it is Pumpkin Spice Latte season at Starbucks, although I’ve never had one, I love the way they smell.  I love the way my house looks with all my fall decorations up.  I love that all the stores are loaded with pumpkins and squash galore.  And best of all I LOVE that it’s time to dress everything up in Pumpkin Pie Spice!  This is my favorite muffin recipe, it’s only fruit sweetened so it’s not overly sweet which makes a dollop of cream cheese frosting just perfect to turn it into a weekend breakfast treat or light dessert!

Pumpkin Spice Muffins

(yields 18 muffins)

2 large ripe bananas

1/2 cup medjool dates, pitted and soaked (about 6-8 dates)

5 eggs, room temperature

1/2 cup pumpkin puree (canned or fresh roasted)

1 teaspoon vanilla extract

1/4 cup coconut oil or butter, melted

1 /2 cup coconut flour

1/4 cup ground flax seeds

1 teaspoon baking soda

1/4 teaspoon salt

1 1/2 Tbsp. pumpkin pie spice

1/2 cup chopped pecans (optional as a mix in, can use for garnish instead)

  1. Preheat oven to 350 degrees F.
  2. Line muffin tins with paper or silicone liners or grease well with coconut oil.
  3. Place pitted dates in a bowl, cover with very hot water and soak for about 10 minutes, drain well after soaking.
  4. To a blender add bananas, pumpkin, dates, vanilla, eggs, and melted coconut oil or butter.  Puree until smooth.
  5. Sift all dry ingredients together in a separate bowl.
  6. Add wet ingredients to the dry and stir until there are no lumps.
  7. Stir in chopped pecans.
  8. Divide evenly between the muffin cups (I use an ice cream scoop which is about 1/4 cup of batter)
  9.  Bake for 22 to 25 minutes or until a toothpick comes out clean.
  10. Let cool completely on rack before frosting.
  11. Frost tops of muffins and sprinkle with additional chopped pecans and lightly dust with pumpkin pie spice.

Whipped Maple Cream Cheese Frosting

¾ cup heavy cream
8 ounces cream cheese, softened
¼ cup maple syrup
1 Tbsp. vanilla

  1. Whip heavy cream until stiff
  2. In a separate larger bowl, whip cream cheese until smooth, then blend in maple syrup and vanilla
  3. With a rubber spatula, gently blend whip cream into cream cheese mixture
  4. Store leftover frosting in an airtight jar in the refrigerator

This recipe is shared at:

Tempt My Tummy Tuesdays, Slightly Indulgent Tuesday, Tasty Tuesday, Fat Tuesday, Whole Foods Wednesday, Fill Those Jars Fridays, Allergy Free Wednesday, Wednesday Extravaganza, French Cuisine Fridays, Fight Back Friday, Gluten-Free MondayGluten-Free Wednesdays , Gluten Free Fridays

Crispy Delicata Squash Fries

Crispy Delicata Squash Fries…so tasty.

Winter squash seem to be EVERYWHERE these days and I couldn’t be happier!  This is a super easy and quick recipe that makes a comforting side dish for any meal…I love to roast pretty much any squash but I especially like the Delicata since the skin is edible, no peeling necessary!!!

Delicata Squash Fries

2 Delicata Squash

2 Tbsp. coconut oil

salt and pepper, to taste

Preheat oven to 425 degrees F.  Line a large rimmed baking sheet with parchment paper.  With a sharp knife cut squash in half and remove the seeds.  Slice the squash into 1/4″ pieces.

Seeded and sliced delicata squash

Place squash in a large mixing bowl and toss with coconut oil and salt and pepper to coat.

Place coated squash on the parchment lined baking sheet.

Bake for 30 minutes, turning all the squash halfway through baking.  Once the squash is browned and crispy, remove from oven and sprinkle with sea salt.  Serve immediately.

Hot out of the oven.

This recipe is shared at:

Tempt My Tummy Tuesdays, Slightly Indulgent Tuesday, Tasty Tuesday, Fat Tuesday, Whole Foods Wednesday, Fill Those Jars Fridays, Allergy Free Wednesday, Fight Back Friday, Gluten-Free MondayGluten-Free Wednesdays , Gluten Free Fridays